Howdy, Stranger!
It looks like you're new here. If you want to get involved, click one of these buttons!
Categories
YL2 update October
Originally posted Oct 29 at 12:12am.
Hello everyone!
This month took a bit of an unexpected turn. Originally we had intended to work on preparing and integrating shapes into the character creator. However, due to someone close to Dogson passing away suddenly and unexpectedly, plans had to be changed. As you might understand, Dogson needed some time off. So instead of integrating shapes, we've been working on other things. These things are stuff we probably would have done sooner or later anyway, so it's not like we've lost time or anything. Just the order of doing them was changed slightly.
So without further ado, let's get into it!
Surface point tracking
In YL2, we're hoping to combat many of the limitations that exist in Yiffalicious, but also making things easier. One thing that sort of is a pain right now [in Yiffalicious] is placing hands on other characters. Basically, the way you would do this, is to manually move the hand anchor using the gizmo tools until you get something that looks OK. Then you'd parent the hand to the closest bone, using the parenting tools. This comes with several problems. In addition to just being a tedious process in itself, the hand also wouldn't adapt its location if the surface of the other character was changed (for example through inflation). Considering just how much characters can change in YL2, this is a big problem we have to solve. Furthermore, because parenting is a direct mapping between two objects, it meant that hands would twist/rotate if the object it was parented to was rotated. Sometimes that might not be an issue, but perhaps more often than not it would cause weird looking rotations for the hands.
This month, we've been looking into how we can improve all of this. So we developed a system that allows us to efficiently and accurately track a specific surface point on a dynamic mesh. Since we're tracking a point on the surface rather than an offset from a bone, the point changes its location if the mesh is changed. Also, it's not a direct mapping to a single bone, but rather all bones that influence the surface are considered when calculating the point, meaning the point will always keep the same place on the surface regardless of how it is deformed by bones.

https://gfycat.com/IdealisticShinyInchworm
(Red cross stays at the same place when using inflation and bone deformation.)
For now, it's nothing more but a surface point tracking system, but we're hoping to expand on it in the future. The idea, if we can pull it off, is to completely replace parenting with a new system. In this system, you'd be able to snap hands to a specific part of a character, and the hand would automatically readjust itself if the other character is altered (for example through inflation). Furthermore, because the surface point is nothing but a point in 3D space (no rotation), the authored transformation of the hand could be preserved even as the surface its attached to would rotate. Fingers adapting to the surface they're gripping is another milestone we're hoping to achieve, and that may be within our reach. Read more about this down below!
Custom raycasting
GPU powered raycasting is something I've been wanting to do for quite some time now. I tried achieving it once before, but was unsuccessful. However, in the wake of creating the custom GPU normal recalculation (that we talked about in the last update), I feel just so much more confident working with GPU related computation now. So I decided to give this another go.
Before diving into all this, perhaps it would be helpful if I explained what all this is even about, lol.
Raycasting is a technique used extensively in video games to sample the game world. A ray consists of a point in space and a direction. The typical example would be a laser gun - tracing along its path to see if any objects are hit by it.
OK, so far so good.
Unity provides raycasting functionality in its APIs. In Unity, you don't raycast against the rendered world (the one visible to the user), but rather against the physical world, i.e. the world made up by all the so called "colliders" in the scene. So for example, if you have a cube in your 3D scene, and raycast against it, no hit ("intersection") would be generated unless this cube had a physical representation (a "collider") attached to it.
Raycasting is quite an expensive operation to perform, so in order to make things as efficient as possible, you usually only want to raycast against simple physical representations. The most basic one would be a sphere. In order to calculate a ray-sphere intersection, all you need is the ray (position, direction), the sphere's location and its radius. Next one on this simplicity scale would be a capsule, which is like sphere but along a line. Then a box.
Using just these colliders, you can create physical representations of most things, even characters. Obviously they wouldn't be super accurate representations, but still good enough to get the results you need (for example shooting things). A common term you might be familiar with is the "hit box" of a character in a game. It's this physical representation that is referred to when talking about it.
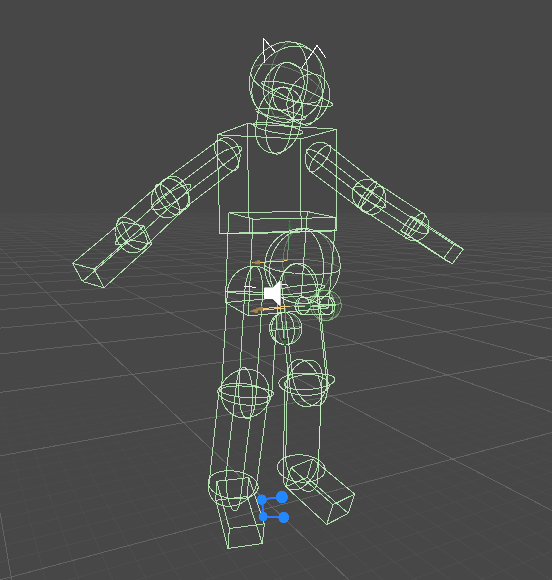
(Finn's physical representation in Yiffalicious.)
However, there are times when you may need more accuracy, i.e. where the physical representation needs to match up with the rendered object. For this purpose, we have MeshColliders. A mesh collider is simply a physical representation of a mesh (model). The thing about mesh colliders though is that they're insanely expensive to calculate/prepare/bake. Once you have calculated/prepared one, you're good to go (although raycasting against them is much more expensive than raycasting against simpler representations), so ideally you only want to use it for static objects whose surfaces won't change. Characters aren't static objects though. Their surfaces are constantly changed by bones. So if you'd want a mesh collider on a character, you'd have to recalculate the collider each time the mesh is altered.
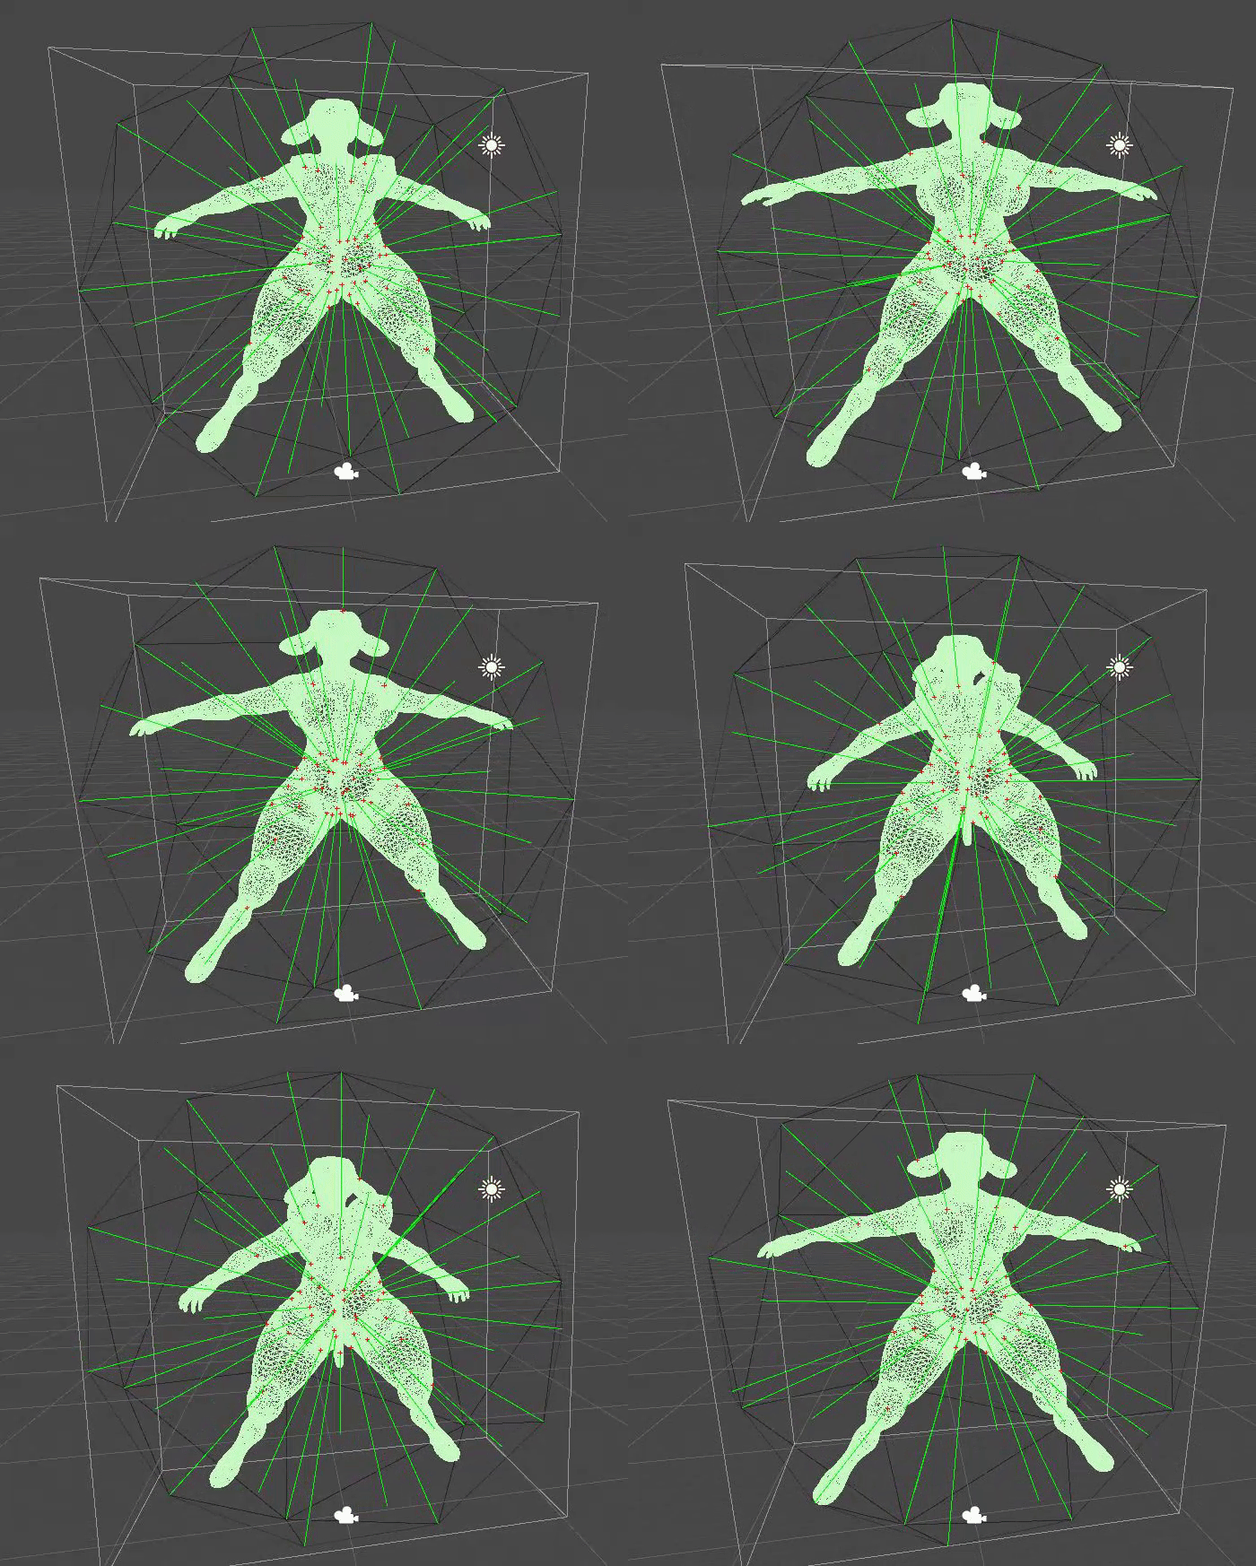
https://i.gyazo.com/5ae046f3837c03025a05a693db0733ac.mp4
In this example benchmark above, we're casting 42 rays (one ray from each vertex in the icosphere) against a mesh collider which is updated each time the character mesh is changed. It isn't pretty. Calculating the mesh collider each time causes the framerate to drop to 8 fps! Clearly this isn't acceptable.
(BTW, in the gif above we're just rotating each bone in the character on their X-axis according to a sine curve, so the pose/animation is not really supposed to make that much sense. The purpose of it is to raycast against a changing surface.)
One might imagine that a solution to this problem could be to simplify the mesh of the mesh collider, so it isn't as complex as the character mesh (creating a "proxy"). While it's true that this would increase the performance, it's still a very expensive operation to perform, and even if you reduced the vertex count by 80%, it still wouldn't produce acceptable framerates. The mesh collider calculation is just that expensive to perform in real time. Furthermore, creating proxies would take extra time and effort to author, and it's not even certain that using them would generate more accurate results than using simpler physical representations instead (i.e. spheres), making the whole process pointless.
Alright! That should give you a good understanding of this problem.
GPU to the rescue
The biggest issue with mesh colliders is that they take such a long time to calculate. The reason for calculating/preparing/baking them (aka "cooking" in PhysX lingo) in the first place is to make them more optimized for intersection queries later on (raycasting). Unity does this optimization by default, and as far as I know, there's no way to turn this operation off. Even if you could, I'm not sure it would be a good idea. Mesh intersections are extremely expensive to do, because basically what you're doing is going through each and every triangle in the mesh, and test if it is intersected by the ray (unless you perform previously mentioned optimization, which reduces the amount of triangles you have to go through, but performing that optimization takes time).
Luckily, GPUs are pretty much made for this type of problem. They are extremely efficient at running thousands of parallel computations, meaning you can do things at a fraction of the time otherwise required by a regular CPU. By utilizing the parallel computation power of GPUs, we have managed to create our own custom raycaster that can test multiple rays against a complex dynamic surface (such as a character), all at once, without the need of a mesh collider baking process or mesh proxies.
Here's the very same test scenario as above, but using our own GPU powered raycaster.
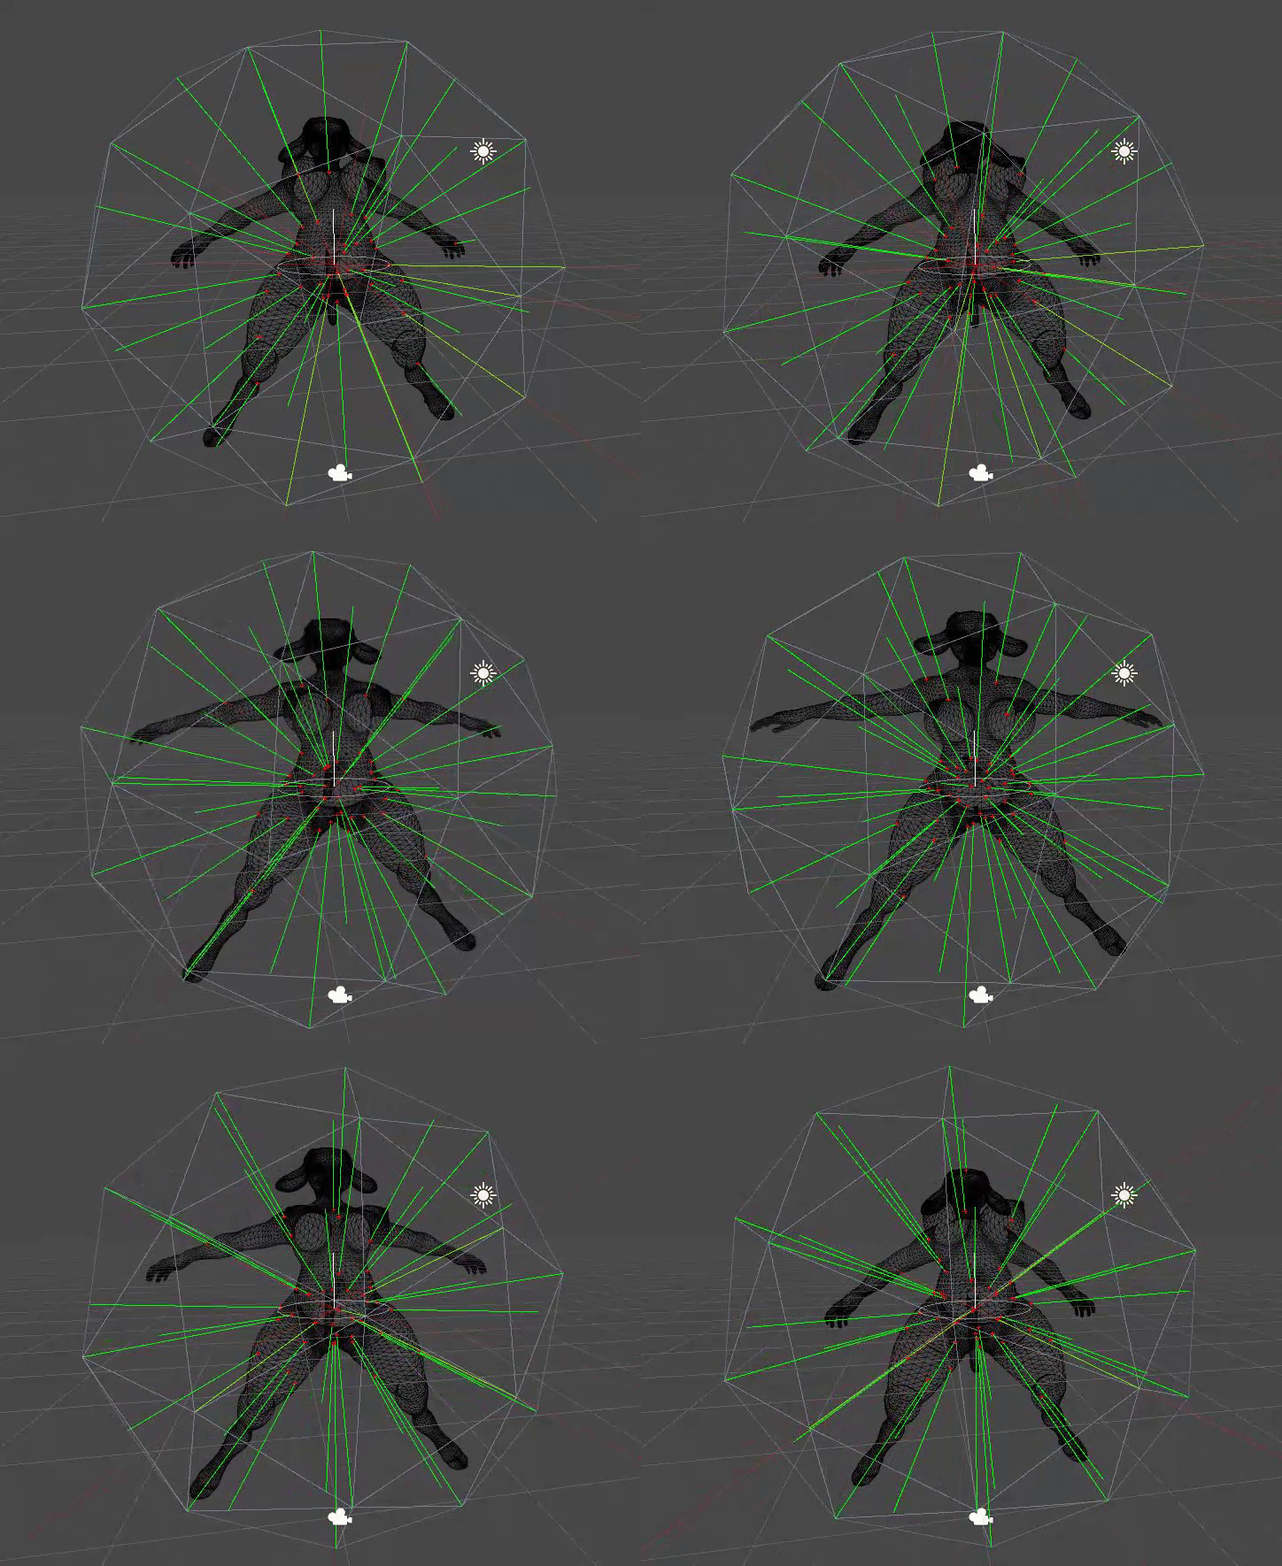
https://i.gyazo.com/d114d5270fb34c96ecdc75a5de5788e7.mp4
(I suggest you open the mp4 link to really see the difference, gif already have horrible framerate.)
Quite the difference! It's running at 450 fps, which is about 56 times faster than the other example.
With this technology in our toolset, there are many opportunities we want to explore. One such opportunity might be hands being able to dynamically grasp any type of surface, including characters.
Fluff
Having done the surface point tracking system, many doors open open up for us. One of those is adding fluff to the surface of a character. We have created a new framework solely for this purpose. So far, only the "backend" of this system has been created (a bit like our texture builder system we showed off previously). Our fluff framework supports a great deal of options, allowing you to tweak the spline curve of the fluff, scale, size (along curve), alpha pattern, mesh resolution, color, normal and texture blending, in addition to its location and orientation (naturally).
One thing that is really cool about this system is that it can pick color from the surface point it's attached to. So you could for example fade the color along the fluff from its surface point color (on the source mesh) to another one at its tip. Likewise, you can also blend the normals of the fluff, so it doesn't appear as a separate object on the character. Here's an image to show you just how big of a difference normal blending does:
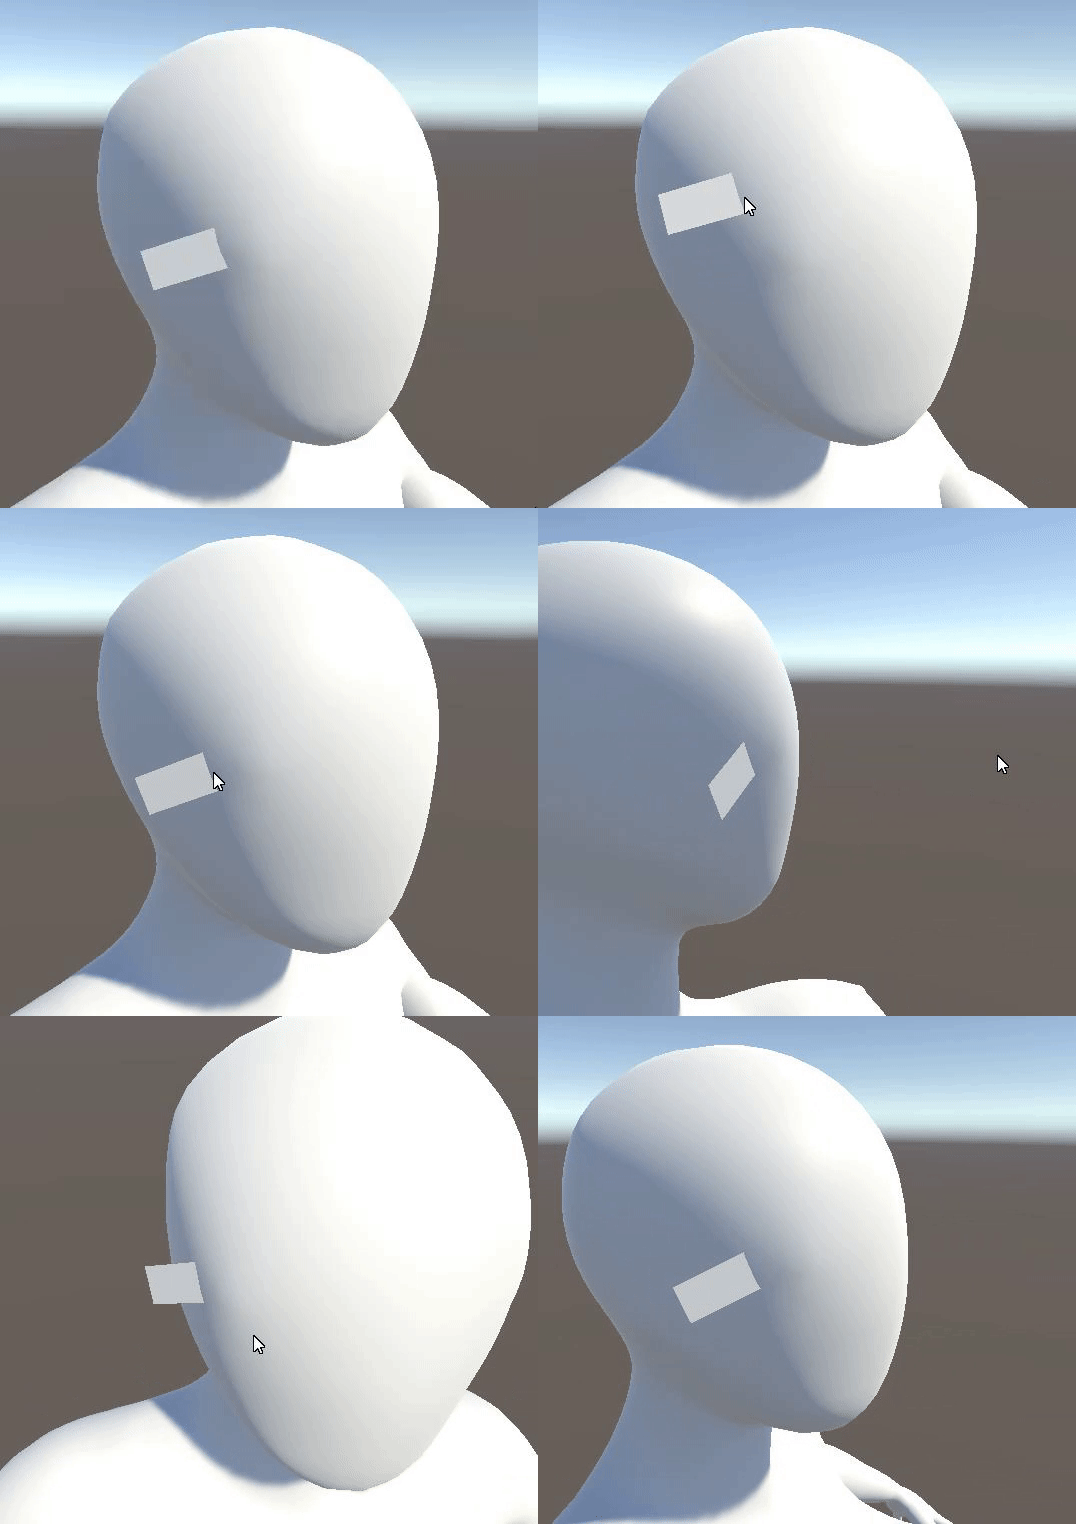
https://i.gyazo.com/ddca3a284dc9bf63464ab220724e02a2.mp4
(No blending.)
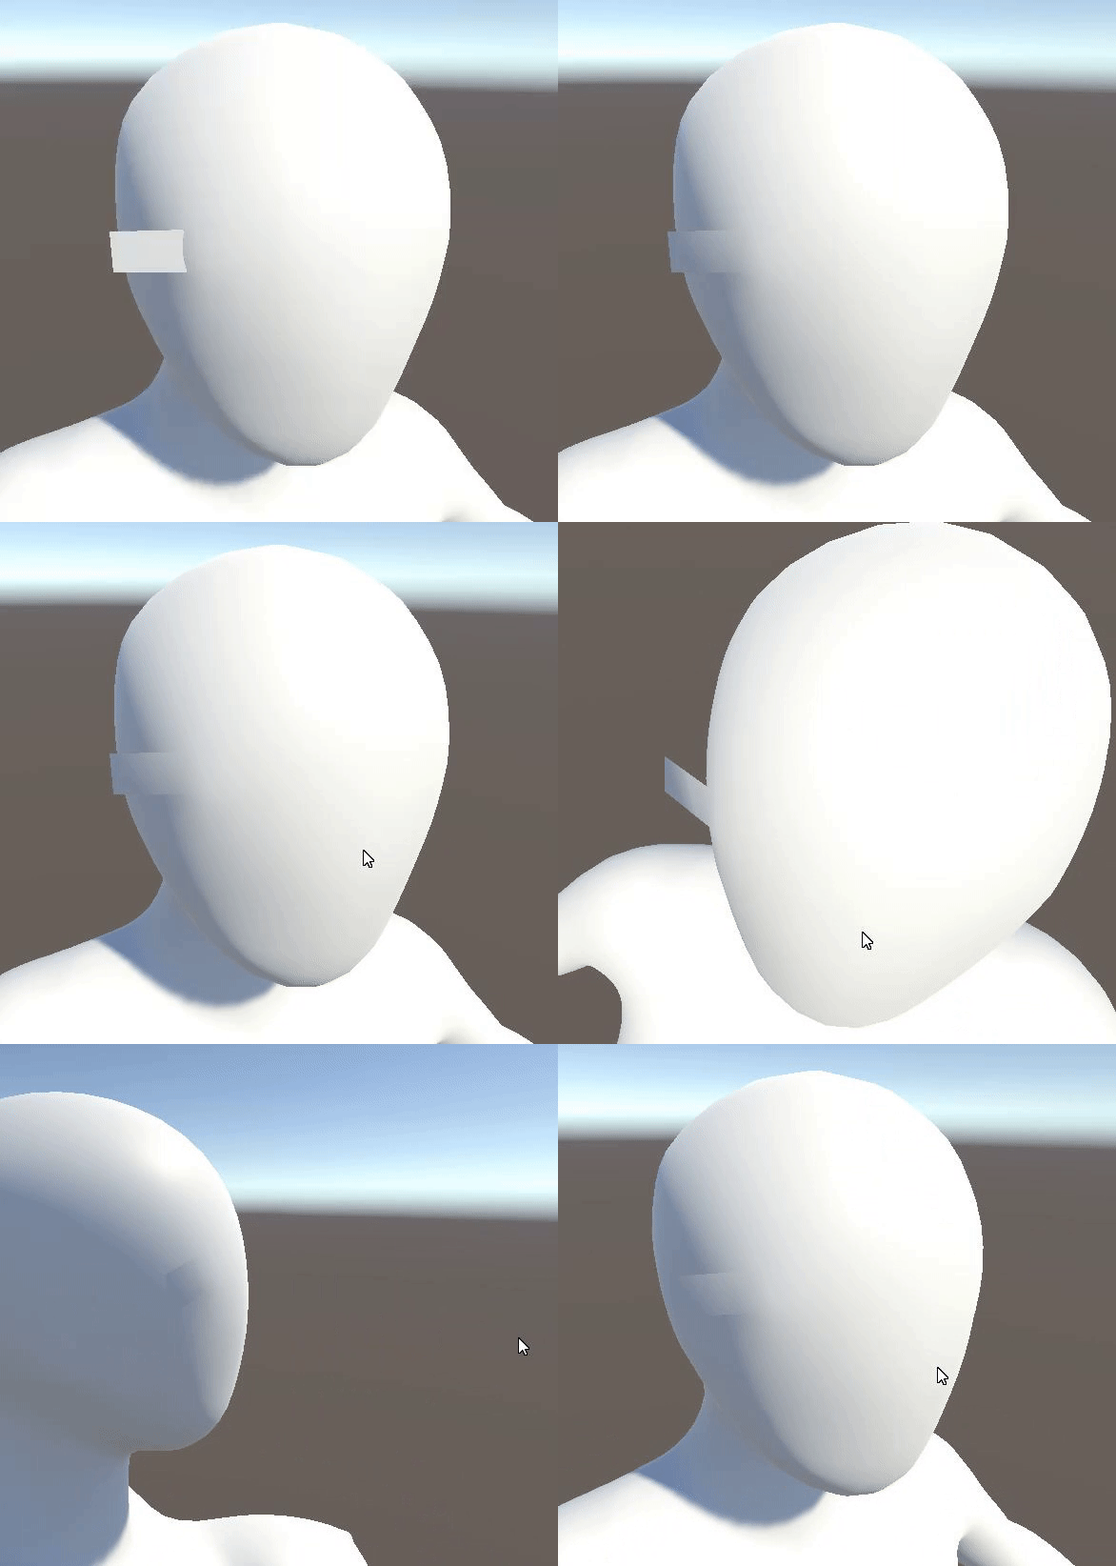
https://i.gyazo.com/2cfc64e1820a80428c46a87d54a80882.mp4
(Projected interpolated normals from character mesh (blending).)
Each curve point on the spline of each fluff instance has a texture and normal blend property, allowing you to tweak just how much blending is going to occur in each segment of the spline in terms of picking color from character texture and picking normal from character mesh.
The samples above shows just 1 simple fluff instance, but the idea is to allow you to add a lot of them. Also it's missing alpha texture, so it just looks like a plain quad, but it's actually a mesh generated from a spline. Again, we've just made the backend for this system and what you see above is just a small test case for us to verify that the backend works as intended.
Since each fluff instance adds a number of triangles/vertices to the scene, we will have to limit the amount of instances you can have (or their total vertex count). Just how many instances will be allowed remains to be seen, as we need to test just how big of an impact they have on performance. Maybe something like a 2000-4000 vertex budget per character (solely for fluff) would be appropriate, but it's something we'll have to decide later on when we have more data.
With this system there will be a great amount of stylization opportunities. We can't wait to see what you'll do with it!
Gender meshes
While dogson has taken some time off this month, he's still managed to get some very important stuff done. Each gender we intend to include in YL2 has been sculpted, retopologized and integrated into our universal mesh.
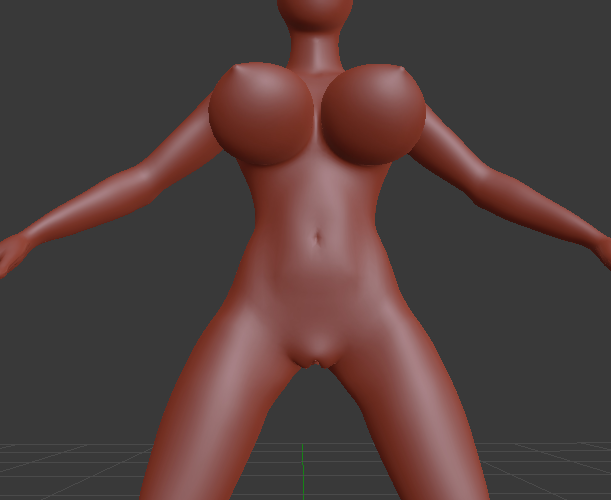
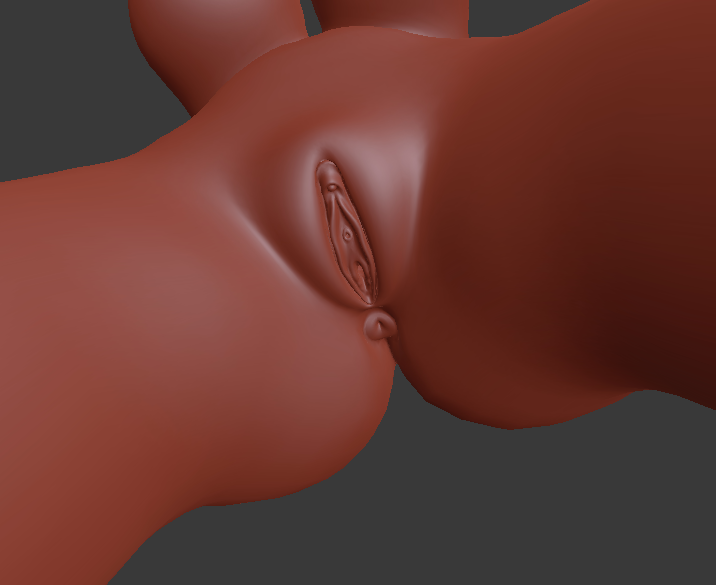
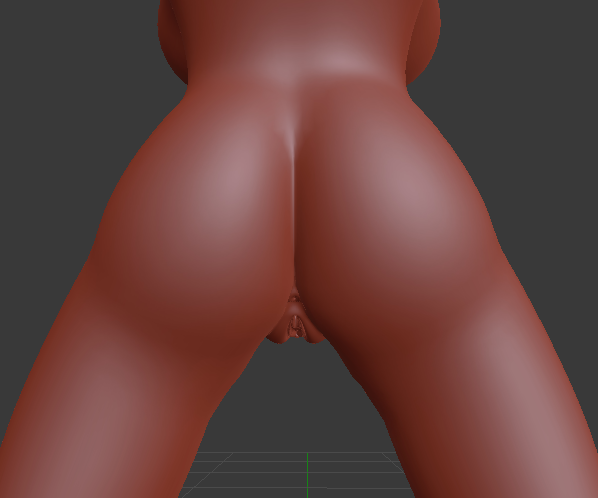
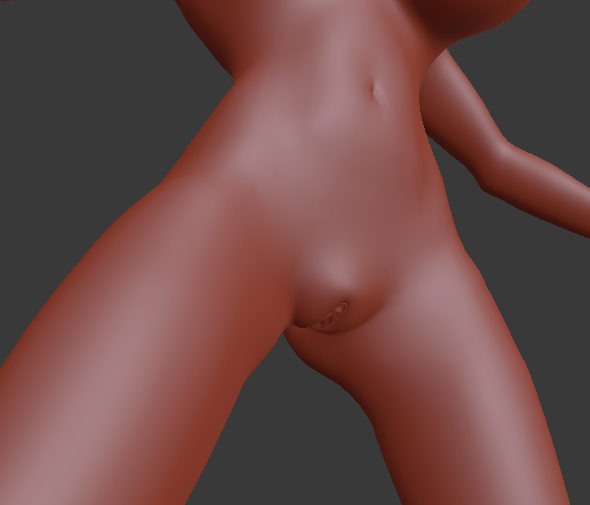
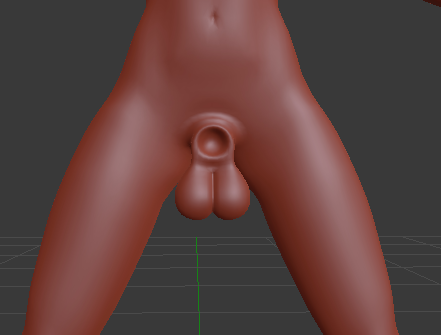
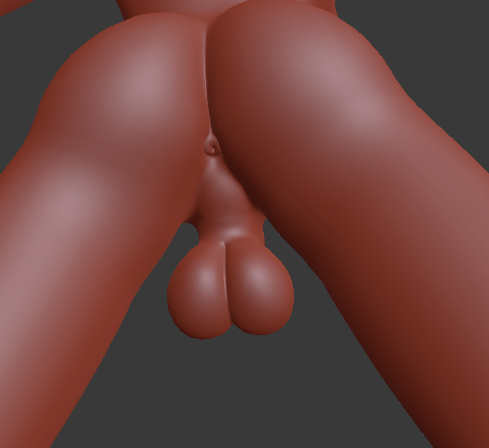
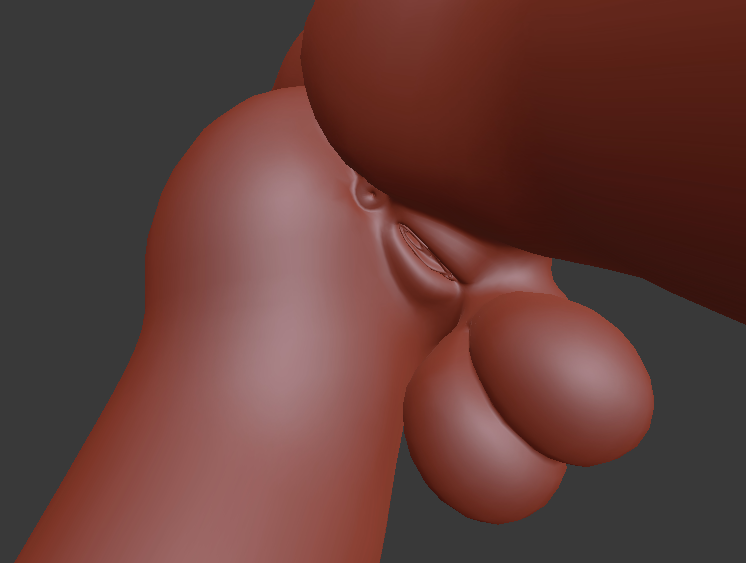
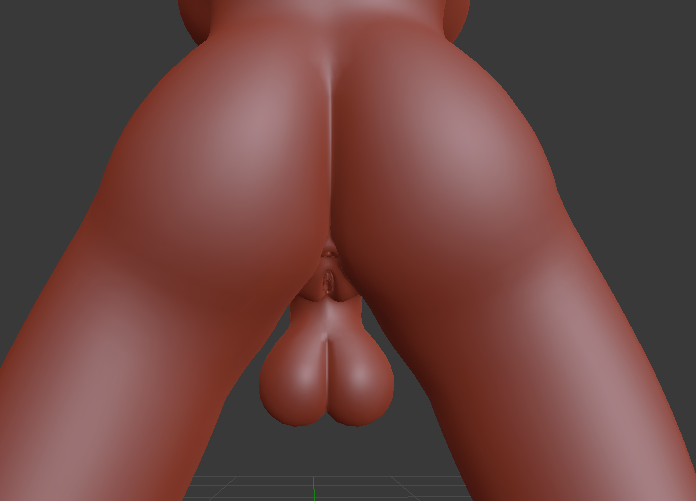
We've tried to make the organs a bit more realistic (albeit stylized) this time around, as you might see from the detail.
Other stuff
It occured to me that while we've been talking about the adaptive rig technology, we never really showed it! (Other than showing the blend shape being applied, but that in itself isn't particularly impressive). So here's a video showing you we weren't making stuff up. ^^

https://gfycat.com/descriptiveimprobablekitty
(Skeleton adapting itself to fit a new shape.)
Summary
Due to life events, our original plans for this month were changed. Instead of integrating shapes, we've been working on key technologies that may come to play a huge role in YL2. These technologies include dynamic surface point tracking, custom GPU raycasting and fluff mesh generation.
Next month, we will go back to our original plan of creating shapes and integrating them into the character creator. These coming months, we hope the character creator will start to materialize now when we have many key components in place.
Happy Halloween everyone!
- odes
Comments
I thought I'd ask something about the female mesh:
will it be possible to change the amount of soft tissue/puffiness of labia and therefore the height of mons pubis and the depth of pudental cleft? It would look more realistic on the "chubbier" characters. It would also be interesting to see if this would work on herms and male anatomy. Do you think if this would be doable, or have you already implemented something like it?
If so this ought to make it so much easier to maintain a full range of characters; I really like the characters in v1, but some body types are over-represented, most species are one gender only (no female fox for example), so being able to really open this up would be huge.
Lastly, fluff is mentioned, but is anything being done towards species with non-fluffy coats, e.g- horses, cows etc.? In v1 the fluff shader means that the fluffier characters look more detailed overall.
Sry for late reply.
We are looking at different ways for character customization, but just how much you can customize genitals is a bit too early to share at this moment.
@Renara
All characters will be based on the one universal mesh, but that mesh can be altered greatly thanks to our dynamic rig adaptation technology that we have developed and that we talked about here.
This time around, we're going for a more stylized look in general, with perhaps exaggerated mesh based fluff instances rather than fine fur. I'm not a fan of the tech used by fur shaders, because they're inherently inefficient due to the way they work - basically rendering the same object serially 40-100 times with an increasing offset ("shells").
Maybe we'll get to implementing some kind of anisotropic shader for certain types of coats, but right now only a stylized pbr shader is planned.
It's okay. Was just brainstorming here. I hope to see a lot of options later on.
Renara mentioned body types. I hope it will be possible to adjust things like body proportions (neck/limb length, head size etc.) eventually.