Howdy, Stranger!
It looks like you're new here. If you want to get involved, click one of these buttons!
Categories
YL2 summary Sep - Fluff sculpting!
We hope you're doing great!
First of all, apologies for the slightly belated update. Usually we try to round things up and begin writing a text around the 25th of each month, but this time, our tasks have been just so big and time consuming to implement, that we weren't finished until Tuesday (Oct 1st). We opted for trying to reach our milestones and writing a text afterwards, rather than interrupting the development and not having that much to show. We definitely think that was the right choice! We are super excited about these developments, and can't wait to share them with you. So here we go!
Fluff problem background
"Fluff" is a subject we've touched on previously, but it isn't until now that we've started integrating the "backend" of this system into the actual YL2 character editor itself, with interfaces and behaviors. (When we talk about "fluff", we simply mean mesh instances that can be added to a model to give the appearance of fur or feathers.)
Our original idea (and what the old backend entirely relied on) was to organize fluff instances into groups, where each group had its own fluff instances generated from a curve, and then have that single shape duplicated numerous times across the surface of the model (according to user authoring).
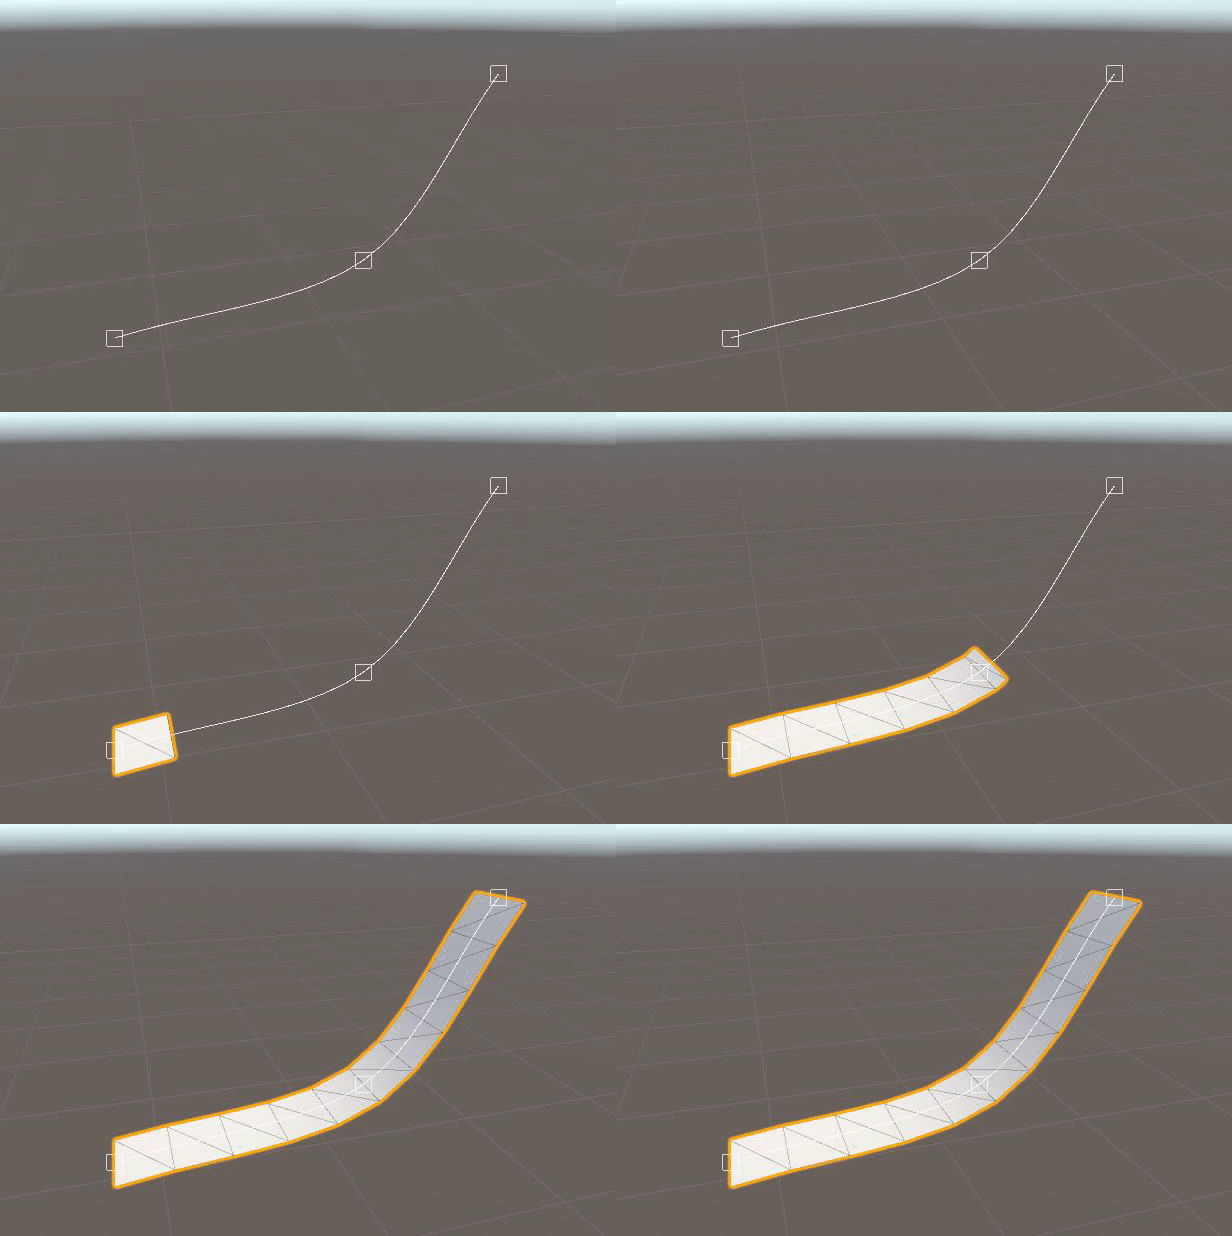
(Example of a mesh generated from a curve.)
Each individual instance could have its own size, position and orientation, but the shape itself would always be the same from that one generated shape. Since all the individual strands would be part of the same group and mesh, they could all be rendered fast in a single draw call.
However, once we started implementing this system into the editor, we realized we weren't happy with it at all. Not being able to configure the shape of each individual strand meant some severe limitations on the expressiveness of the author. The only way to get more strand shapes with this system would be to introduce more fluff groups (each with their own mesh curve shape), but that would increase draw calls, and even with more groups it would still be very hard to get the kind of look you're going for. Having the shape of the strands tied to a group was simply too intrusive and too limiting. We realized the whole system was wrong from a conceptual standpoint. The only way to remedy this would be to move the shape computation from the group to each strand. The problem with this is that curves are quite heavy (and complex) to process, so letting each individual strand have its own curve and shape would be very heavy to compute. Every curve library that I've seen in Unity so far seem to only run on the main thread, meaning that generating individual meshes for each strand would be slow - too slow for authoring hundreds if not potentially thousands of individual strands.
This is where we started to panic a little bit, because we're already behind schedule, and having to rethink and redesign this system would take time. Also, there was no guarantee we would succeed in designing something better. Again, the problem is the complex nature of curves, and how to generate meshes from them in a fast and efficient manner. Ideally, we want to be able to do it using multi-threading, and all the libraries we've found so far in Unity do not seem to support this.*
Eventually, we dropped the idea of trying to find or alter a curve library to fit our needs. Instead, we began working on our own custom fluff mesh generation library, tailored for our specific needs and designed with multi-threading in mind from the very beginning. It was a very scary and risky move, but at the same time fun and challenging. After much testing and hard work, we managed to get something that we think works perfectly for our needs. Our library doesn't rely on splines for mesh generation, but instead uses much simpler matrix math to accomplish the same thing. It still supports a lot of different parameters to affect the shape in different ways, but does it much, much faster. Here's some images showing what the system is capable of creating:
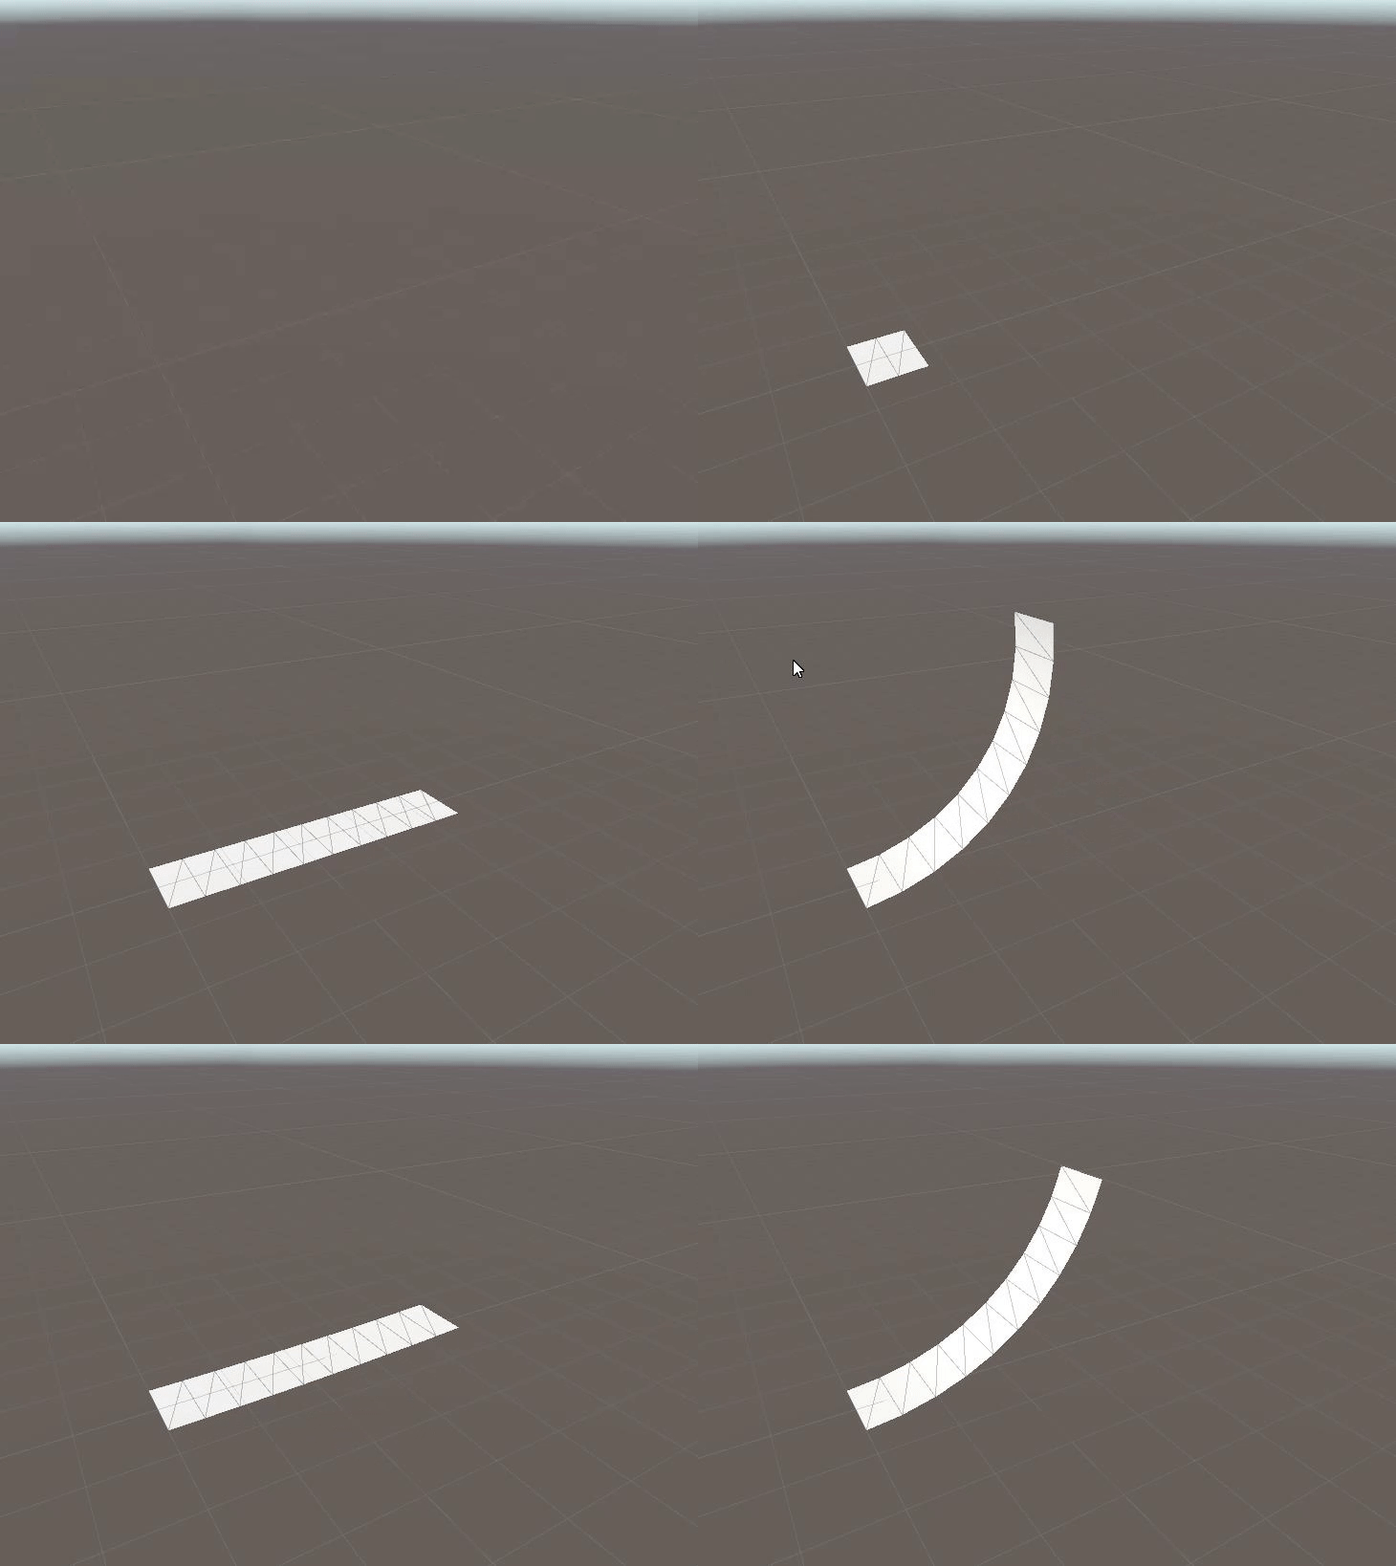
(The mesh adapts its triangle count by the length and resolution settings. It's also possible to angle the instance.)
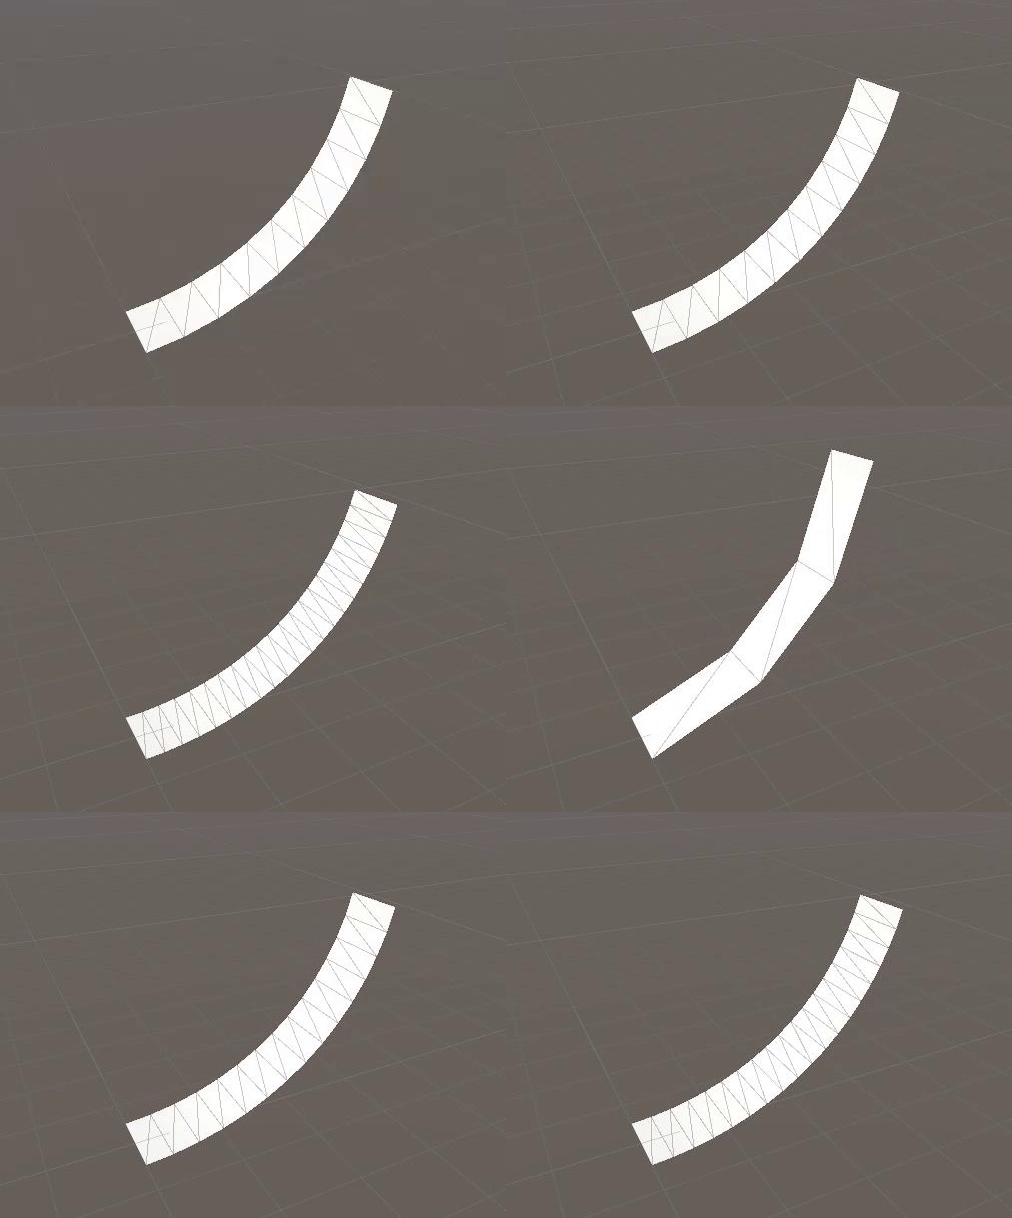
(Resolution can be changed to increase the triangle count and precision.)
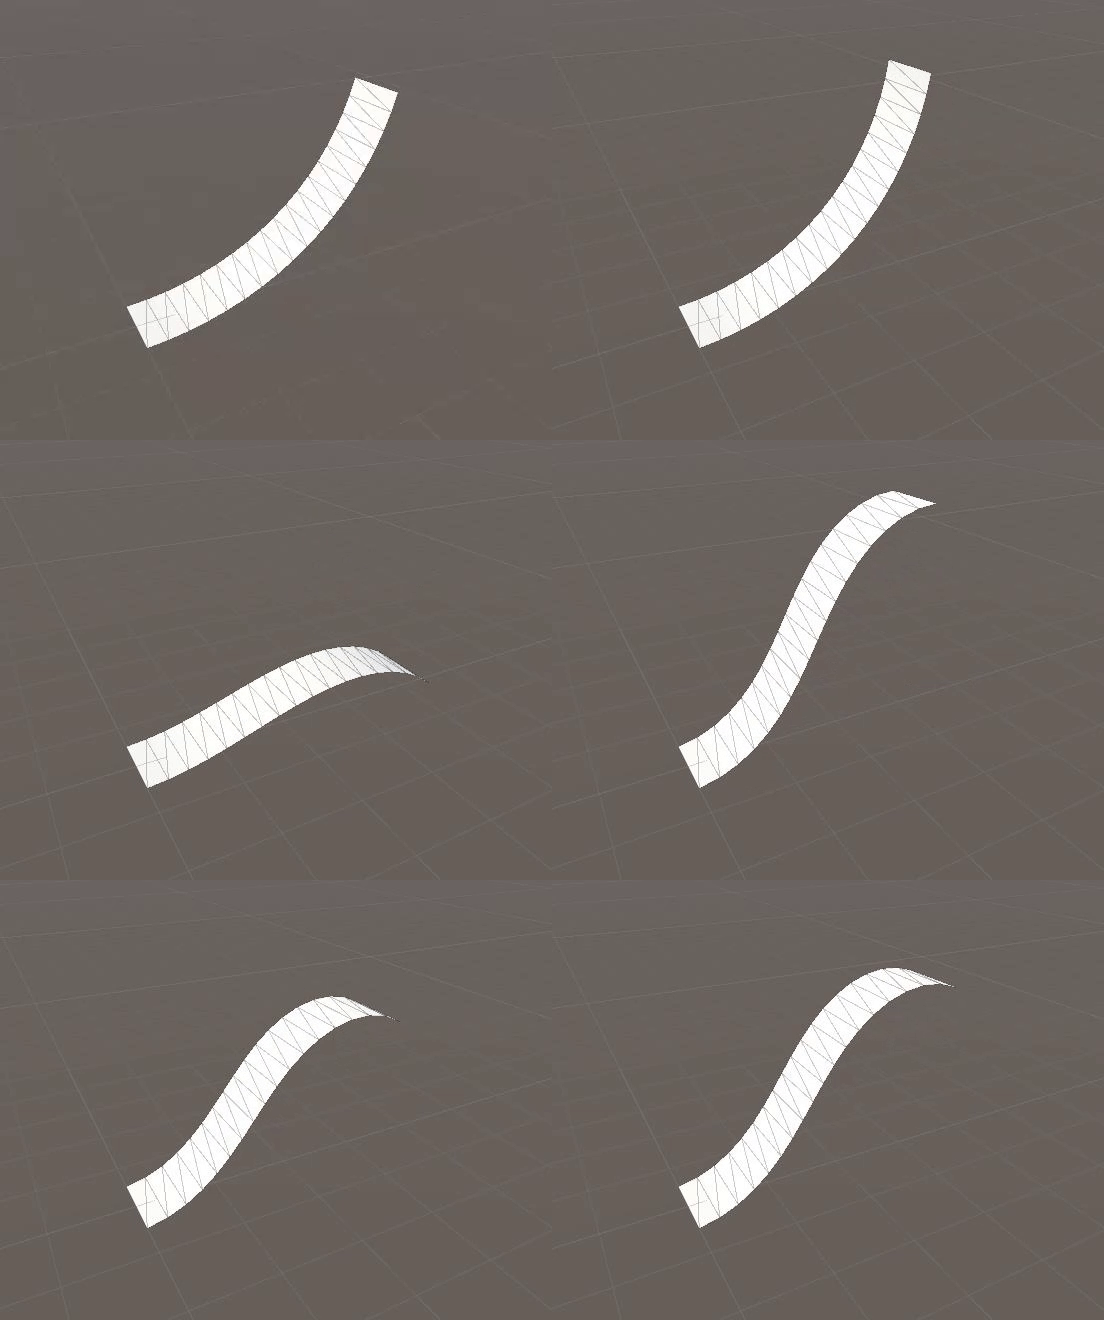
(It's possible to adjust starting and ending angle separately.)
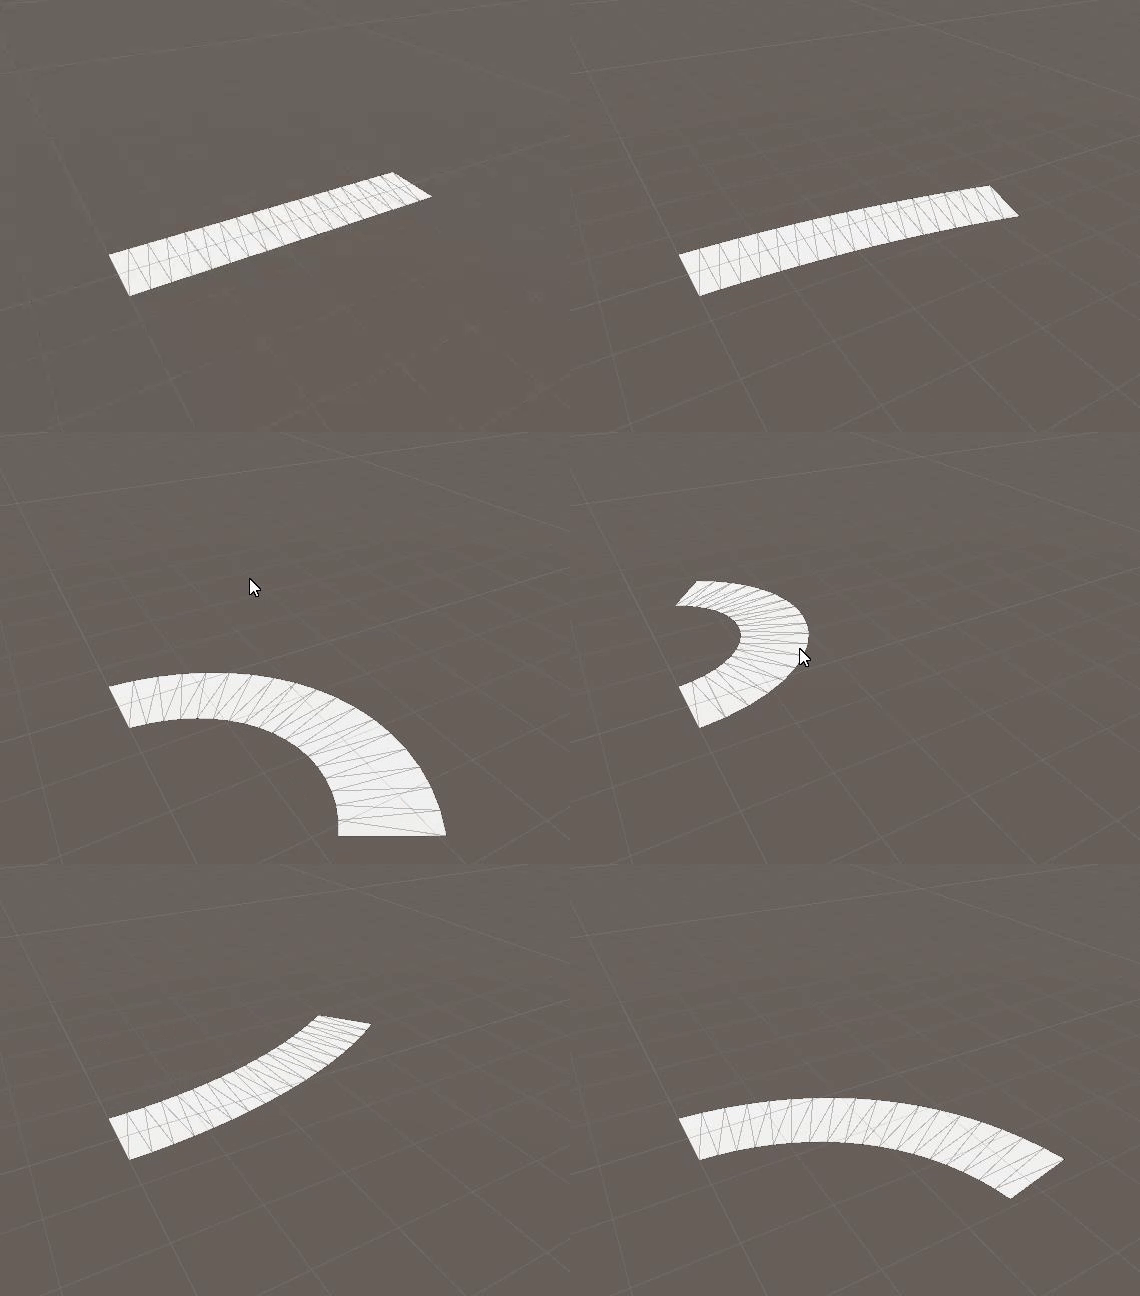
(Bending.)
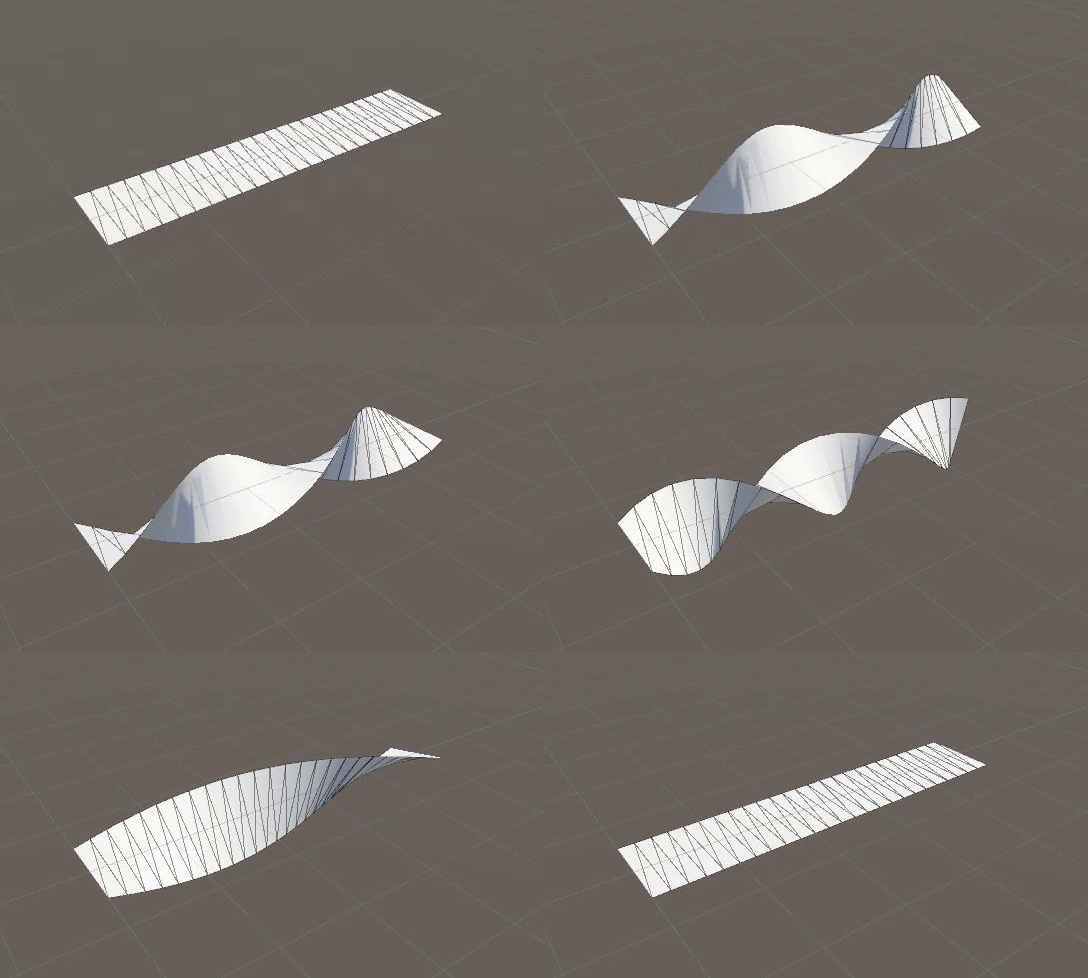
(Twisting.)
With this system, we knew we were onto something great. We still had to refactor existing systems from the ground up to work with this new method, and also work on routines and interfaces to allow the user to interact with the fluff instances in a fun and intuitive manner. But as far as the individual strand mesh generation went, we were good!
Fluff instances are still organized into groups, where each group can have its own texture and resolution settings (among other things). However, the big takeaway here is that the shape was moved from the group to each individual strand, meaning much more freedom for the author.
* Some libraries claim to support it, but actually still require invocations from main thread to generate the shape in the background. In our case, this was not good, because we need to merge all the individual instance meshes together into a single one, which means we would have to synchronize threads. That would be clunky to implement for something that wasn't meant for it and probably in the end wouldn't give the kind of results we were going for anyway. It's not a "run in background" kind of mechanic we want, but rather a "batch curve processing together", which apparently seems to be an uncommon request.
Interactive fluff authoring
With all of that out of the way, let's see these systems at work!
To create a fluff group and start tweaking it, navigate to appendage, click the plus symbol and then select the newly created object:
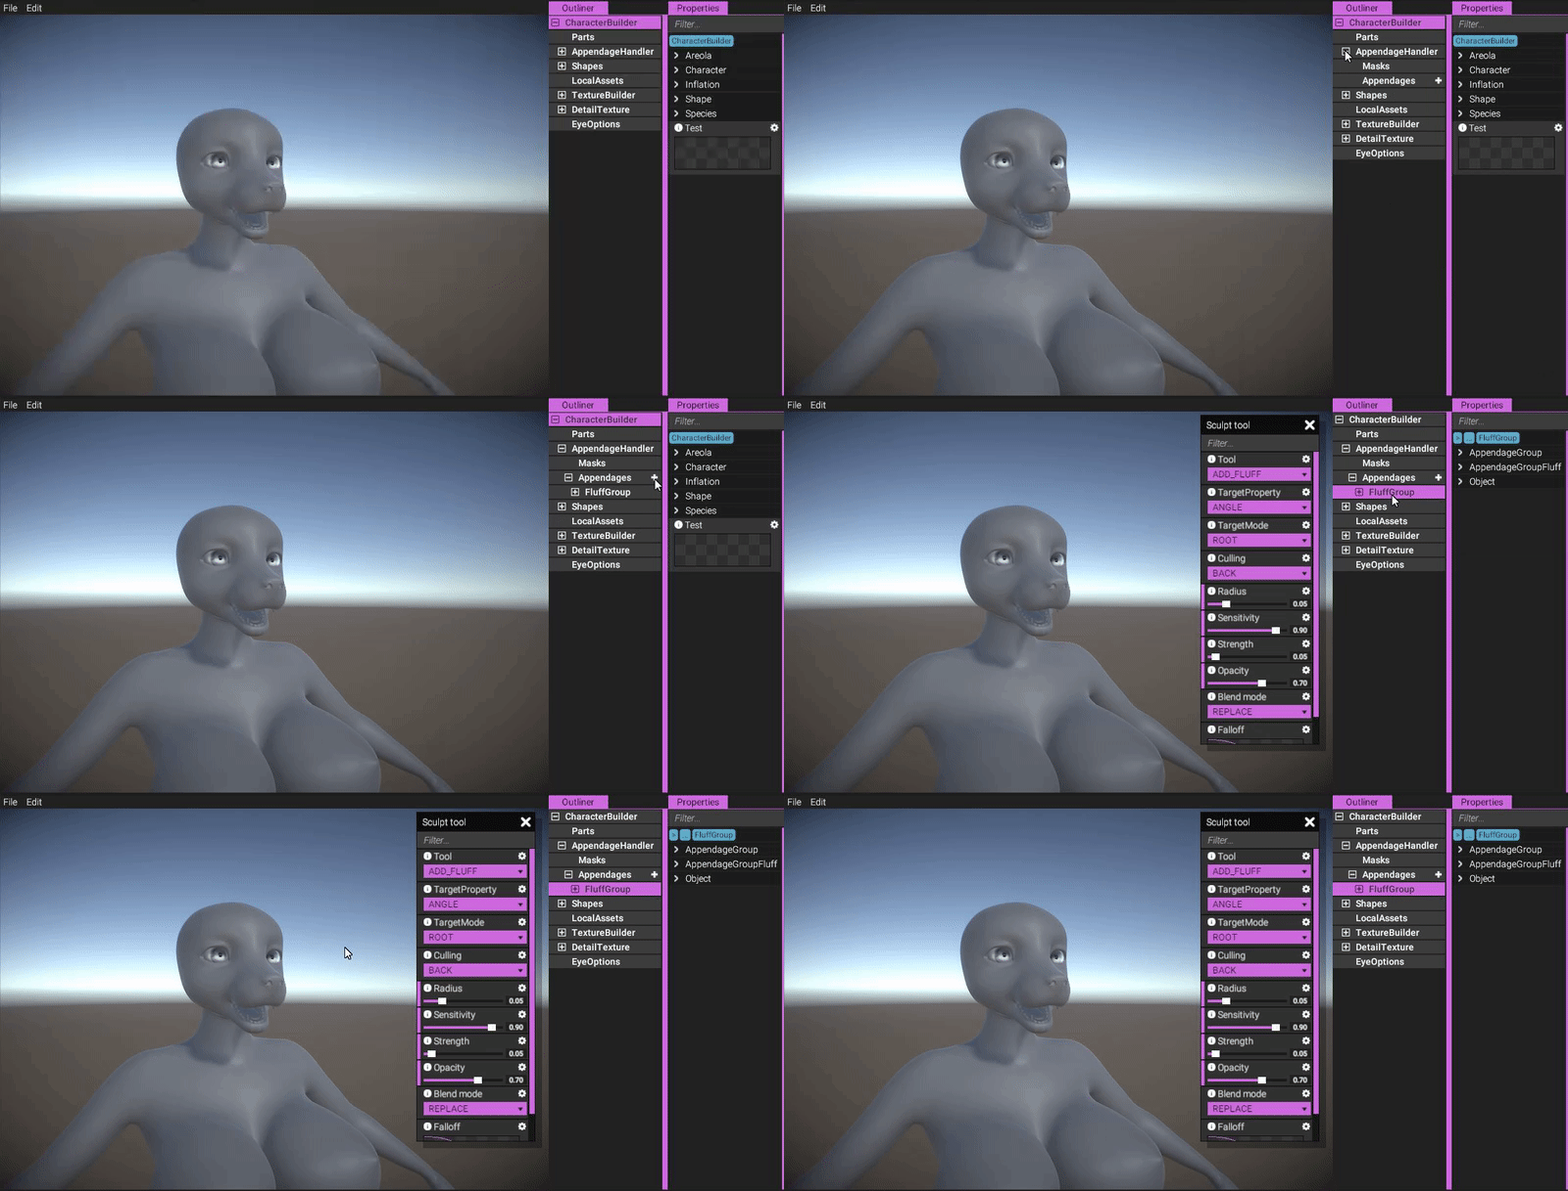
To start adding fluff mesh instances, click on the mesh:
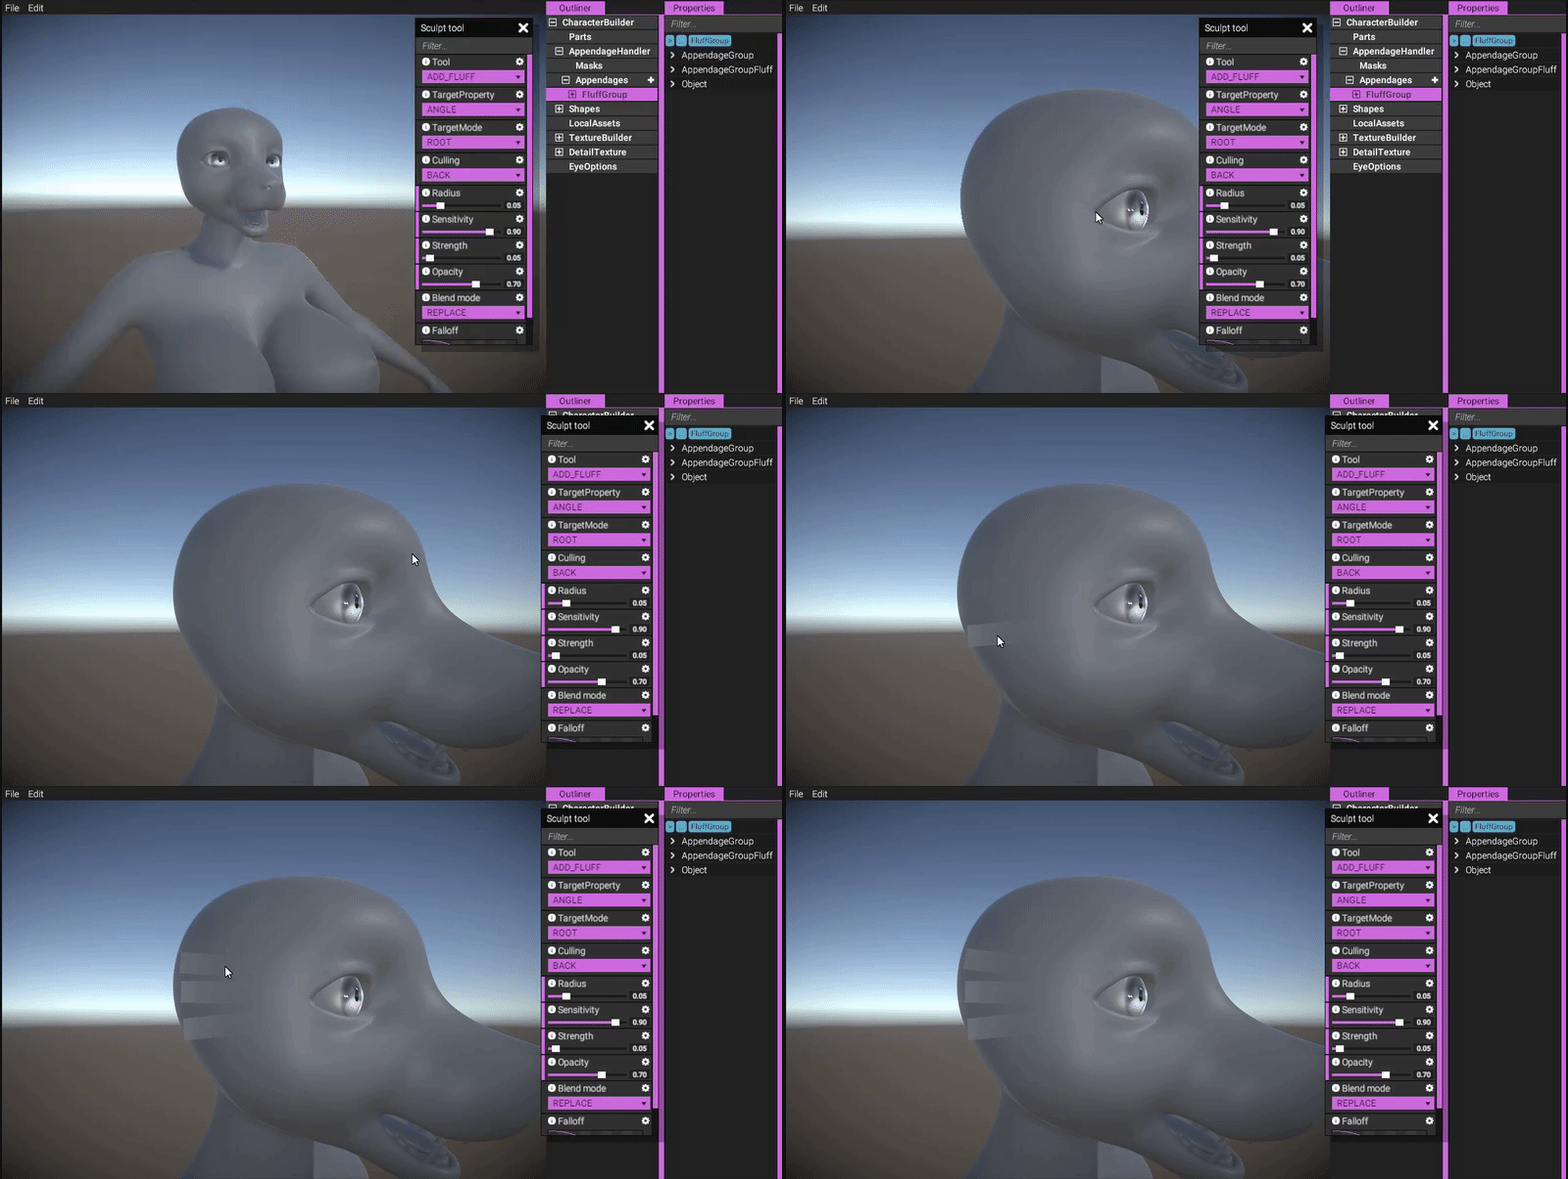
The direction of the created fluff instance is decided by the surface normal and mouse cursor location:
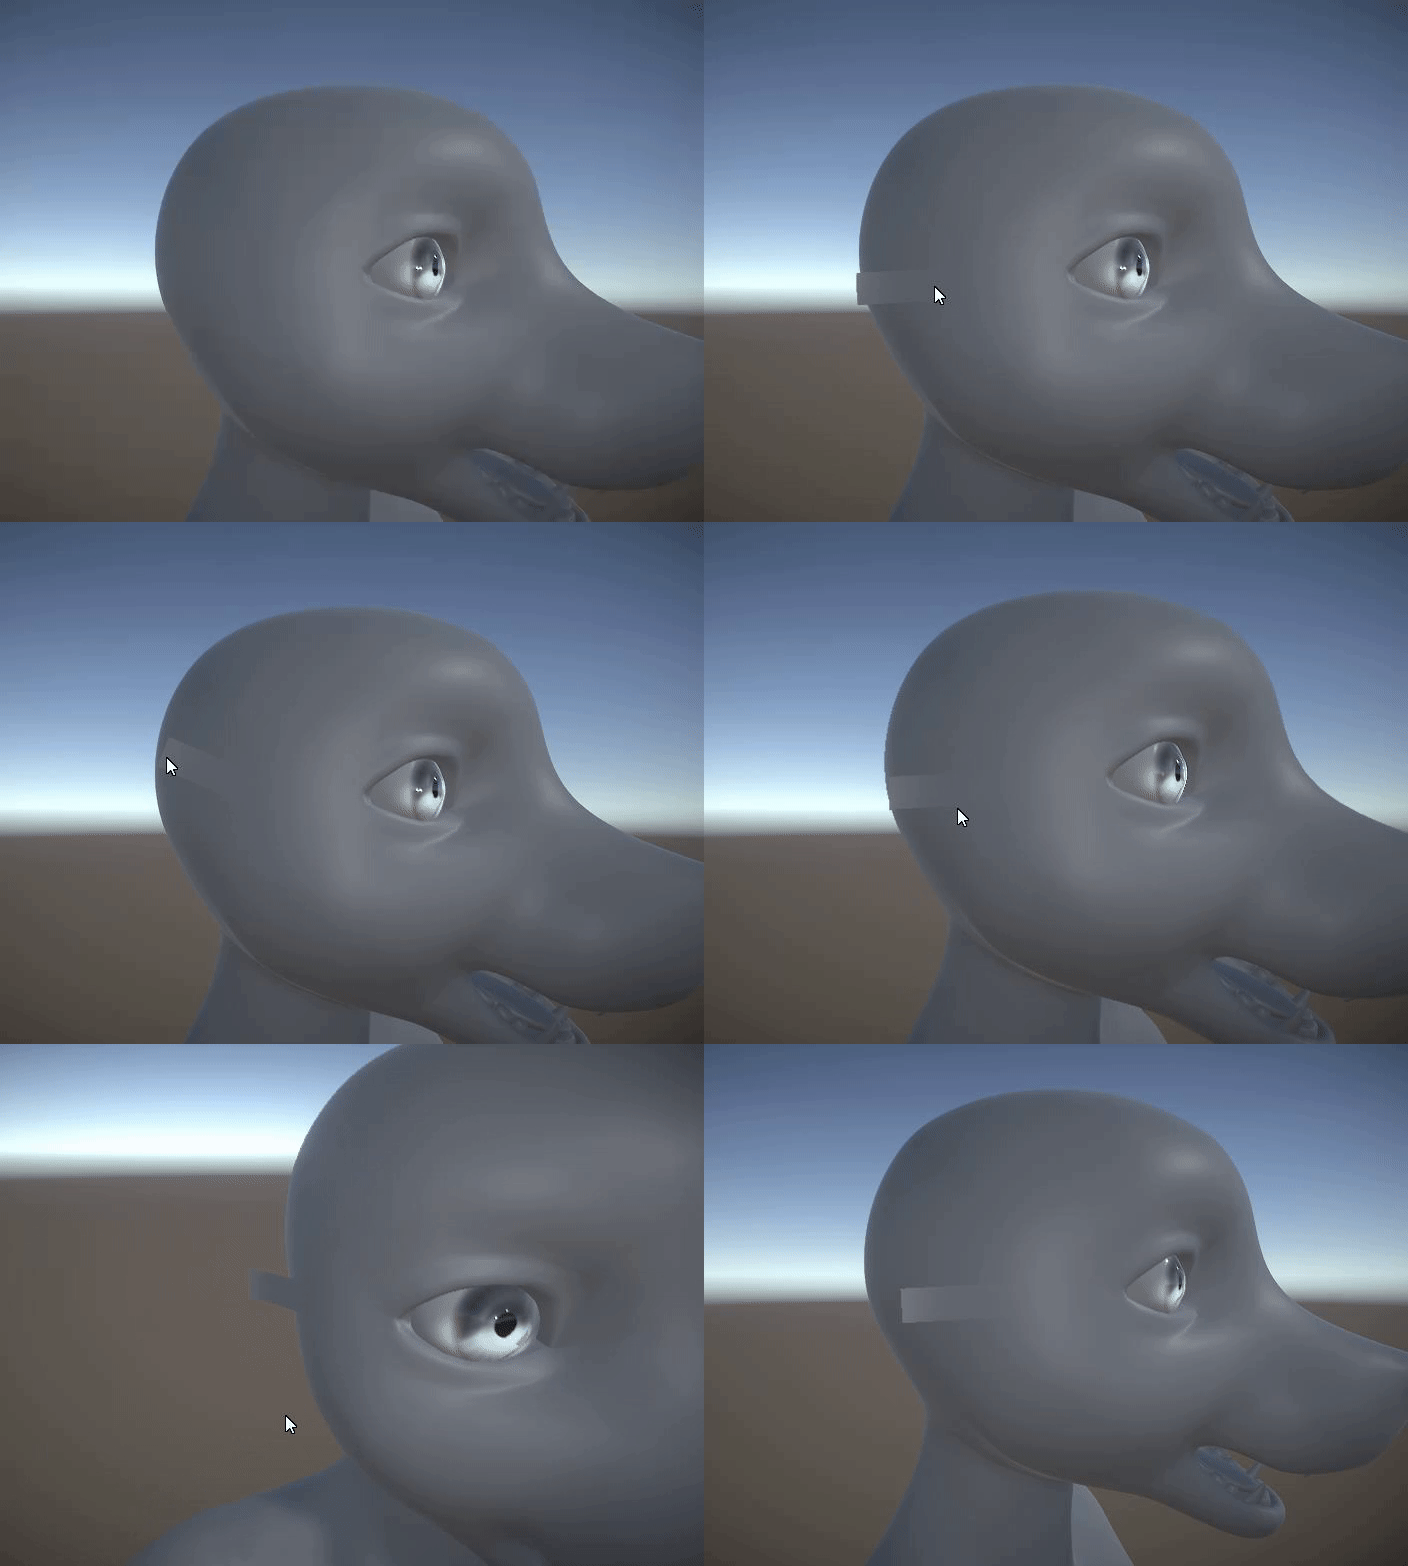
Use the fluff brush tools to sculpt the fluff in the desired way:
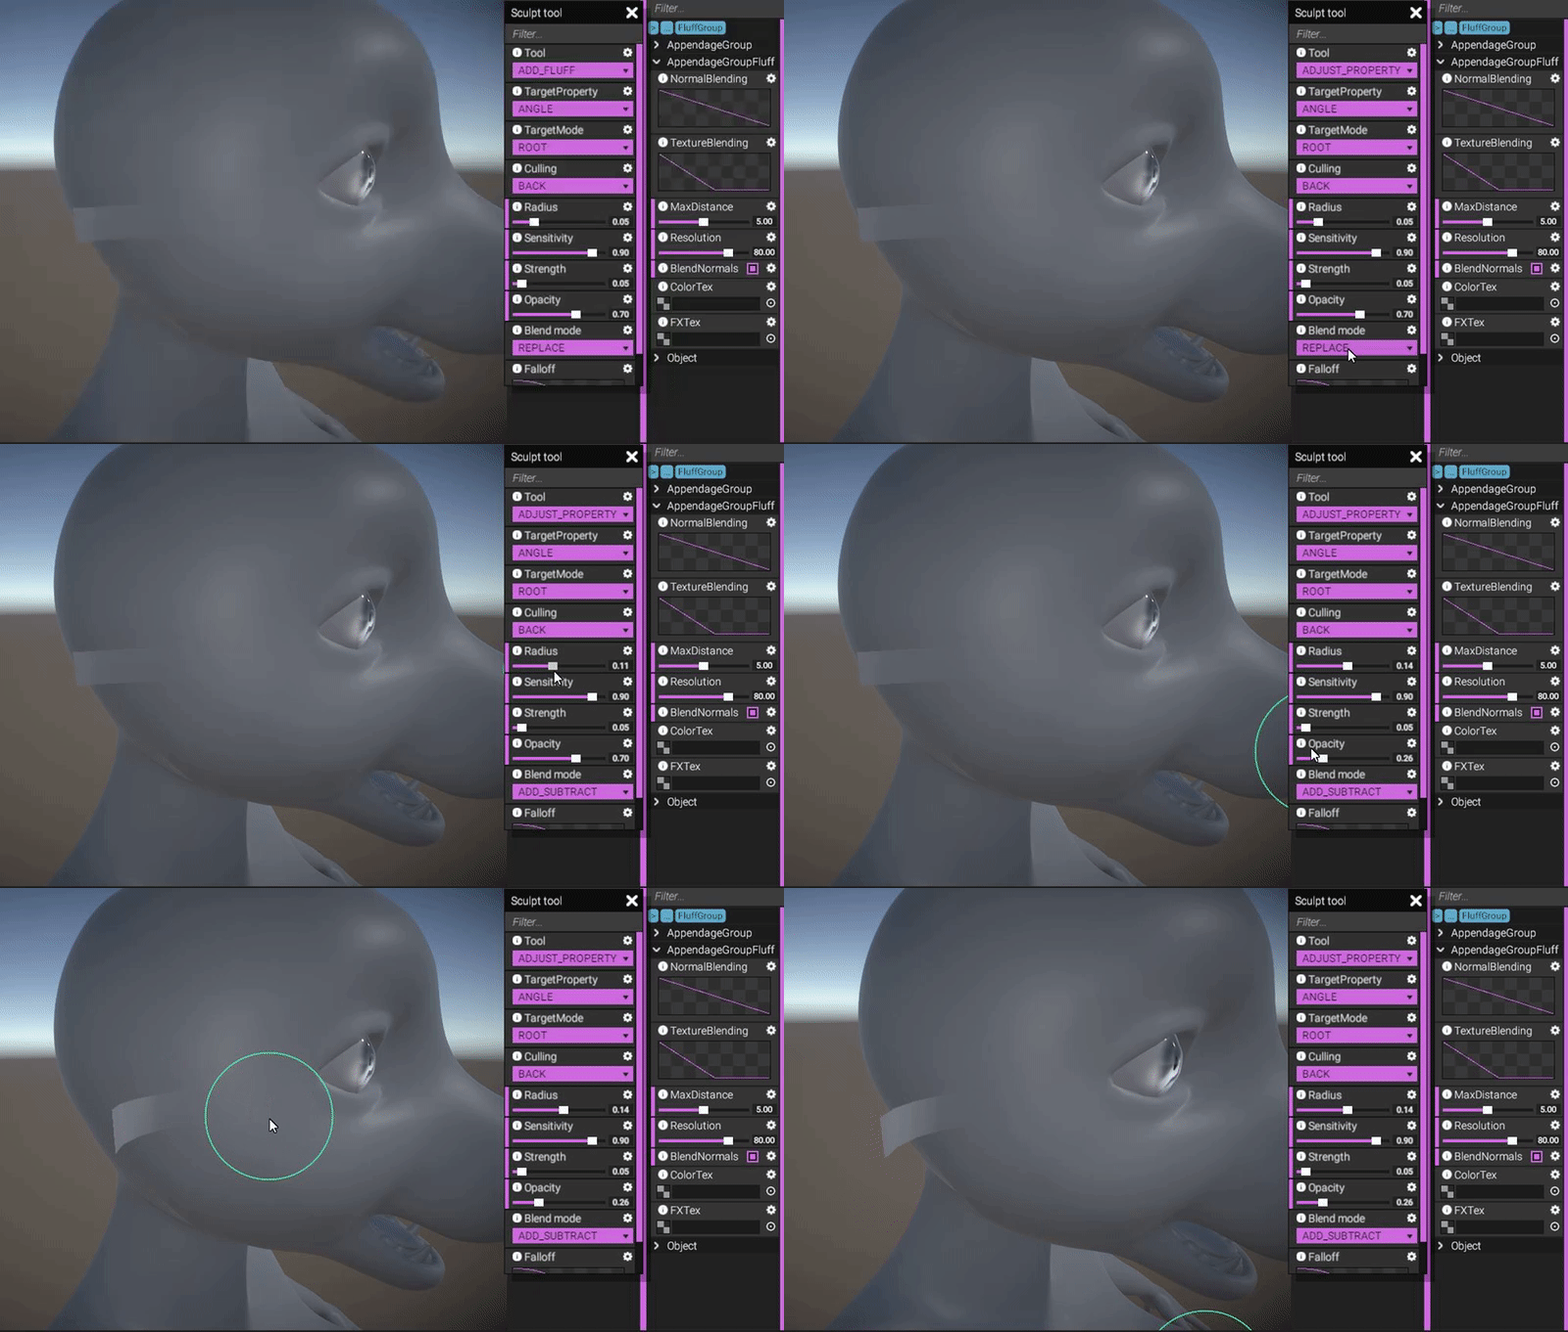
To inverse a brush in the ADD_SUBTRACT blend mode, simply press and hold LEFT_CONTROL:
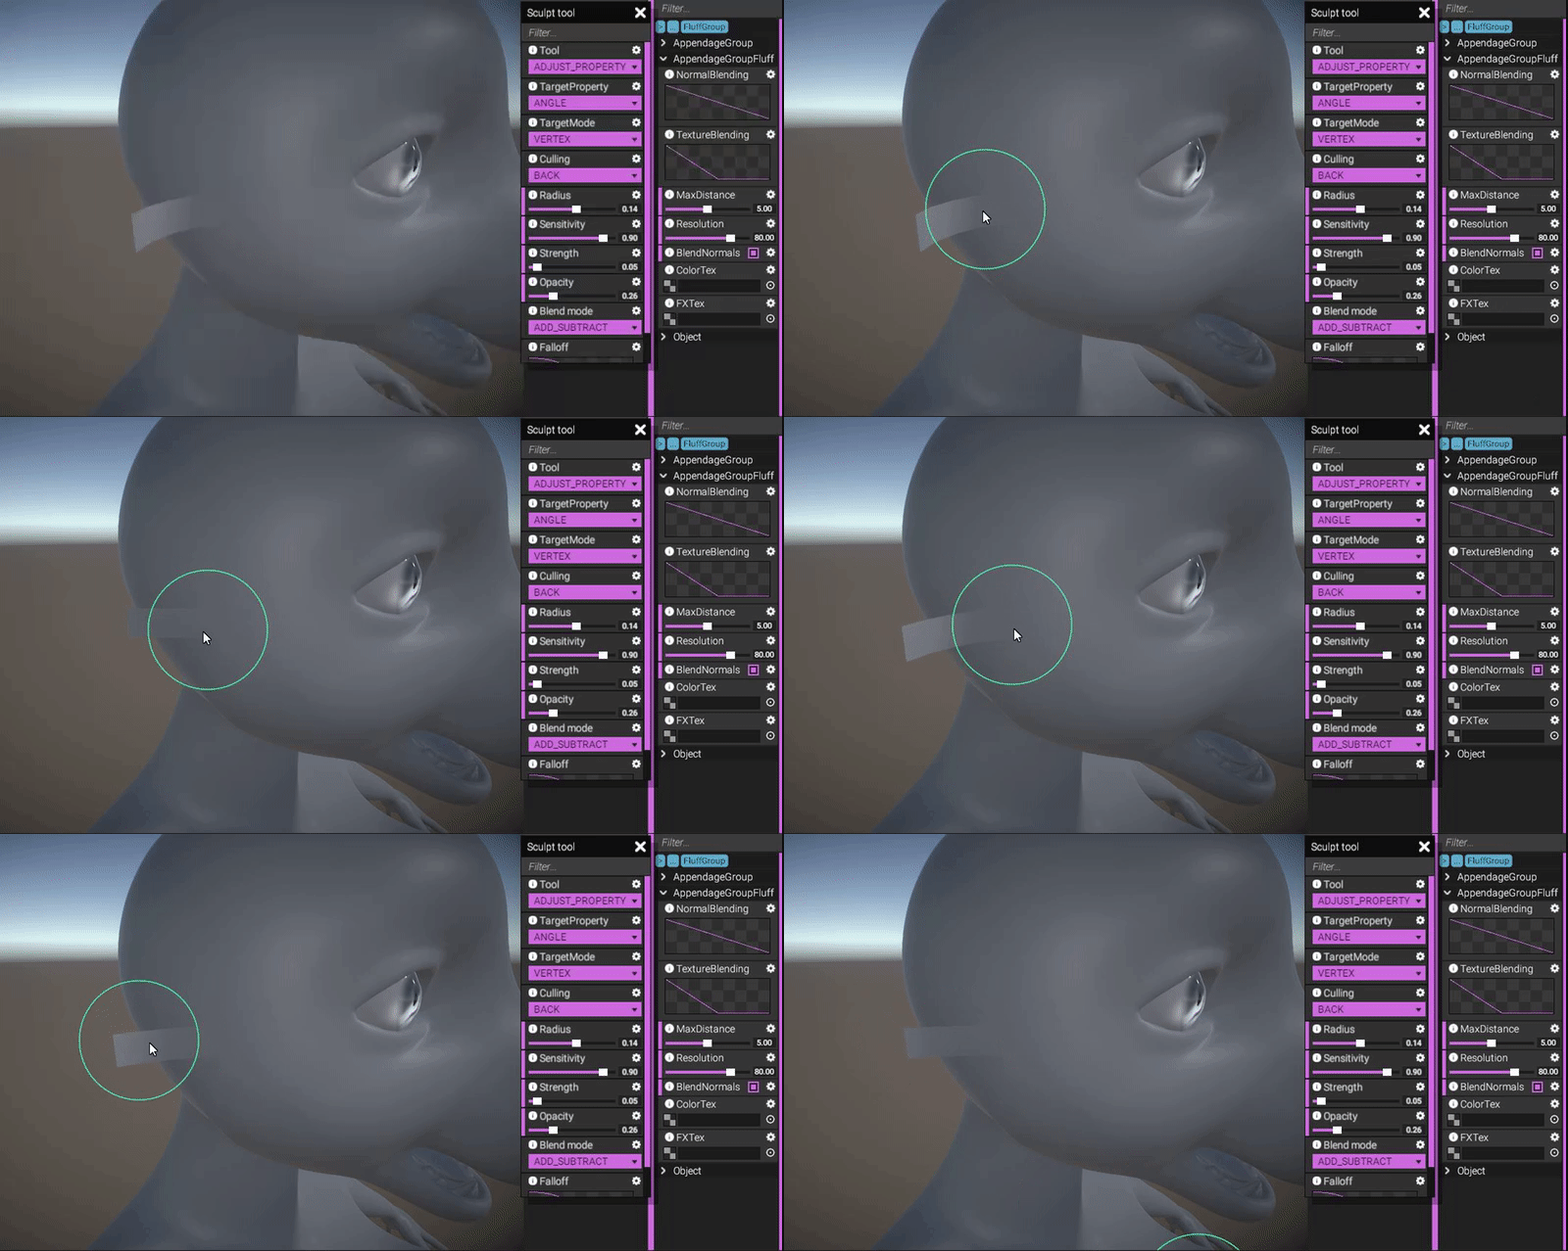
There are a lot of settings to choose from in the sculpting menu and lots of properties to affect:

You can also "smooth" fluff instances using the smooth blend mode (also accessible in all blend modes by pressing and hold LEFT_SHIFT):
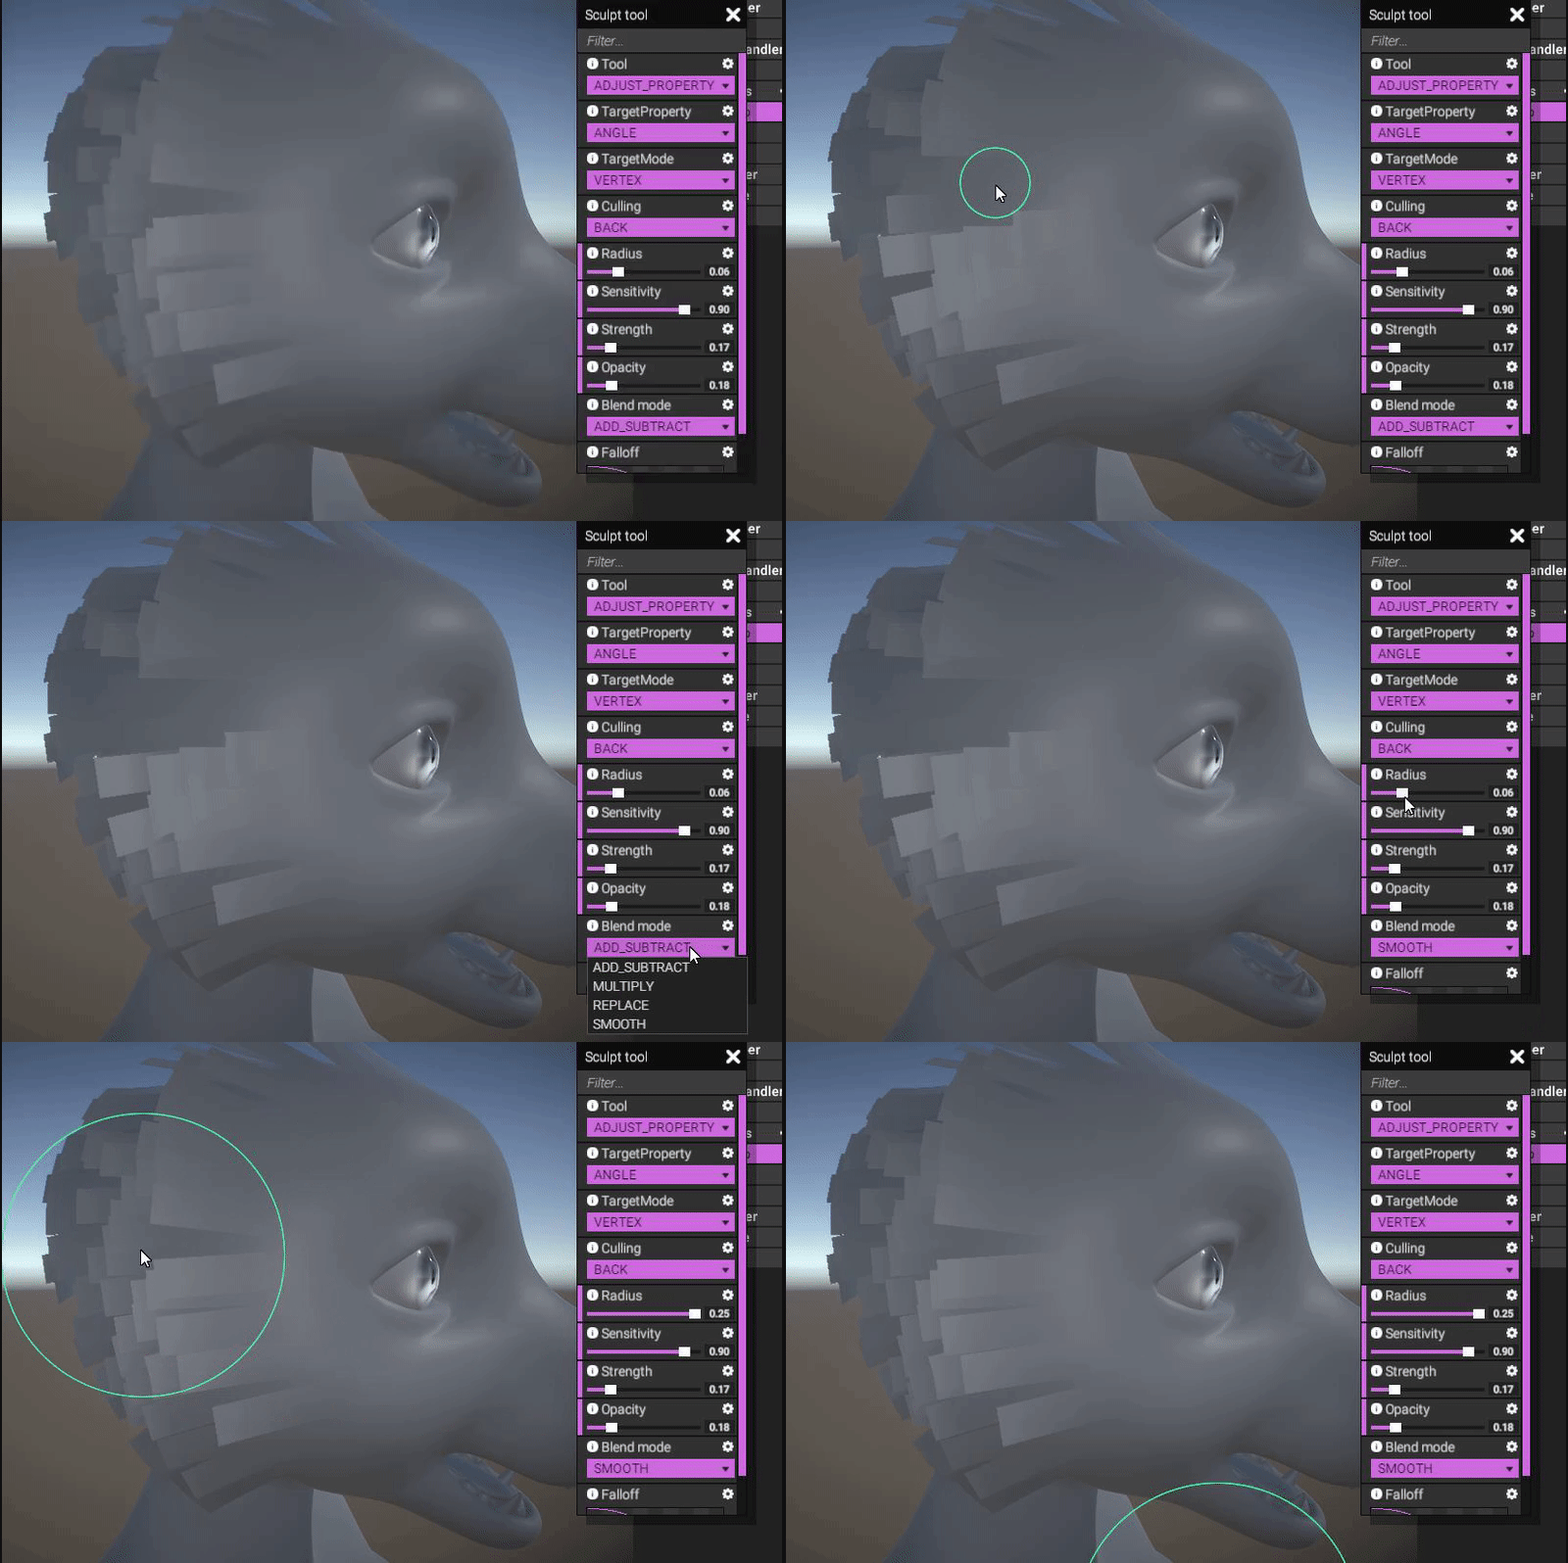
Smoothing works by selecting the average value of the instances within the circle, and blending their individual values towards the average according to the opacity and sensitivity parameters.
Add many instances and sculpt them to create the kind of look you want! (I really recommend opening the gfycat link.)

https://gfycat.com/BadEasygoingElephantseal
As you might have noticed, mirroring is handled automatically by default, but you can disable it if you want to.
Now, this example is a bit silly since the character is a canine and is missing ears, so it looks a bit strange. Still, it goes to show the potential of the system. As we flesh it out more, you'll be able to create looks that resemble fur or feathers more closely.
As with most (if not all) things in the editor, we're developing it in such a way that each action can be undone or redone. The fluff authoring is not an exception to this. It takes extra time to develop in this way, but I think the end result is worth it. It's really starting to feel like a real professional editor.
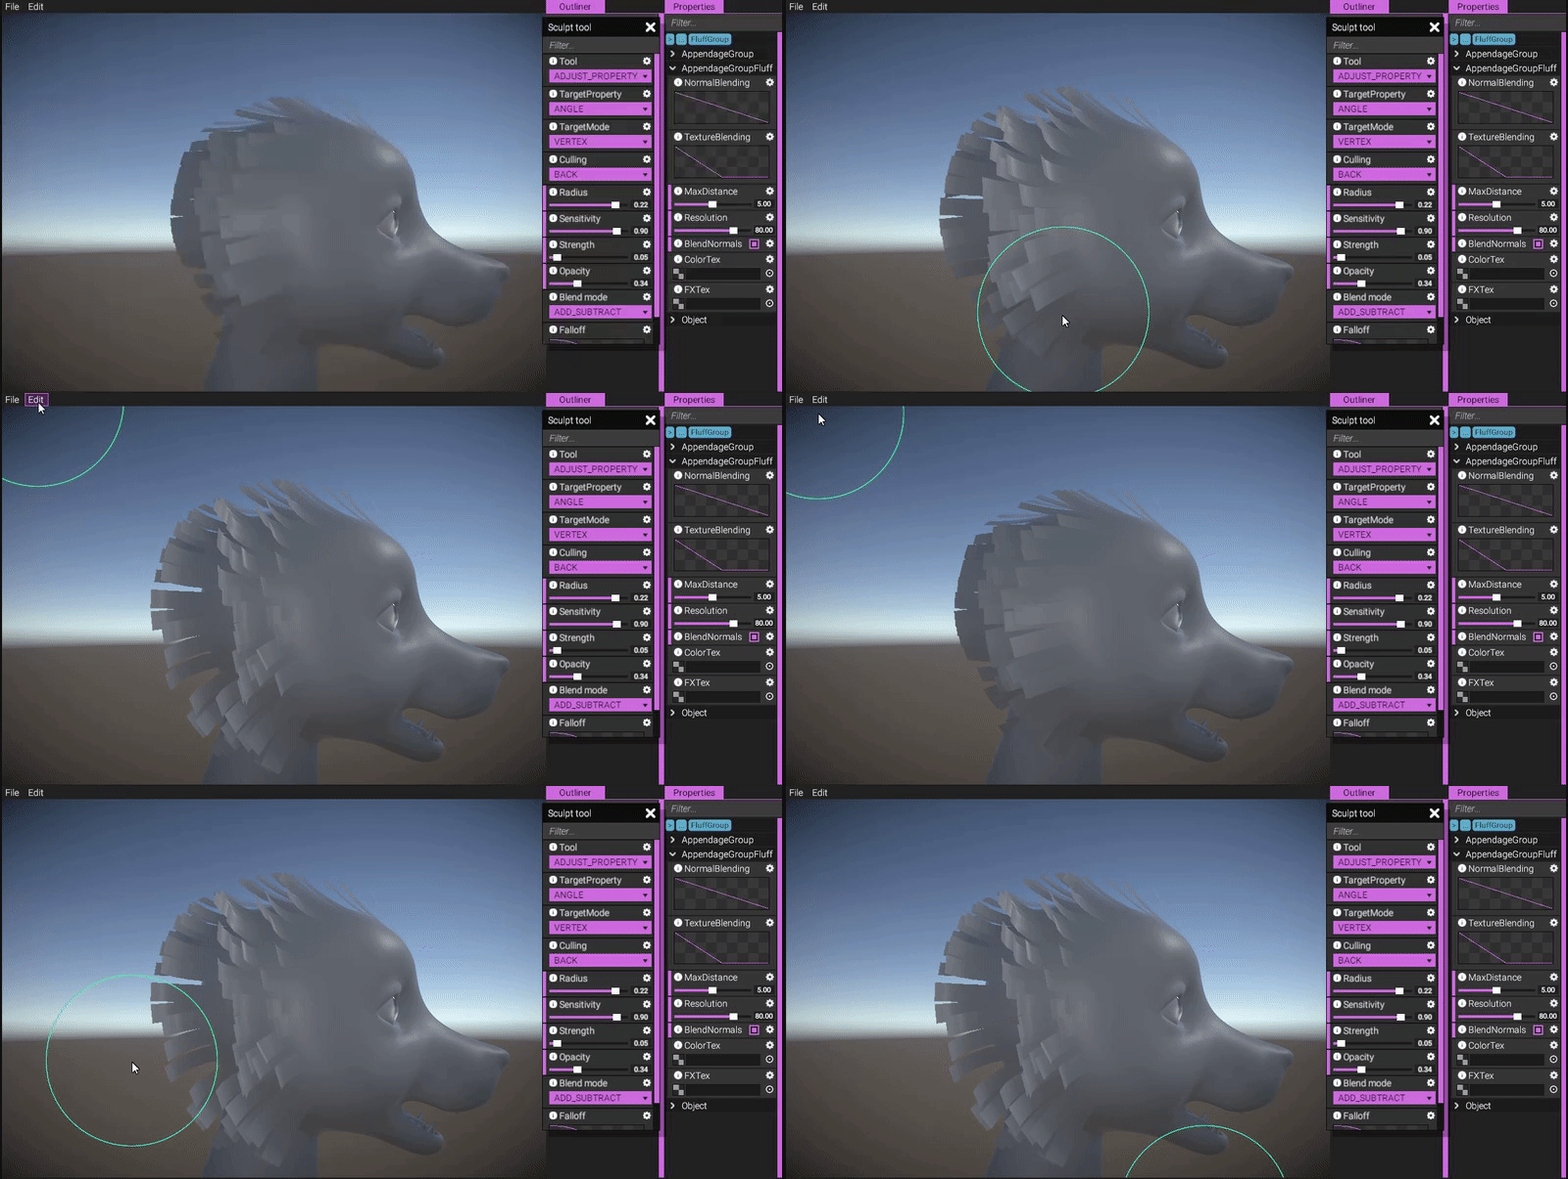
There's a lot more going on here in order for all of these things to work, but I can't cover all of it. Just know that this was quite difficult to achieve and took a ton of work!
We are super excited about this system, and can't wait to see what you'll create using it!
Future work
Obviously there's many things still missing. There's no alpha or texturing yet, but these things will be implemented. Also, there's no convenient way to change the direction of instances once they've been added, so we want to implement some kind of combing tool as well. This system will also require some adaptation to work on non-body meshes (ears, tails, custom models etc).
Intended use & limitations
Obviously we will have to limit the final triangle count for the fluff mesh instances, but what exactly that limit will be we don't know yet. Perhaps something between 5,000 to 10,000 triangles. This system is not meant to be used to cover the entire body of a character, but rather in specific places to achieve a stylized look. We recommend using it on faces, shoulders, elbows and upper torso. Of course, you'll be free to use it in any way you like, as long as you stay within the limits! (Limits will be enforced programmatically.)
I also want to point out that this system is not intended for hair, only for "fluff". We may implement a hair system later on, but that's definitely going to be after the first release.
TriangleKDTree
In the fluff mesh generation, we're using something called "normal blending". What this does is simply fetch normals from the model the fluff instances are attached to in order to make them blend in nicely. Here's an image showing what blend normals does:
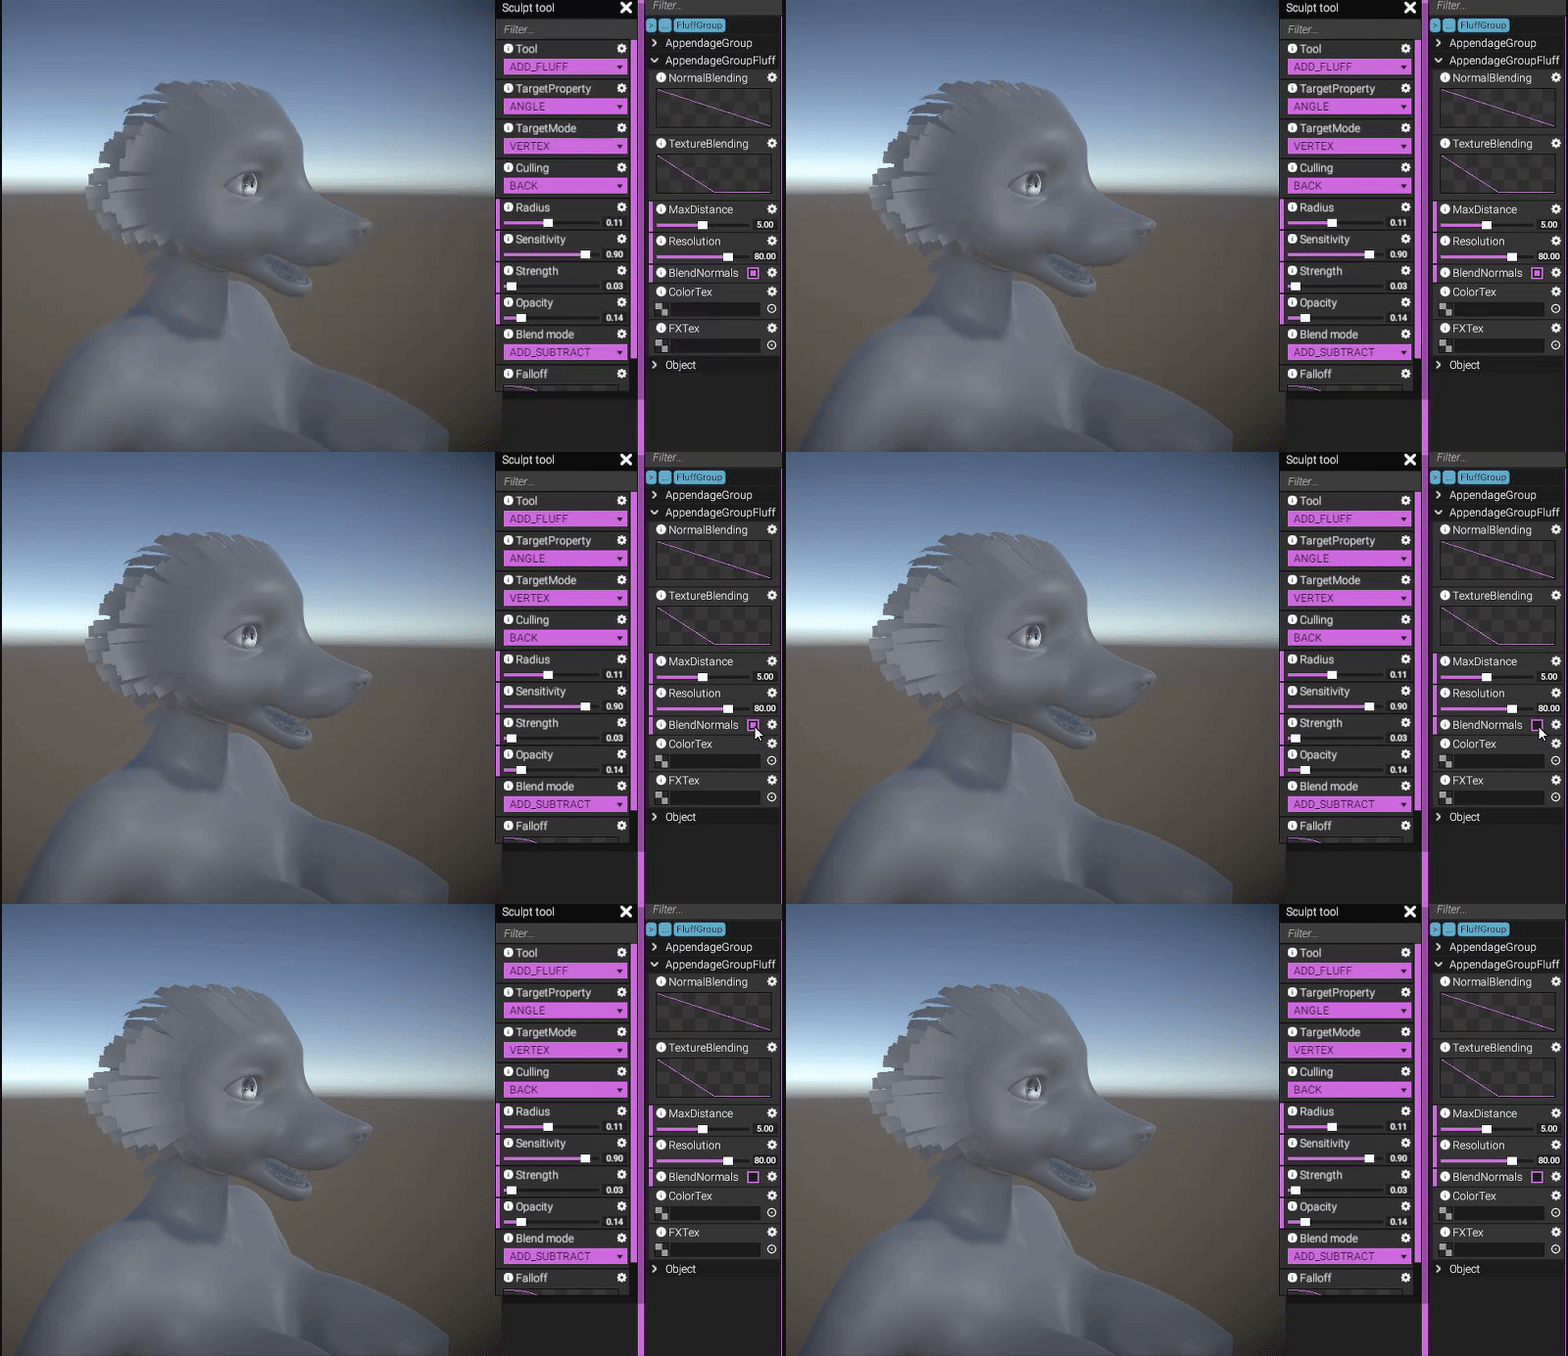
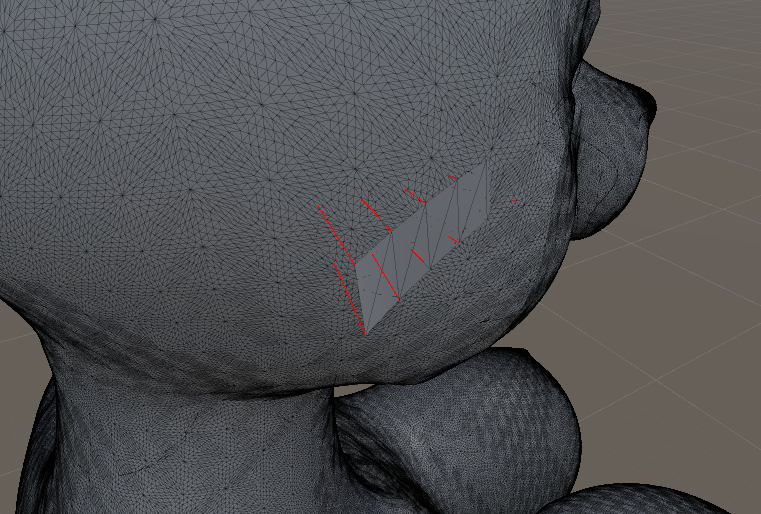
(Normals are fetched from closest surface point.)
Originally, we relied on raycasting to fetch the projected point and normal from each fluff vertex. However, raycasting in Unity must be made on the main thread, meaning we couldn't use it for our mesh generation library. Furthermore, raycasting was never really ideal, since a ray is not guaranteed to hit anything. Ideally, we would want the closest point on the mesh rather than the projected point. This turned out to be huge challenge!
Finding the surface closest point on a mesh given a vector input is apparently a rare request as well. Unity supports no method for doing this, and despite searching like a mad man for algorithms and implementations in C#, I was never successful in finding anything useful. Out of curiosity, I wrote some code to test how long it would take to test each triangle in a character to find the closest point (essentially brute force it). As suspected, this took far too long to be feasible. So I tried to figure something else out...
It occurred to me that I could re-purpose a KDTree to achieve this task. By mapping each vertex index to every connecting triangle [index] for that vertex, we could simply look up a vector in the KDTree, find the vertex index, and then fetch each corresponding triangle. So instead of going through thousands of triangles and test each one to find the closest point, we would only need to test a few ones! Also what's so great about this is that we could use multi-threading to look up multiple vectors at the same time.
We made a class for this purpose that we call "TriangleKDTree". It has a small overhead cost for initialization, but once initialized it's far better than brute forcing the closest point look up. We made a benchmark to test the differences. Not a very shiny benchmark, but thought I'd share anyway:
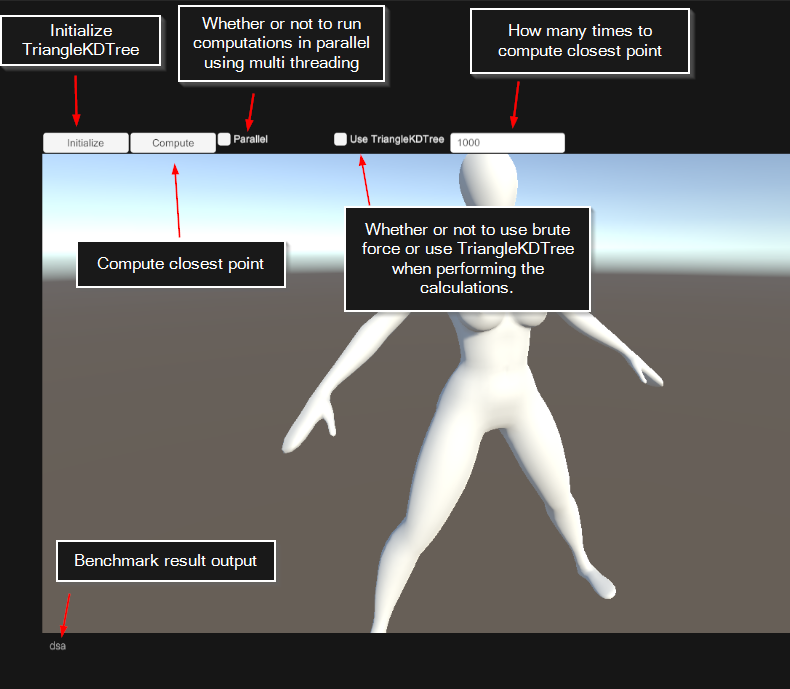
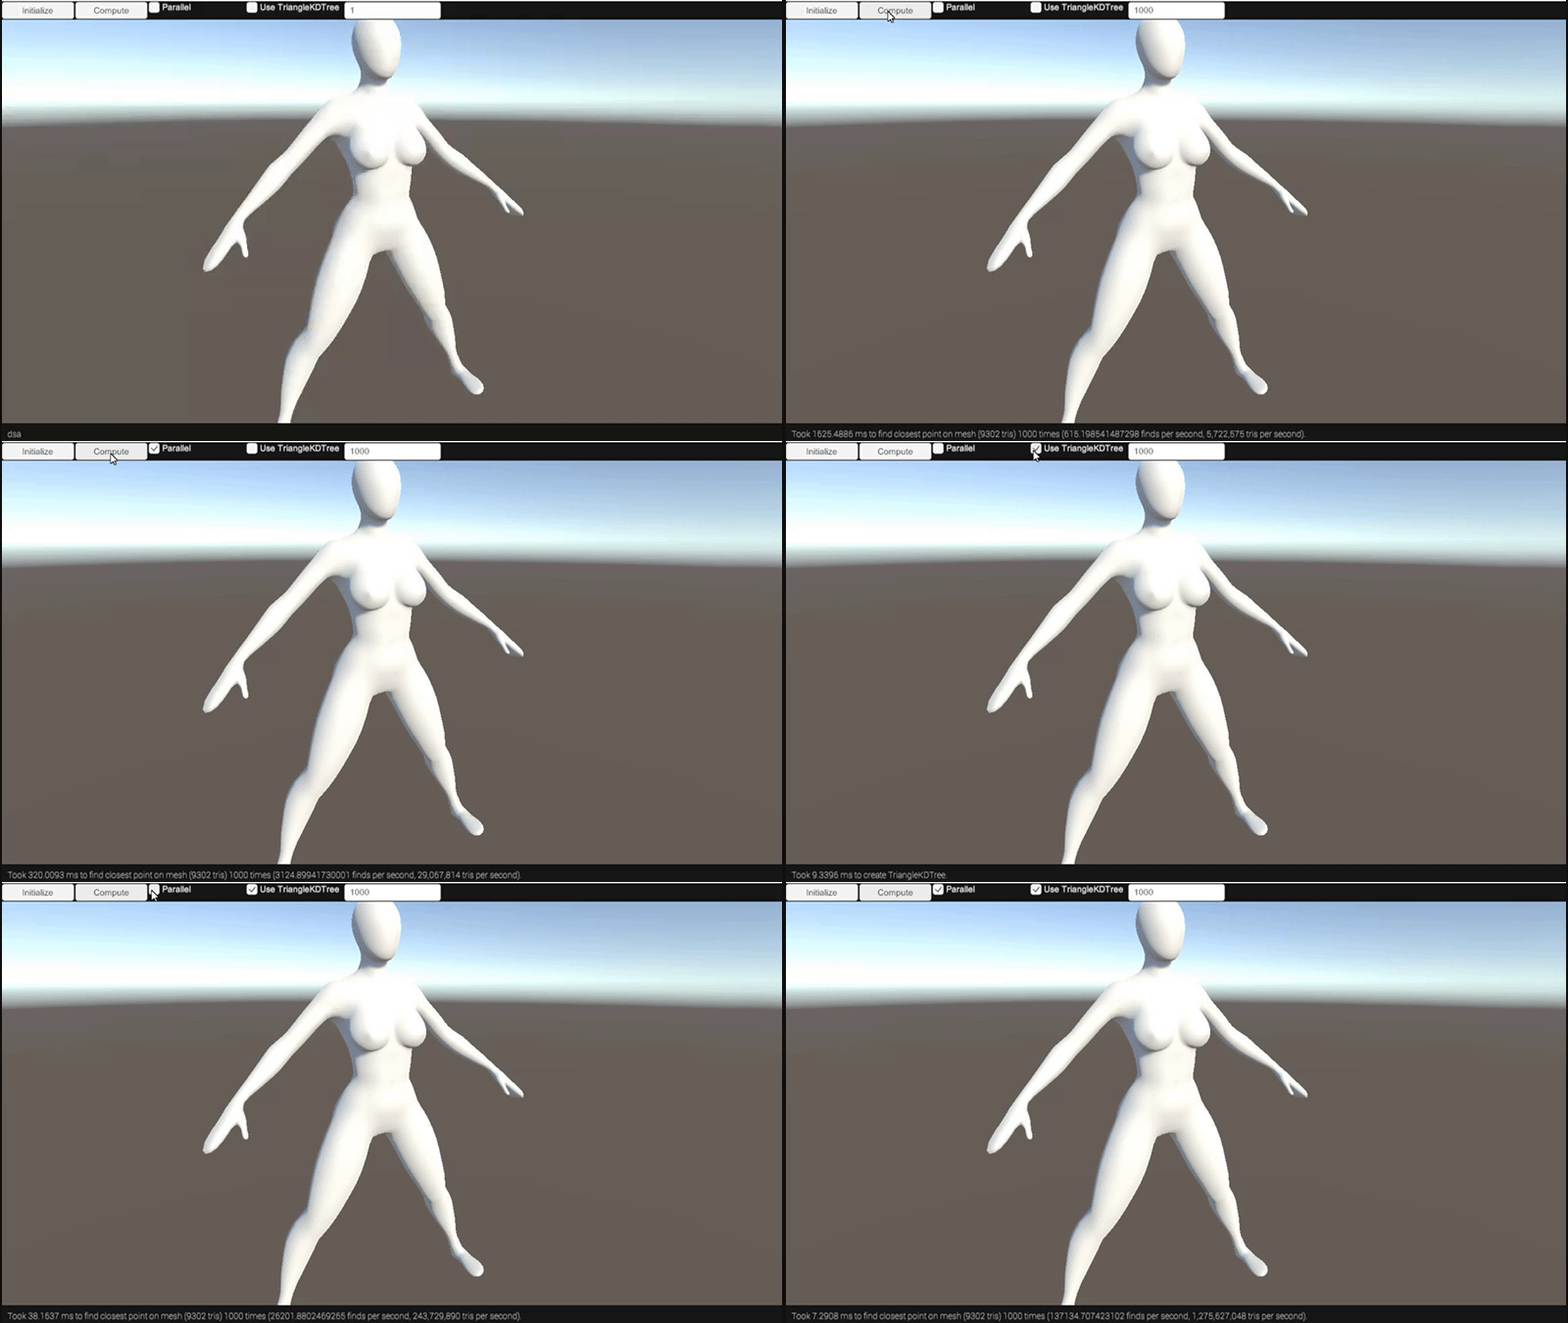
By using the TriangleKDTree, we are able to increase the triangle lookup performance around 43x!
Balls
Who doesn't like a big juicy pair of balls? No one, which is why we've spent so much time polishing these this month:
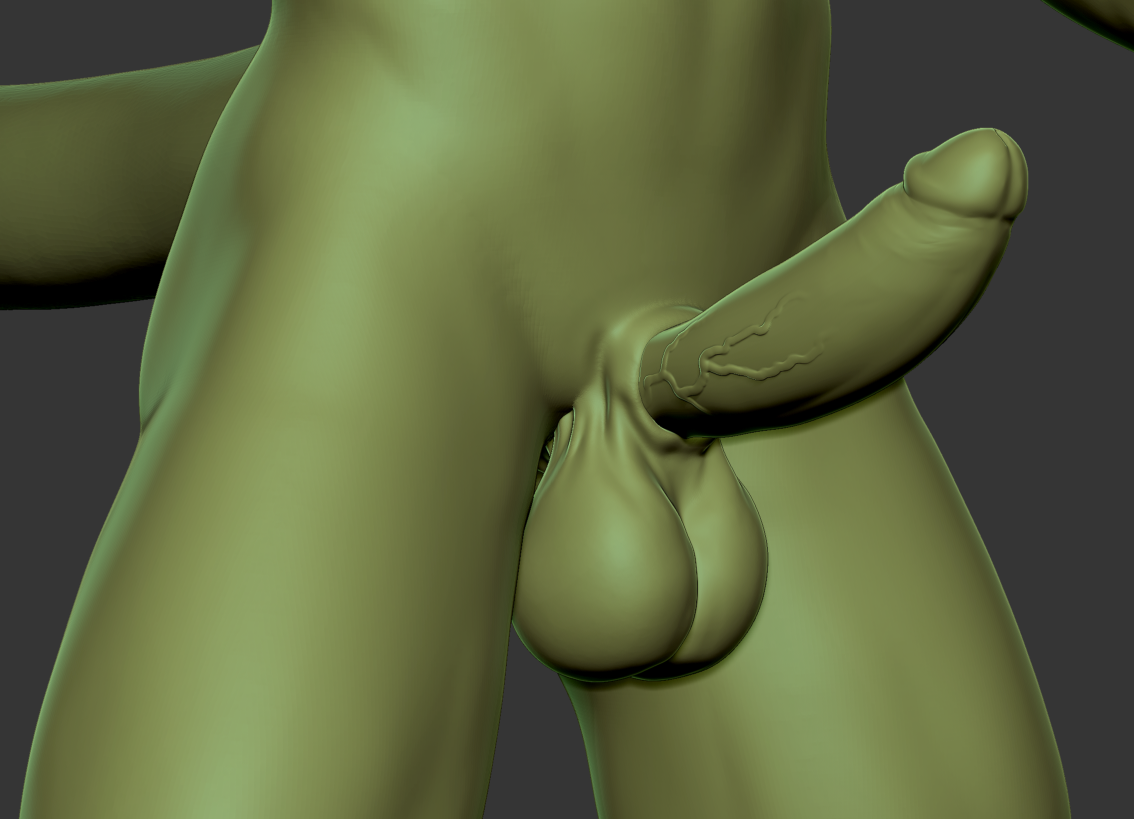
I wish I could adequately express the amount of work that has gone into designing them, but alas, I don't think I can. Just know that these took A LOT of iterations to get right, to the point where I think we were bordering on insanity. Luckily, we finally arrived at something we were happy with.
Balls is a huge topic we've been trying to figure out how to solve, and as we mentioned in our previous updates, we've decided to use a system where the body and balls are separated. This gives us more freedom in the future to design many different types of balls and sockets (for shafts). This image above is our first close-to-final model of the balls that will be shipped in the first release.
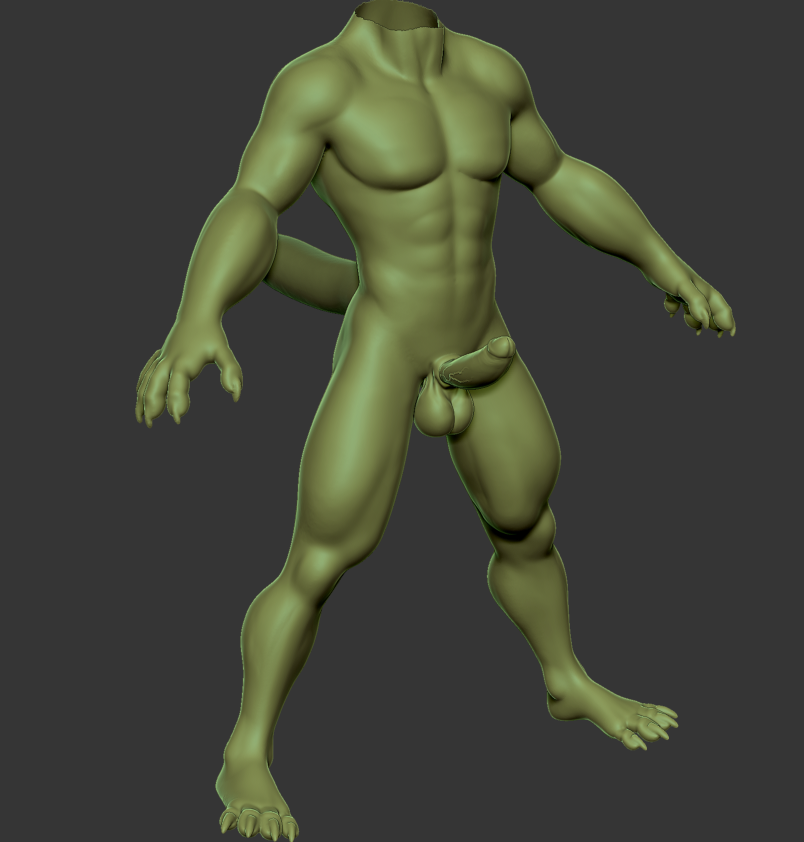
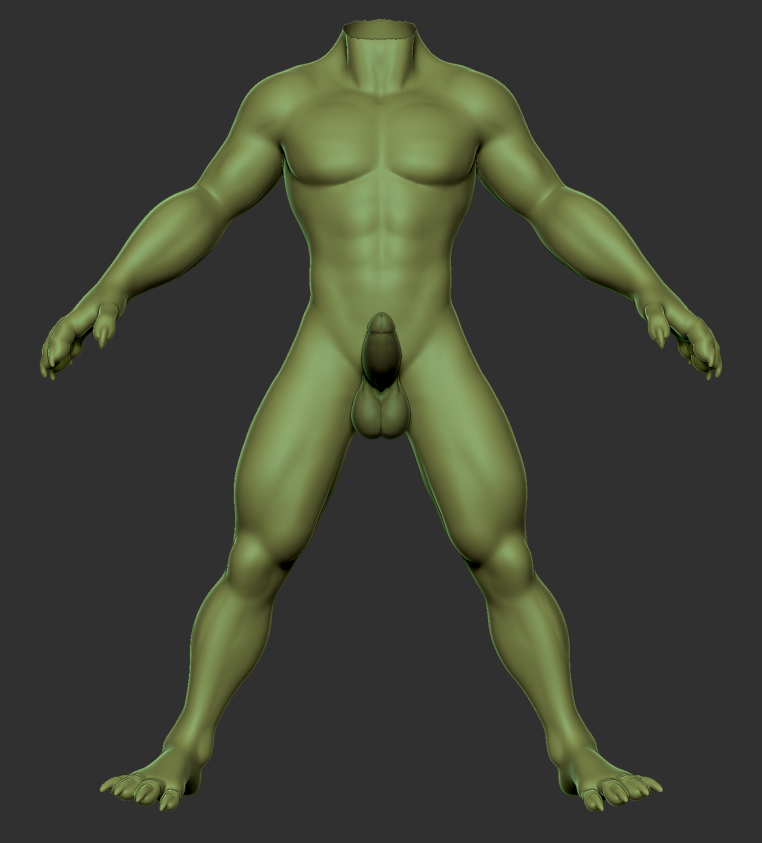
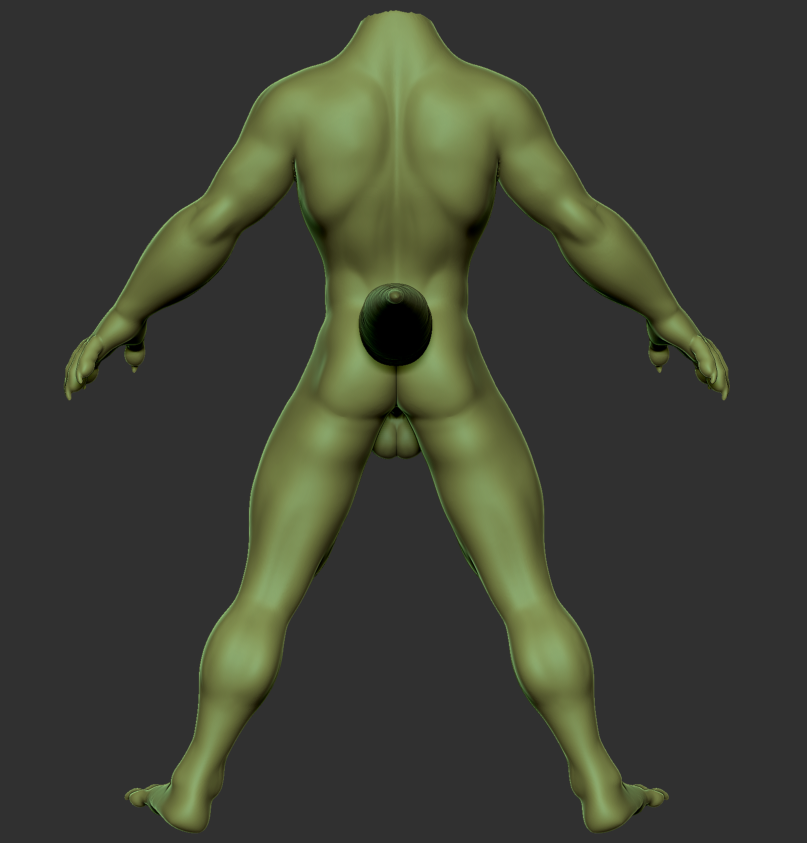
With the help of Nomistrav, Dogson has also been working on stylizing the body shapes as well. Here's a male body type we've been working on:
Other notes
We're finally finished with the curve editor. It now has full support for undo-redo, and has also gotten its own cell view to be used in the properties inspector:
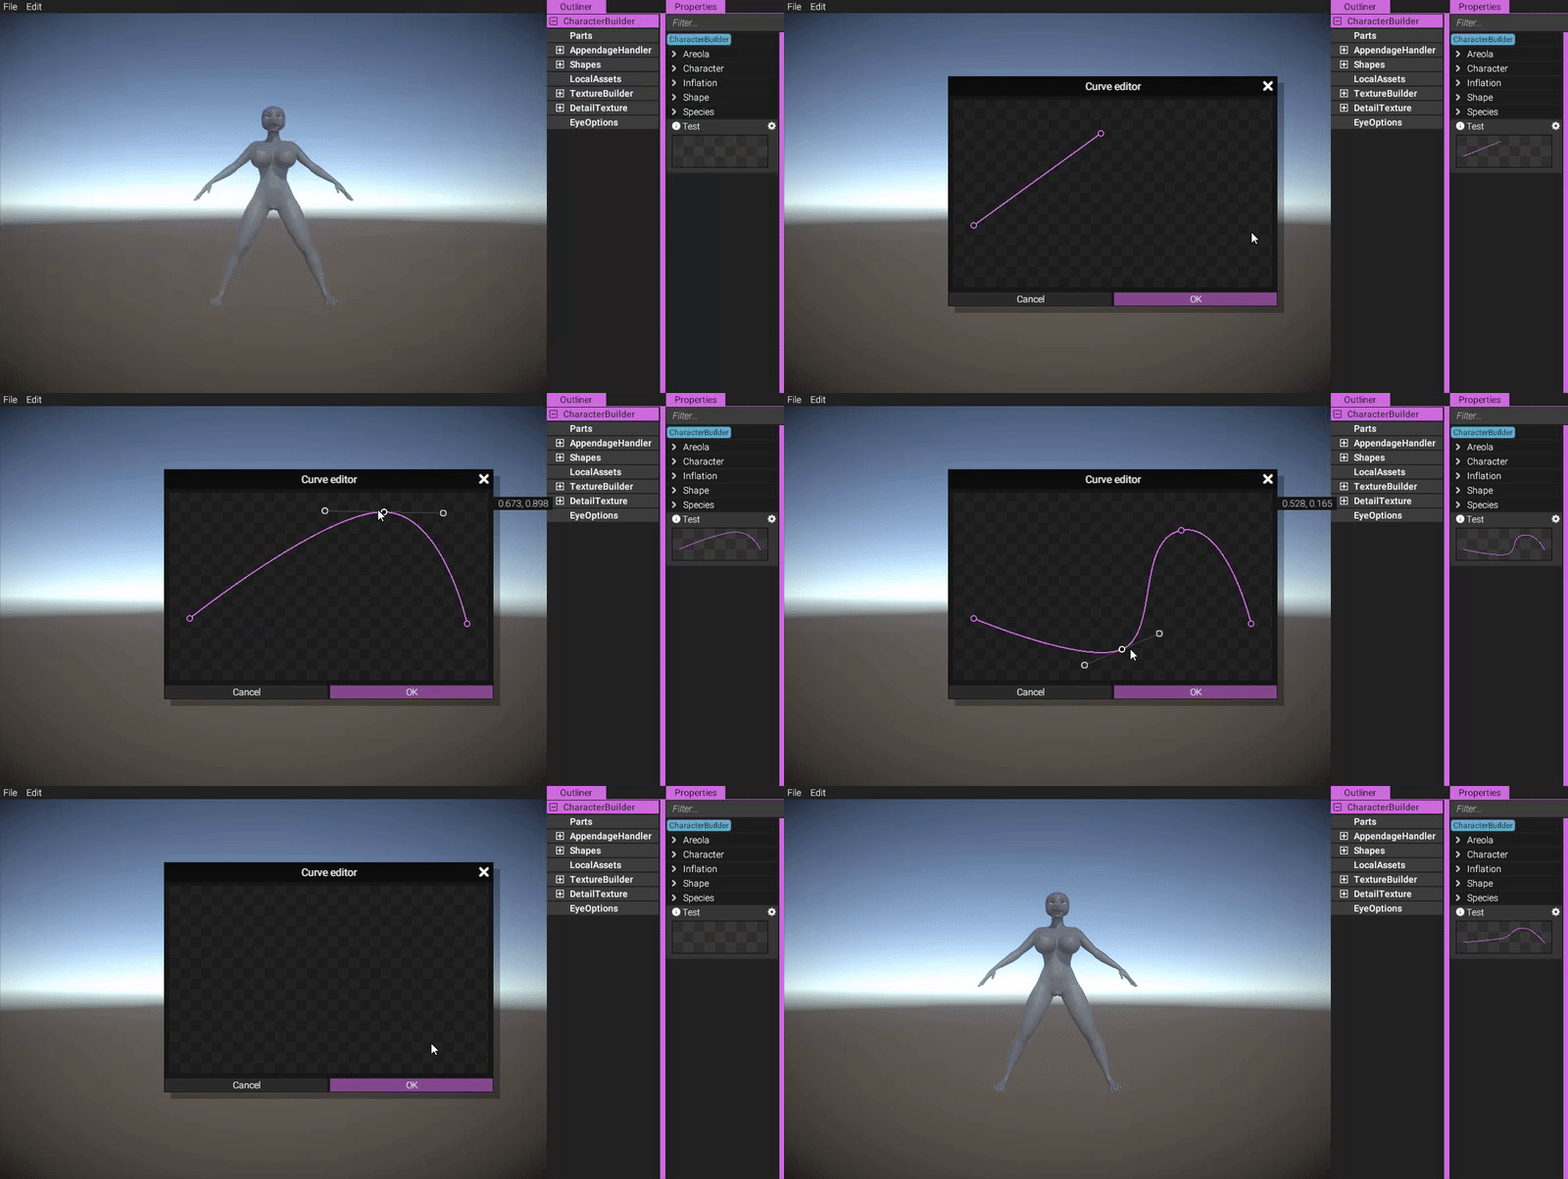
(Notice that the cell view is updated in real time as the curve is changed.)
We've also made optimizations to the curve system. Before, when evaluating an X-location on the curve, we would start at the left side of the curve and traverse it until the desired value was found. Now, we use a binary search algorithm, starting in the center of each attempt, meaning far fewer iterations and thus faster evaluation times.
Another optimization we've made is to the texture baking system. By utilizing the same quirk we described in our previous update (regarding Z depth), we have been able to increase texture baking performance 10x. This may come to play a huge role in cum projection, which is a technique we've been deliberating to use for adding cum effects on characters (something we even tested long ago), since texture projection relies on texture baking. One of the biggest challenges with that system was the bake times, but with 10x increased performance, hopefully that's less of a concern!
Summary
This month we've been hard at work integrating fluff authoring into the YL2 character editor. After realizing our original ideas simply weren't good enough for us to be happy, we decided to implement a completely new system that allows for much more customization and artistic freedom. This came with a lot of challenges and was very risky, but in the end we managed to pull through. We've also been working on finalizing more body shapes and parts.
The editor is shaping up nicely, and while we're behind schedule, we definitely think the redesigned fluff system was worth it. We feel optimistic about the future.
Comments
I can see a lot of potential uses for this already, even a few unconventional ones like exposed, hanging wiring for robotic characters. Be sure to make it possible to secure both ends of a fluff piece to the body to facilitate this sort of use.
This system is not suitable for that imo. Wires would require something that is more like a tube, not a plane, and that has simulation to it. Also, only one end is "secure" with this implementation.
But i will still ask the age old question; When are we going to get our hands on the character creator, just as a tease? And uhm...Please dont have it "patreon blocked"? ;__;
Pretty please? :333
@Placebo00
But hey, this has an really easy fix! Just become a patron and there won't be more begging nor tears. Also, having more funds will help them to work better and faster. It's a win-win situation!
Not that i'm complaining tho, this tech-speech shit is my jam.
(Disclaimer, do not use shit as jam)