Howdy, Stranger!
It looks like you're new here. If you want to get involved, click one of these buttons!
Categories
YL2 - Anus, eyelash and tongue options
This past month we've been hard at work implementing the last remaining options we need for an initial release of the character creator. There are still some more systems we need to create, but as far as authoring options go we're pretty much done!
So let's jump straight into all the goodies!
Anus options
We now have a system in place for anuses. For starters, only one anus model will be possible to choose from, but the system has been designed in such a way that we will be able to add more with time, if necessary.
Even with just a single anus model, there's plenty of options to configure it in different ways. Hopefully these options will be satisfactory for what you want to create. Lets go through them!
Naturally, there's a model property to select what model to use (or none, if you for whatever reason don't want your character to have an anus):
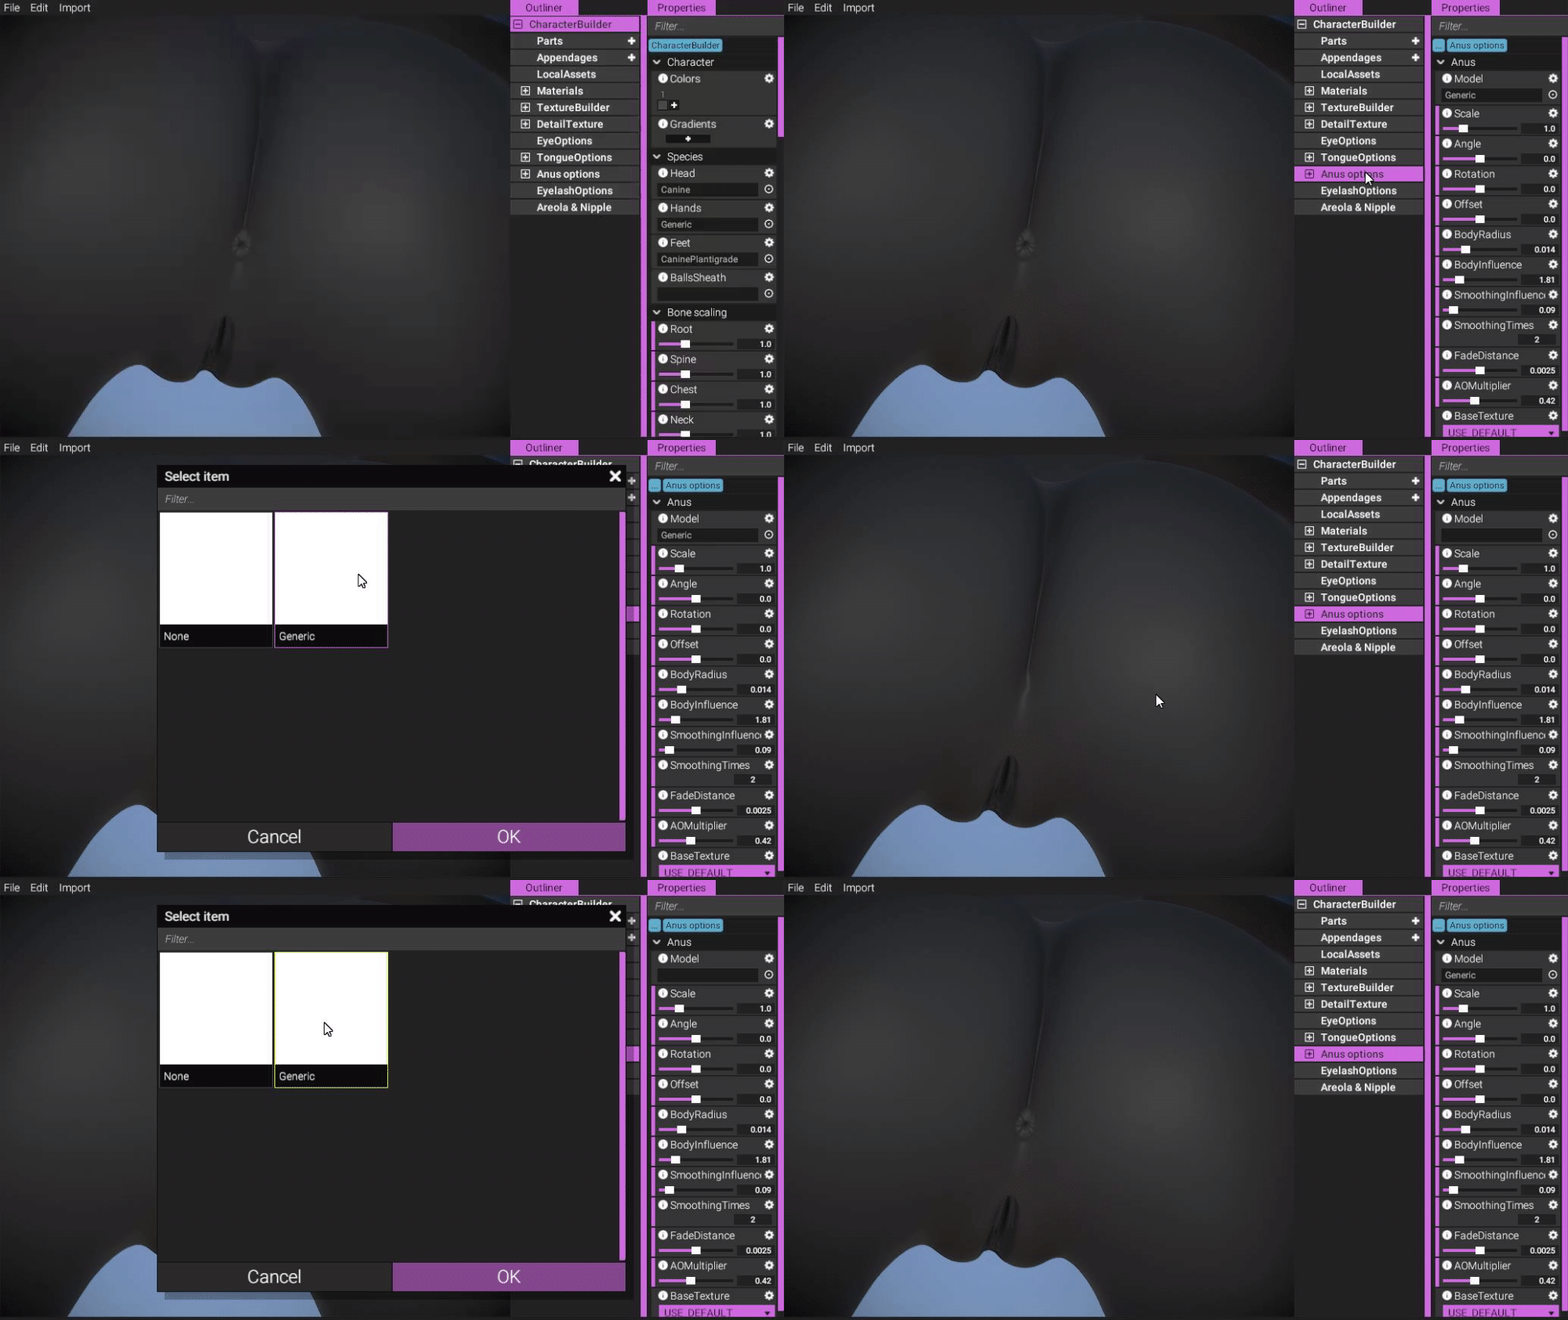
(Select what anus model to use, or none. For now, only 1 anus will be included in the first release.)
https://gyazo.com/889088f321d88926647c9dde1411739e
You can adjust the size of the anus:
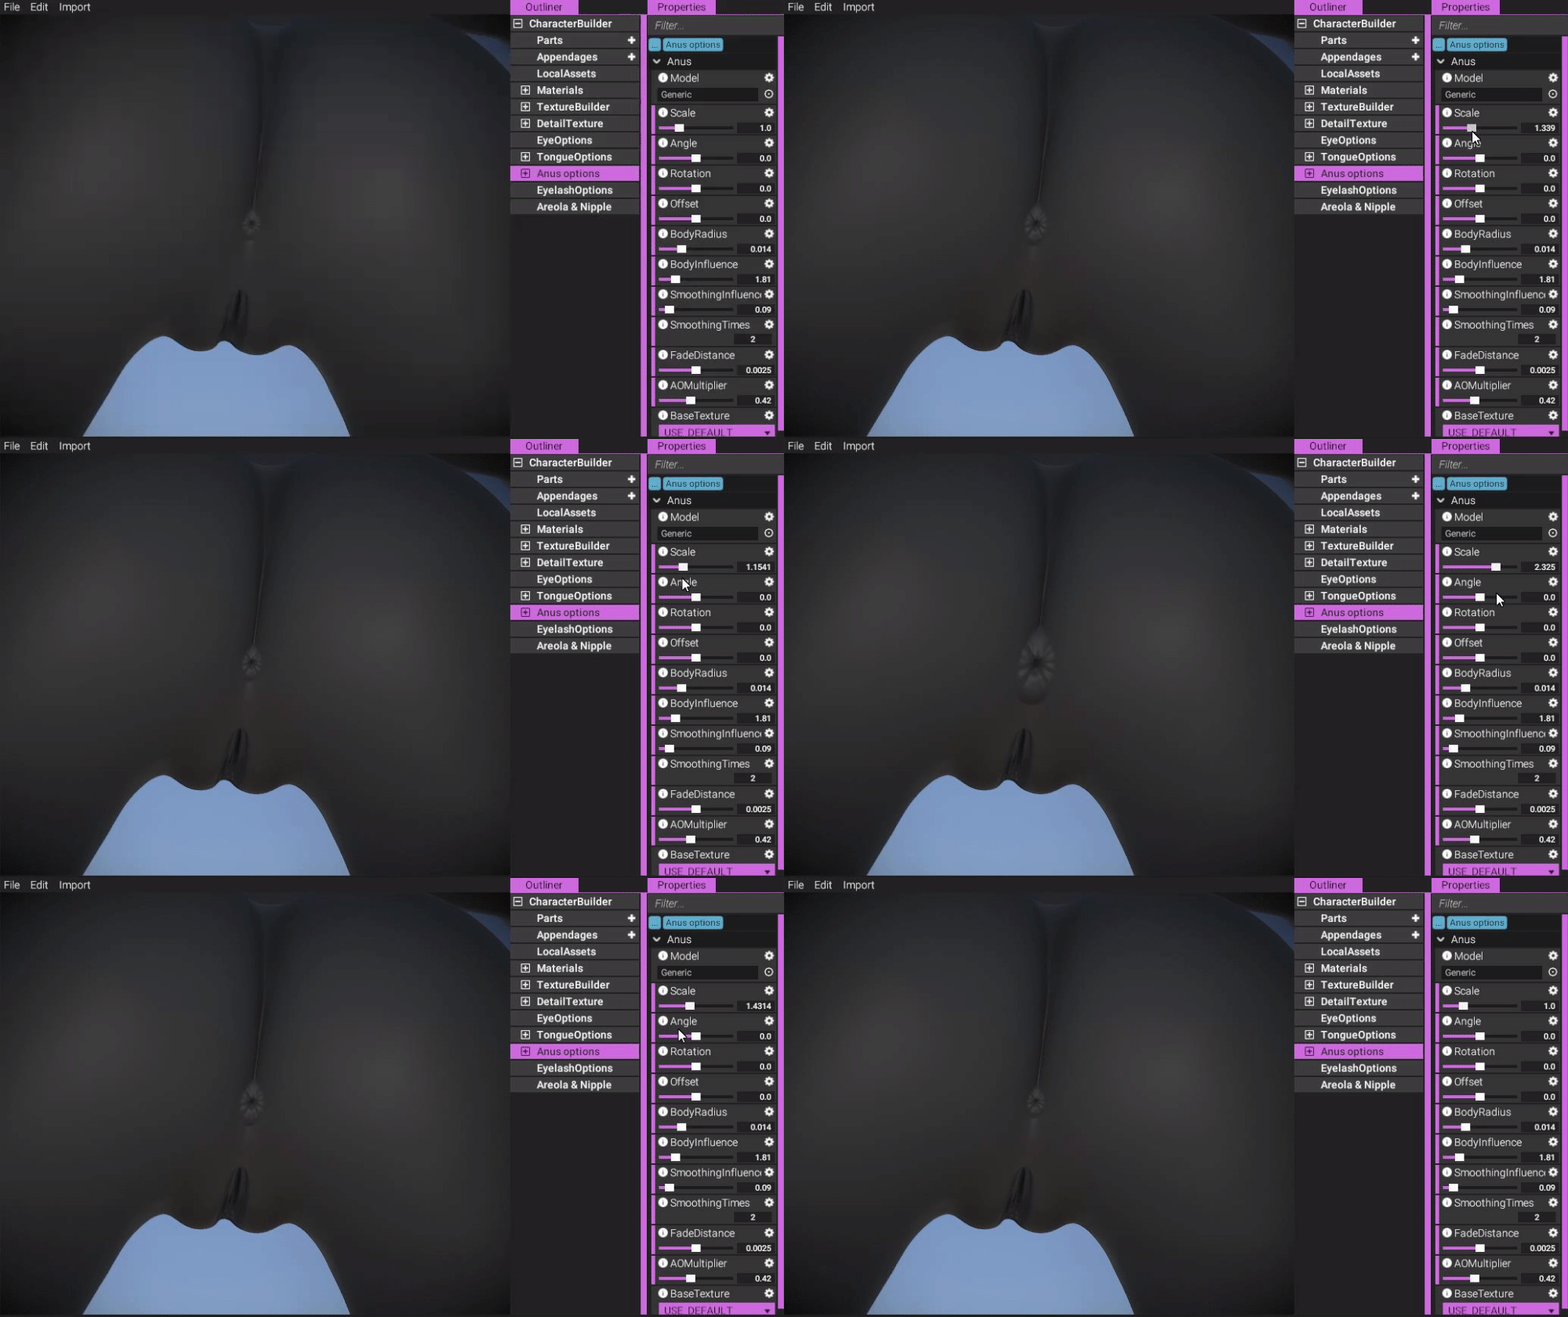
(Adjusting anus size. The anus is clipping into the body in an undesirable way, so we implemented additional options, shown below.)
https://gyazo.com/580bc7704ba36f61035ba3117355b75b
When we implemented this option, we weren't happy with how the butt cheeks of the character "infringed" on the space of the anus, affecting the appearance in a negative way. We wanted to create options for the anus to press the butt cheeks to the sides, making more room for it. So that's exactly what we did!
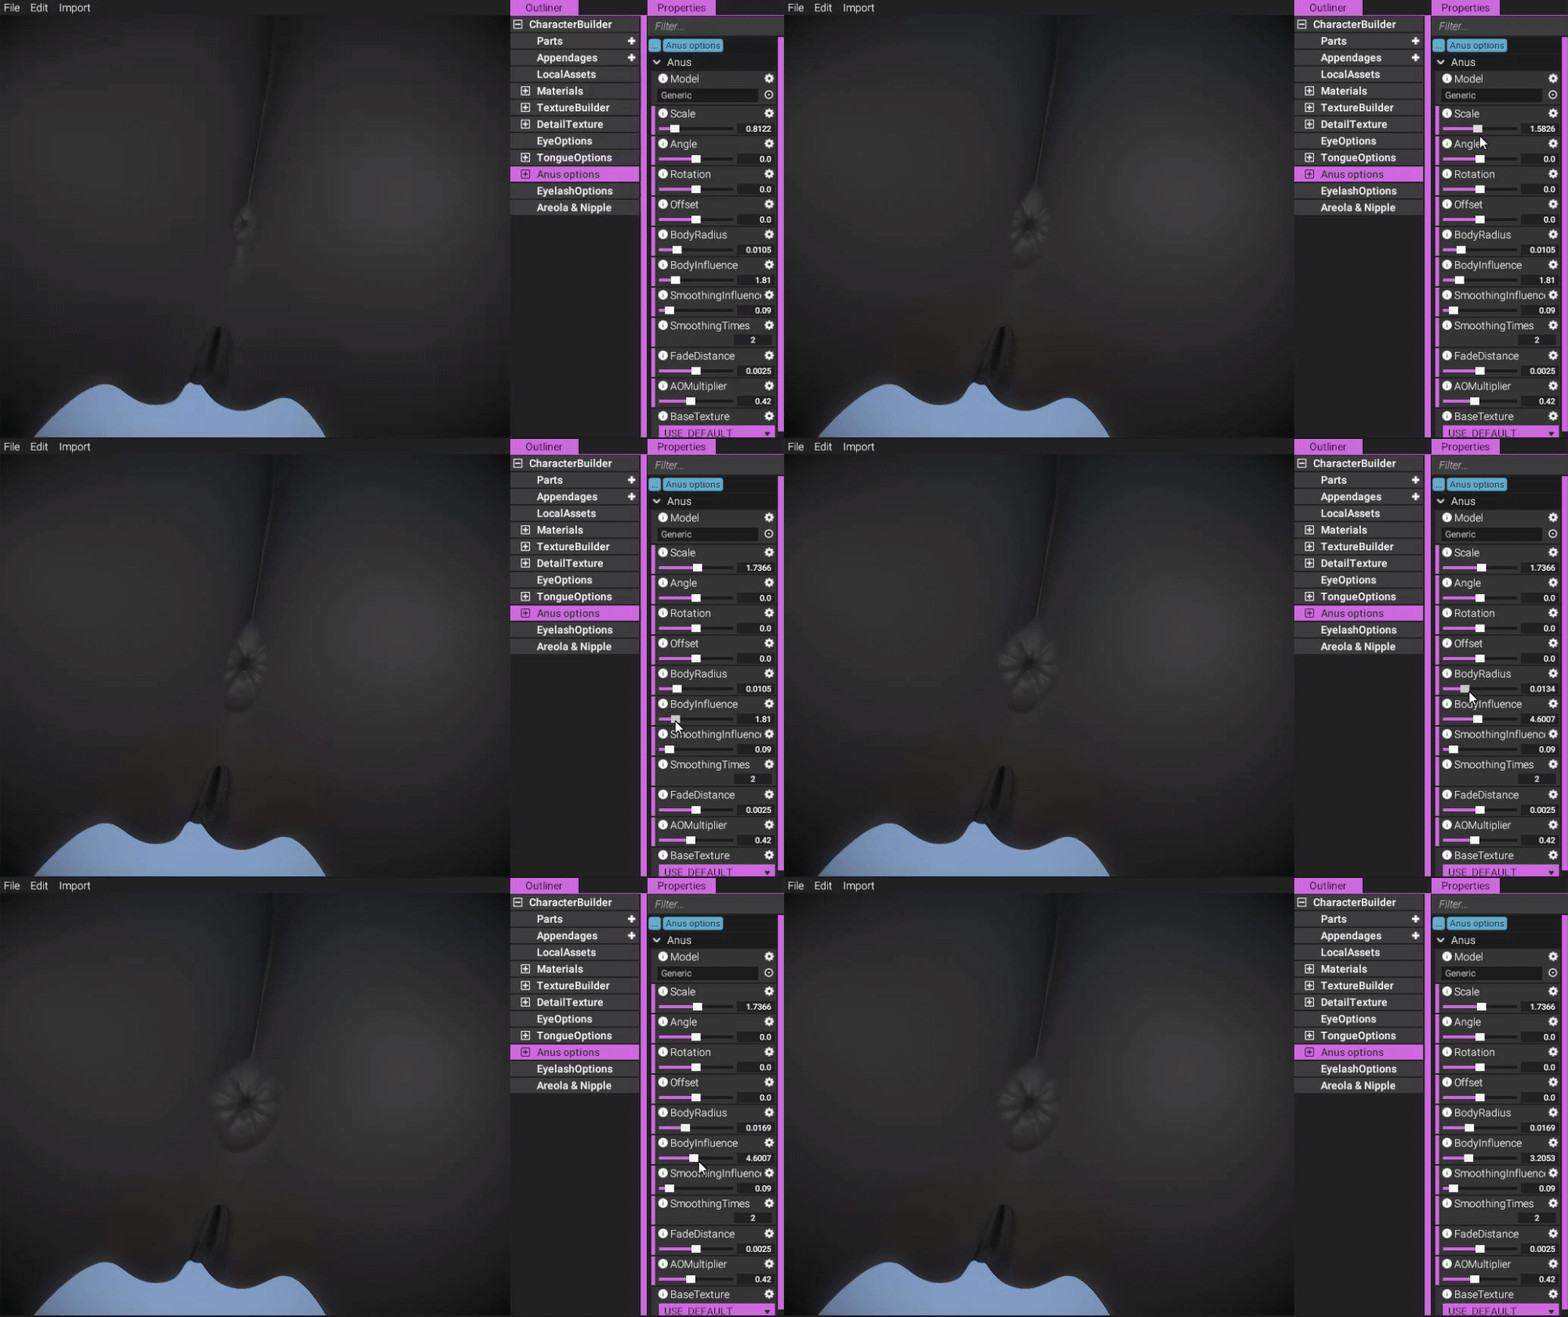
(By playing around with the body influence and body radius sliders, you are able to expand the influence the anus has on the body, to make more room for it. This is an operation that directly affects the body mesh.)
https://gyazo.com/b4e7f8752fd64aedea00bcb6342128eb
We also implemented options for smoothing out the mesh operation shown above, to make the surface smoother:
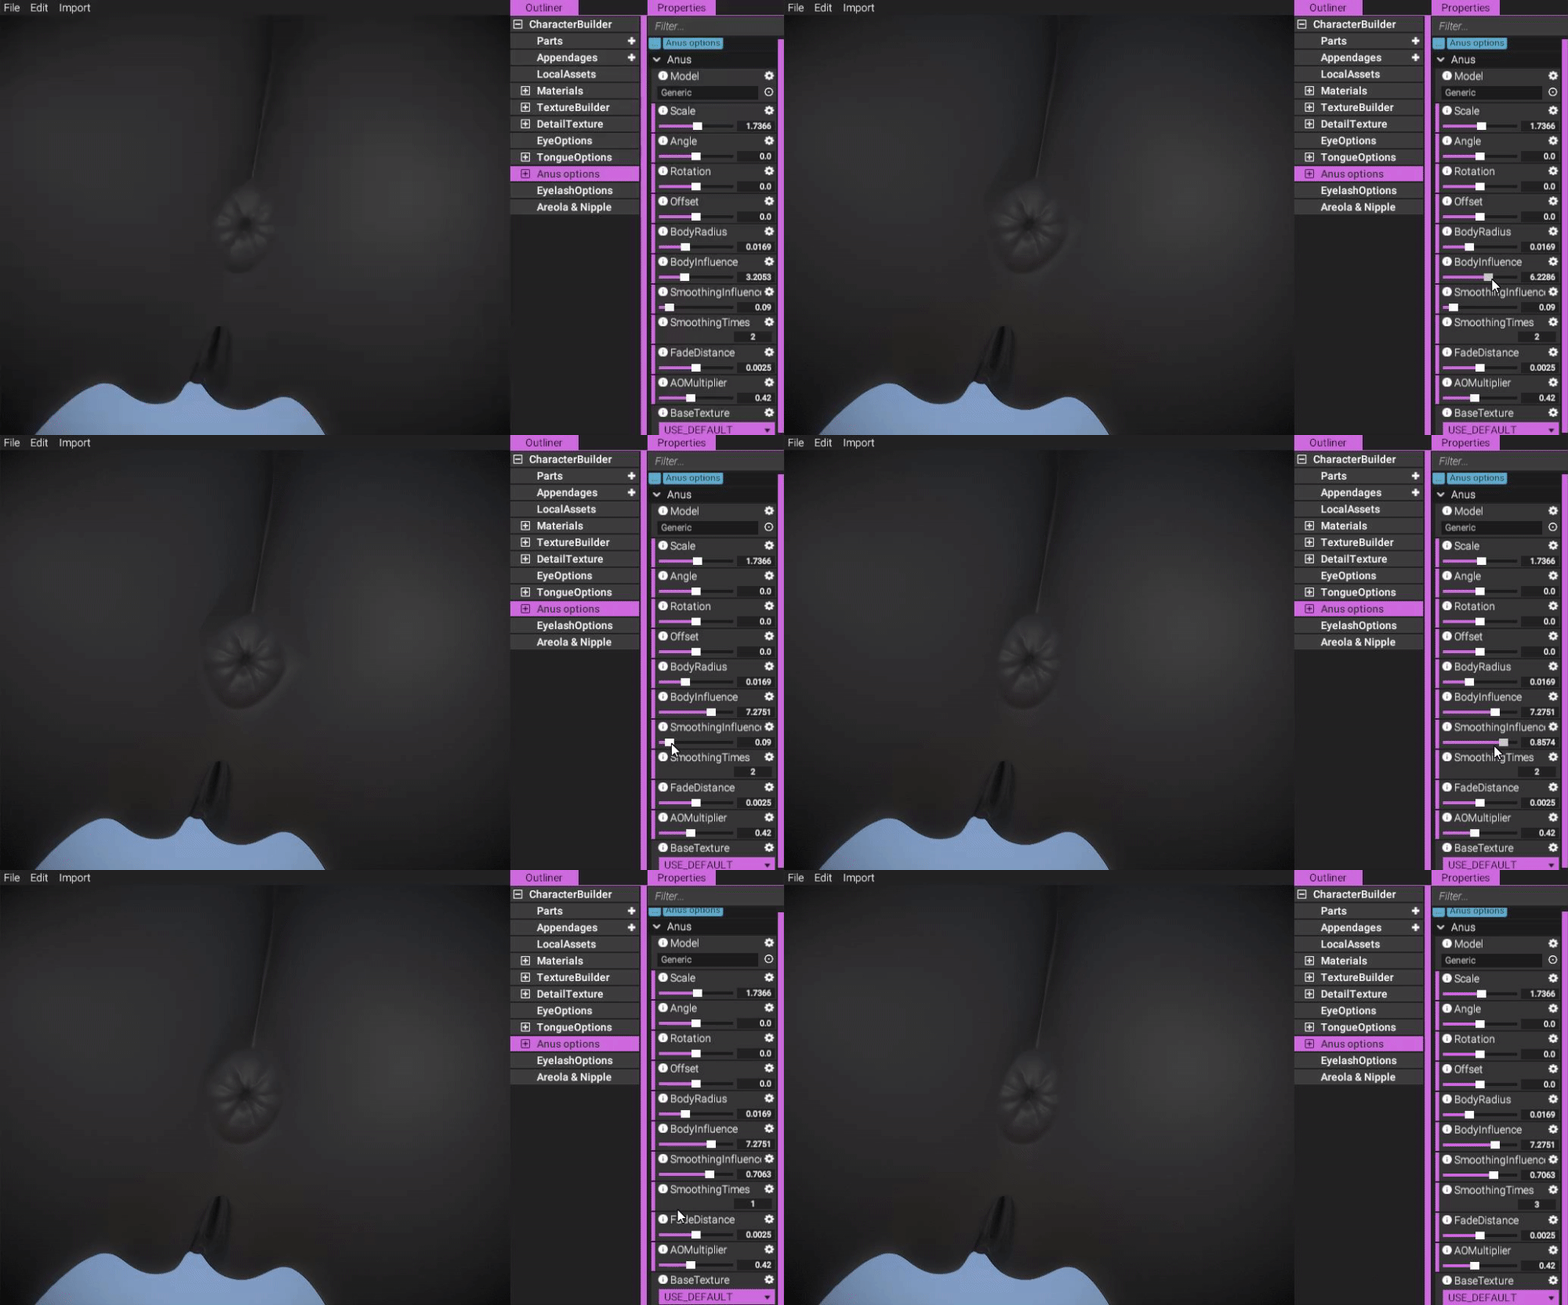
(Using properties to smooth out the surface after "breaking" it by applying body influence too strongly.)
https://gyazo.com/1d4f0b92e3a6504b72344ba212b17943
We also have options for transforming the anus in different ways:
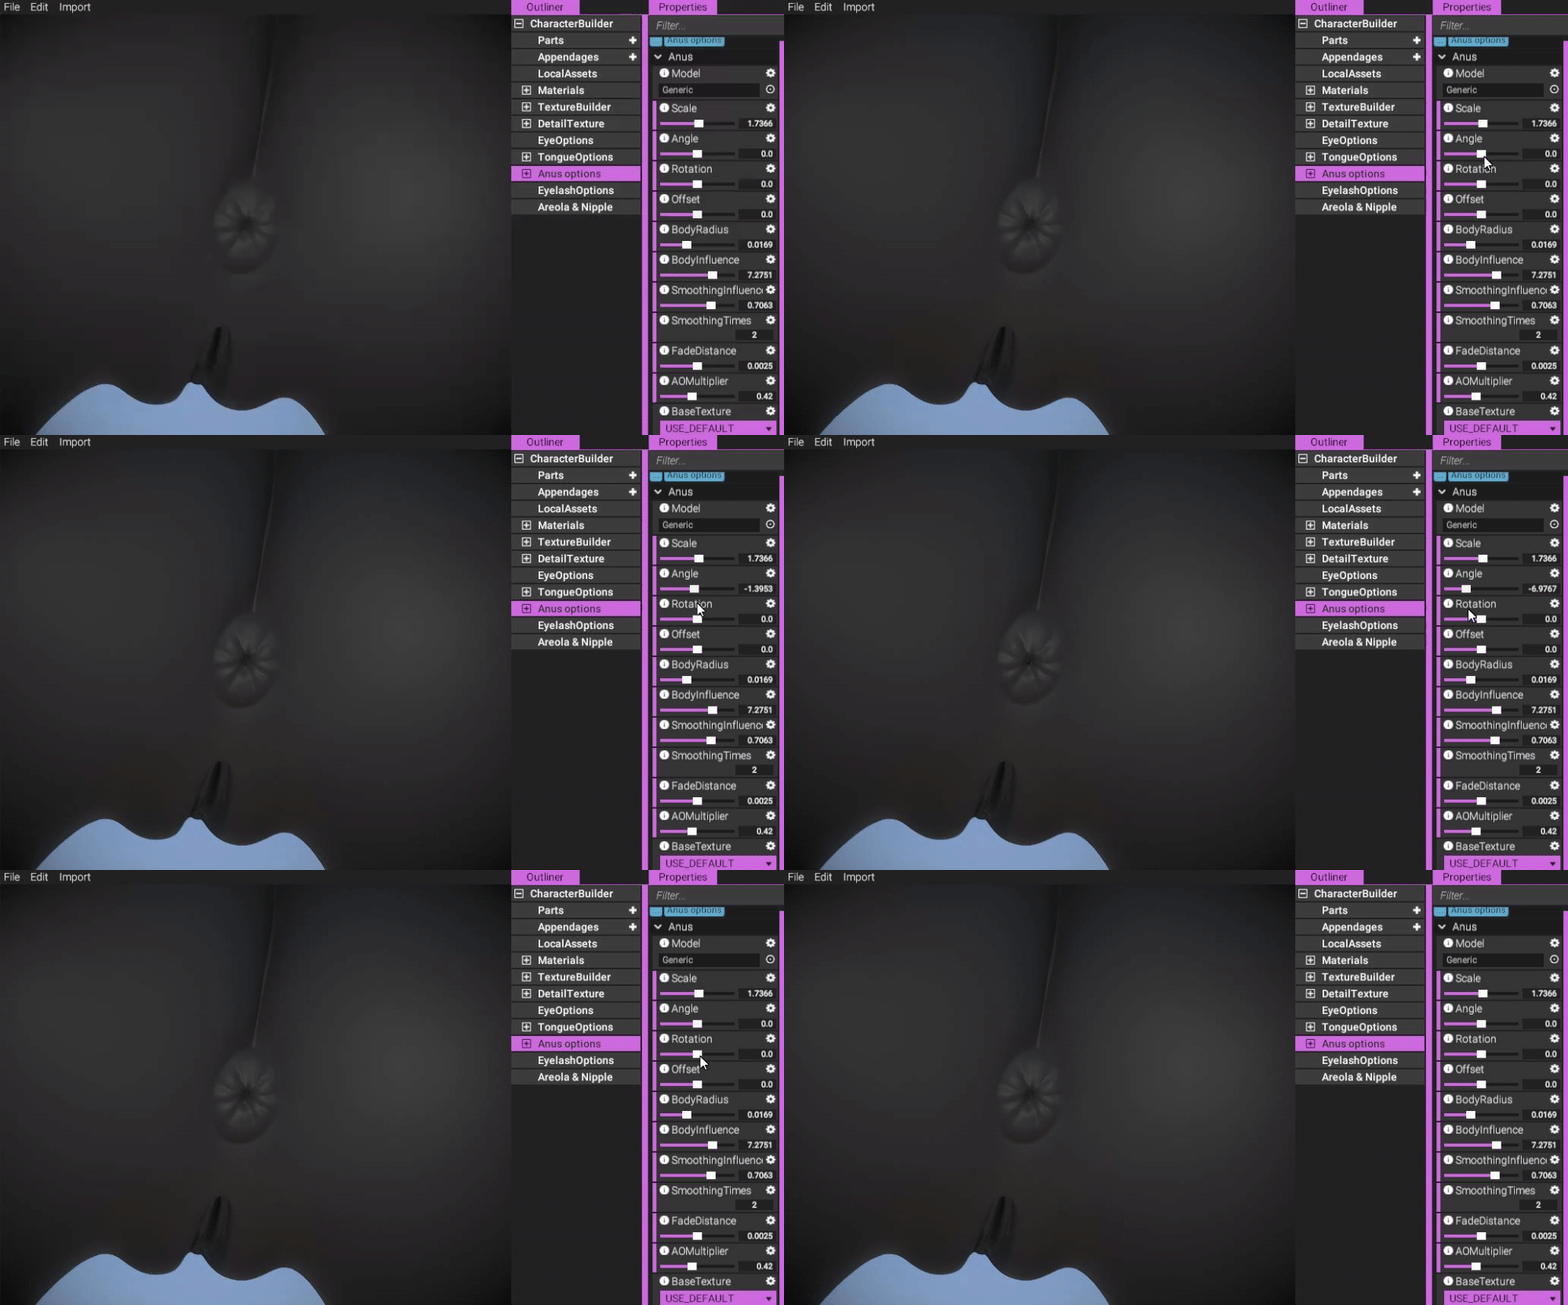
(You can angle the anus.)
https://gyazo.com/4601e6cab2ef7fadcdf47efef8e0b69b
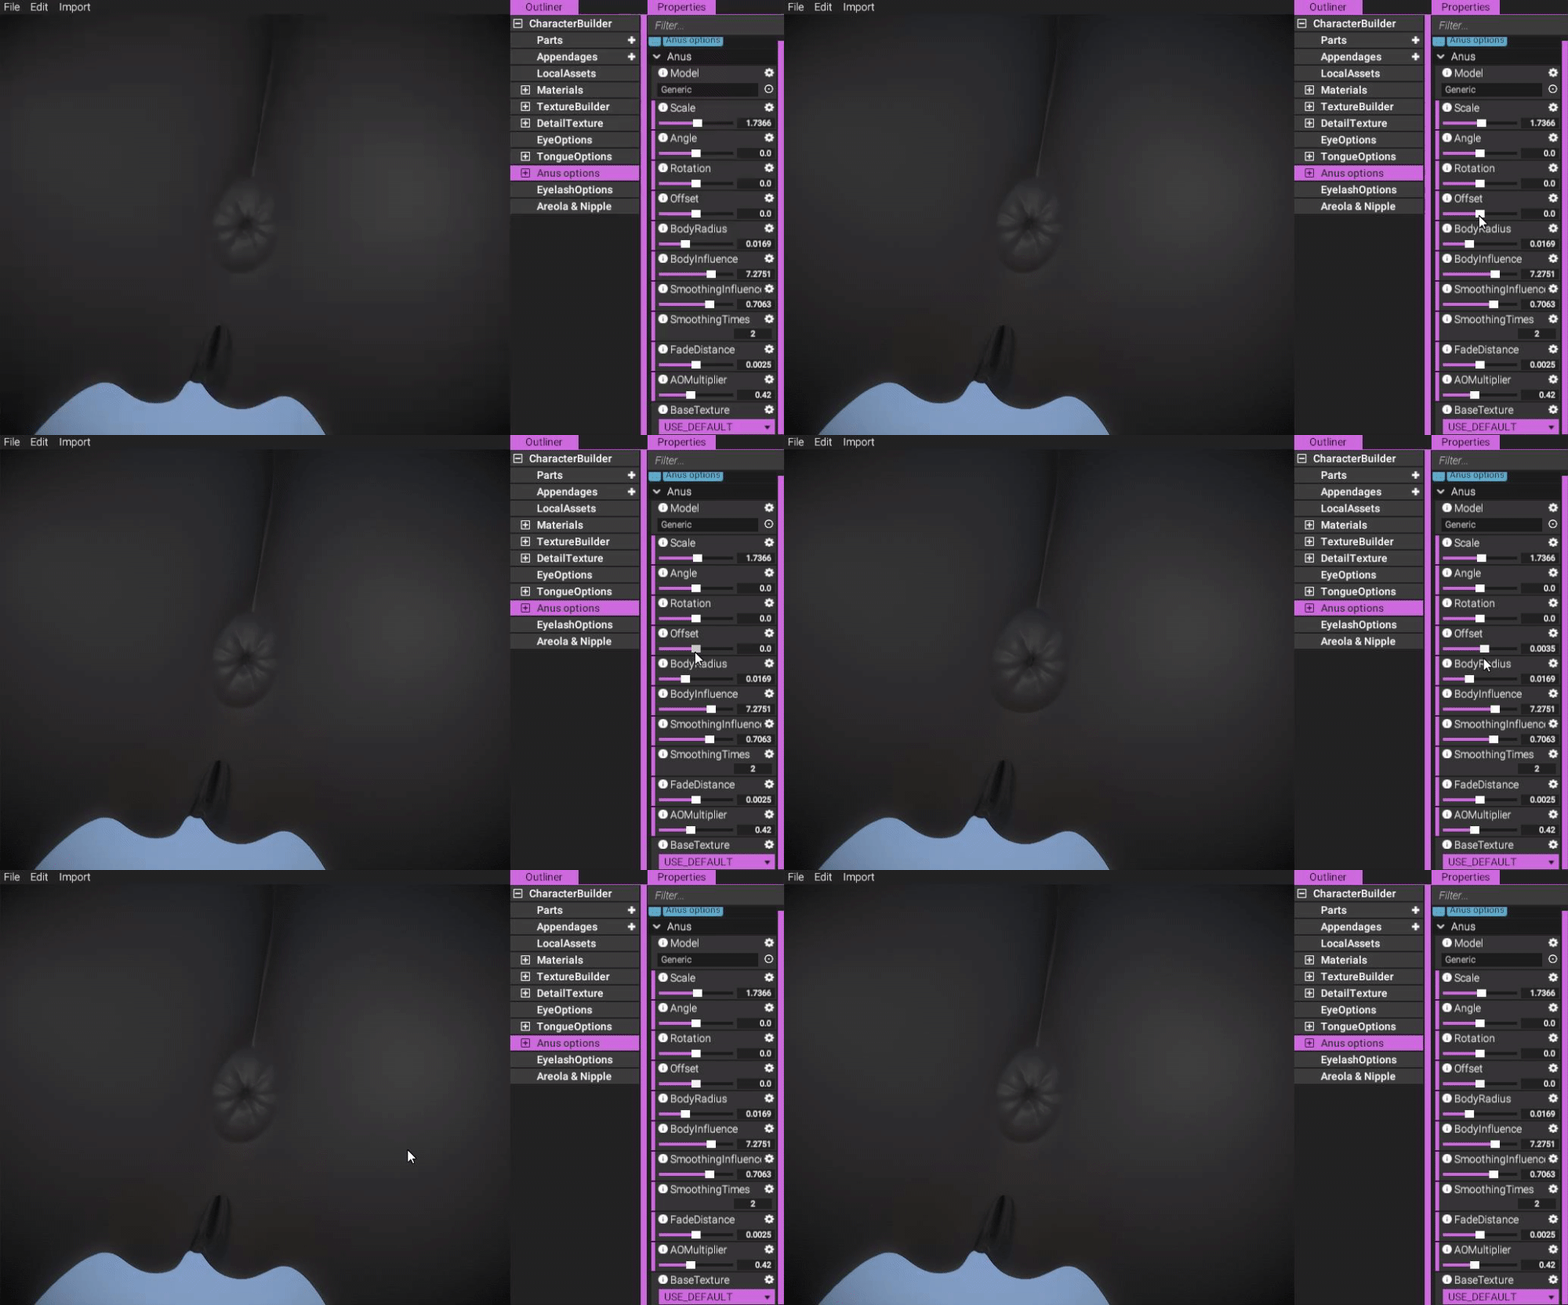
(You can offset the anus.)
https://gyazo.com/6af946e3016c18b993fbb10bc5a64b75
You may have noticed that the anus is blended with the body. This is thanks to our mesh blending tech that we explained thoroughly in our previous post, and which has now been adapted to work with anuses too.
You are able to play around with the mesh fading tech using the fade distance slider:
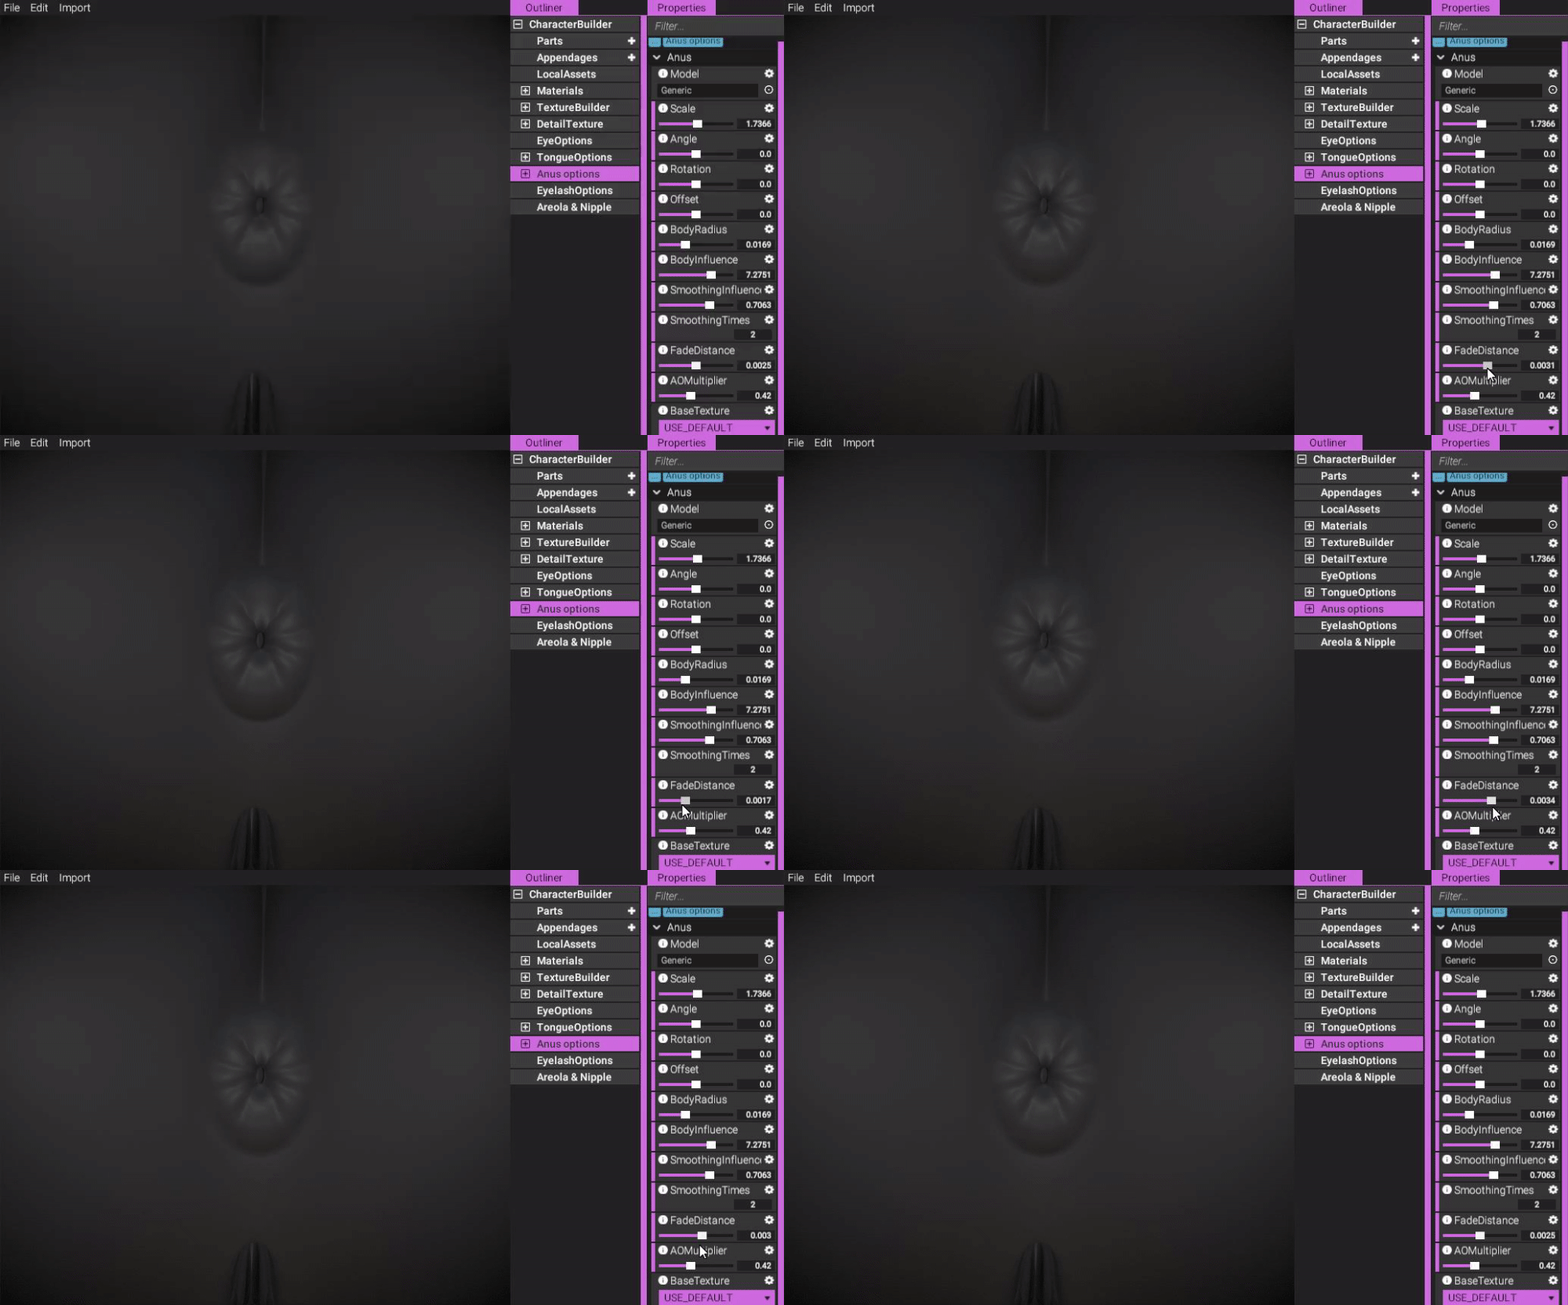
(You can configure how much to fade the anus with the body.)
https://gyazo.com/501004b47577a3ad6f0920a25de47f44
We're also using a special technique to essentially "carve" a hole in the body mesh, giving the anus depth where it otherwise should have been occluded by the body. Let's have a closer look at that!
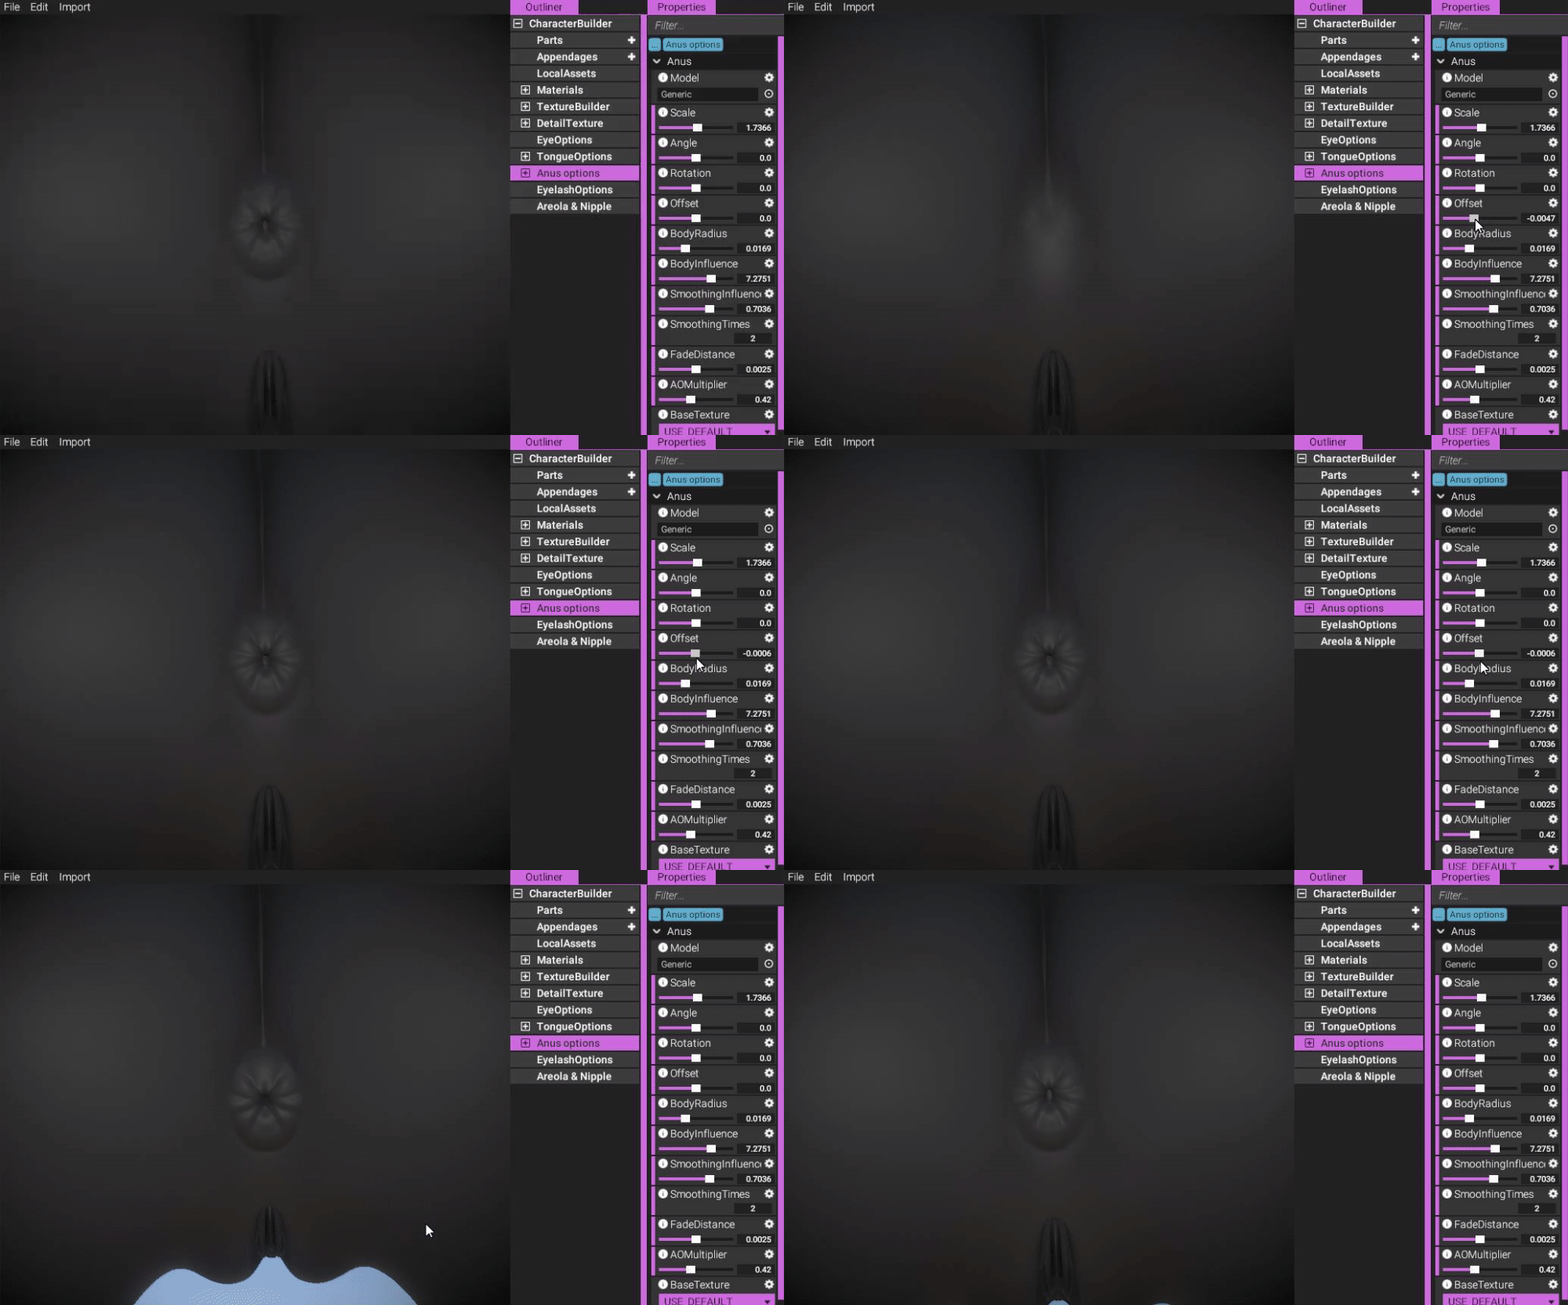
(Using a special technique, we carve a hole in the body mesh, giving depth to the anus.)
https://gyazo.com/16d6f4edc0dd0129bbfde7222e9171eb
By default, each anus has a normal and occlusion map assigned to it, but you can disable this and give it a blank look instead:
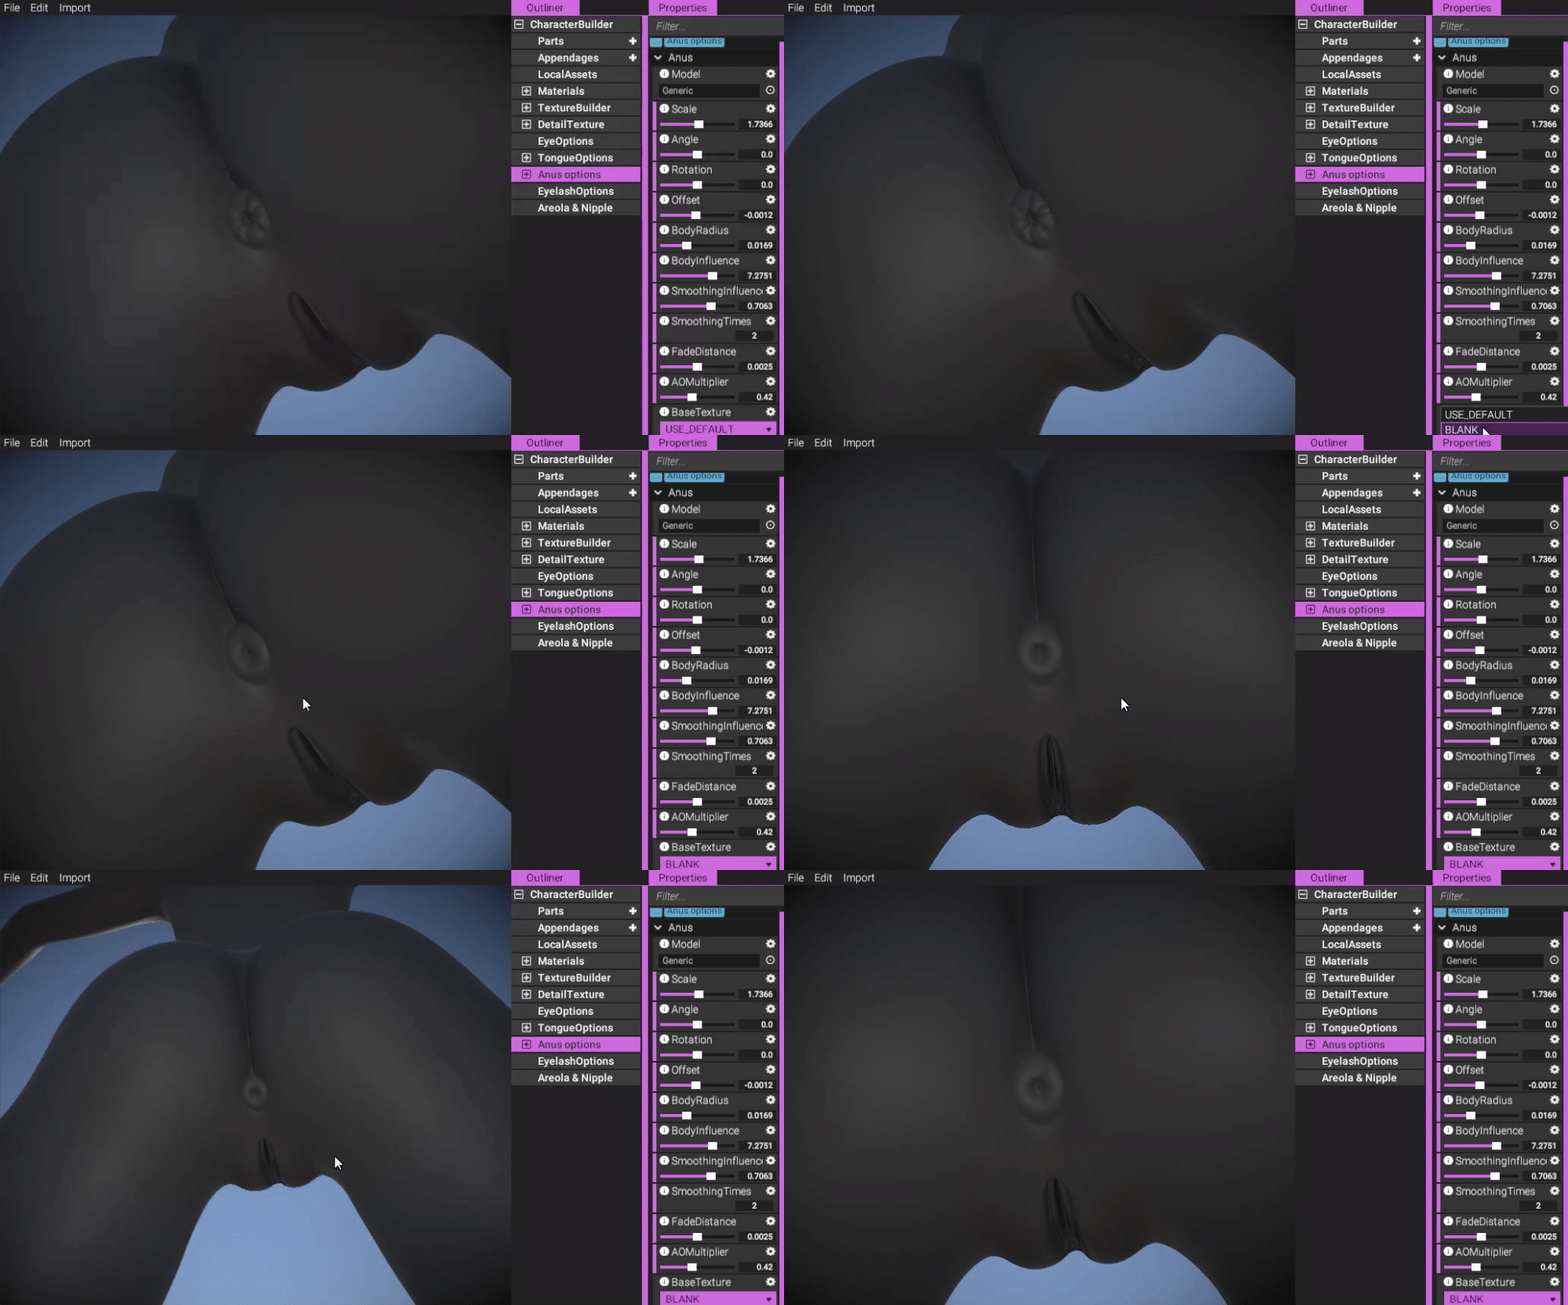
(Whether or not to use the normal and occlusion maps shipped with the app.)
https://gyazo.com/ef609c37786d775a0f957b56d3293814
Naturally, since an object without an occlusion map is brighter than one without, you are able to configure the ambient occlusion (AO) too, to make it fit in with the body better:
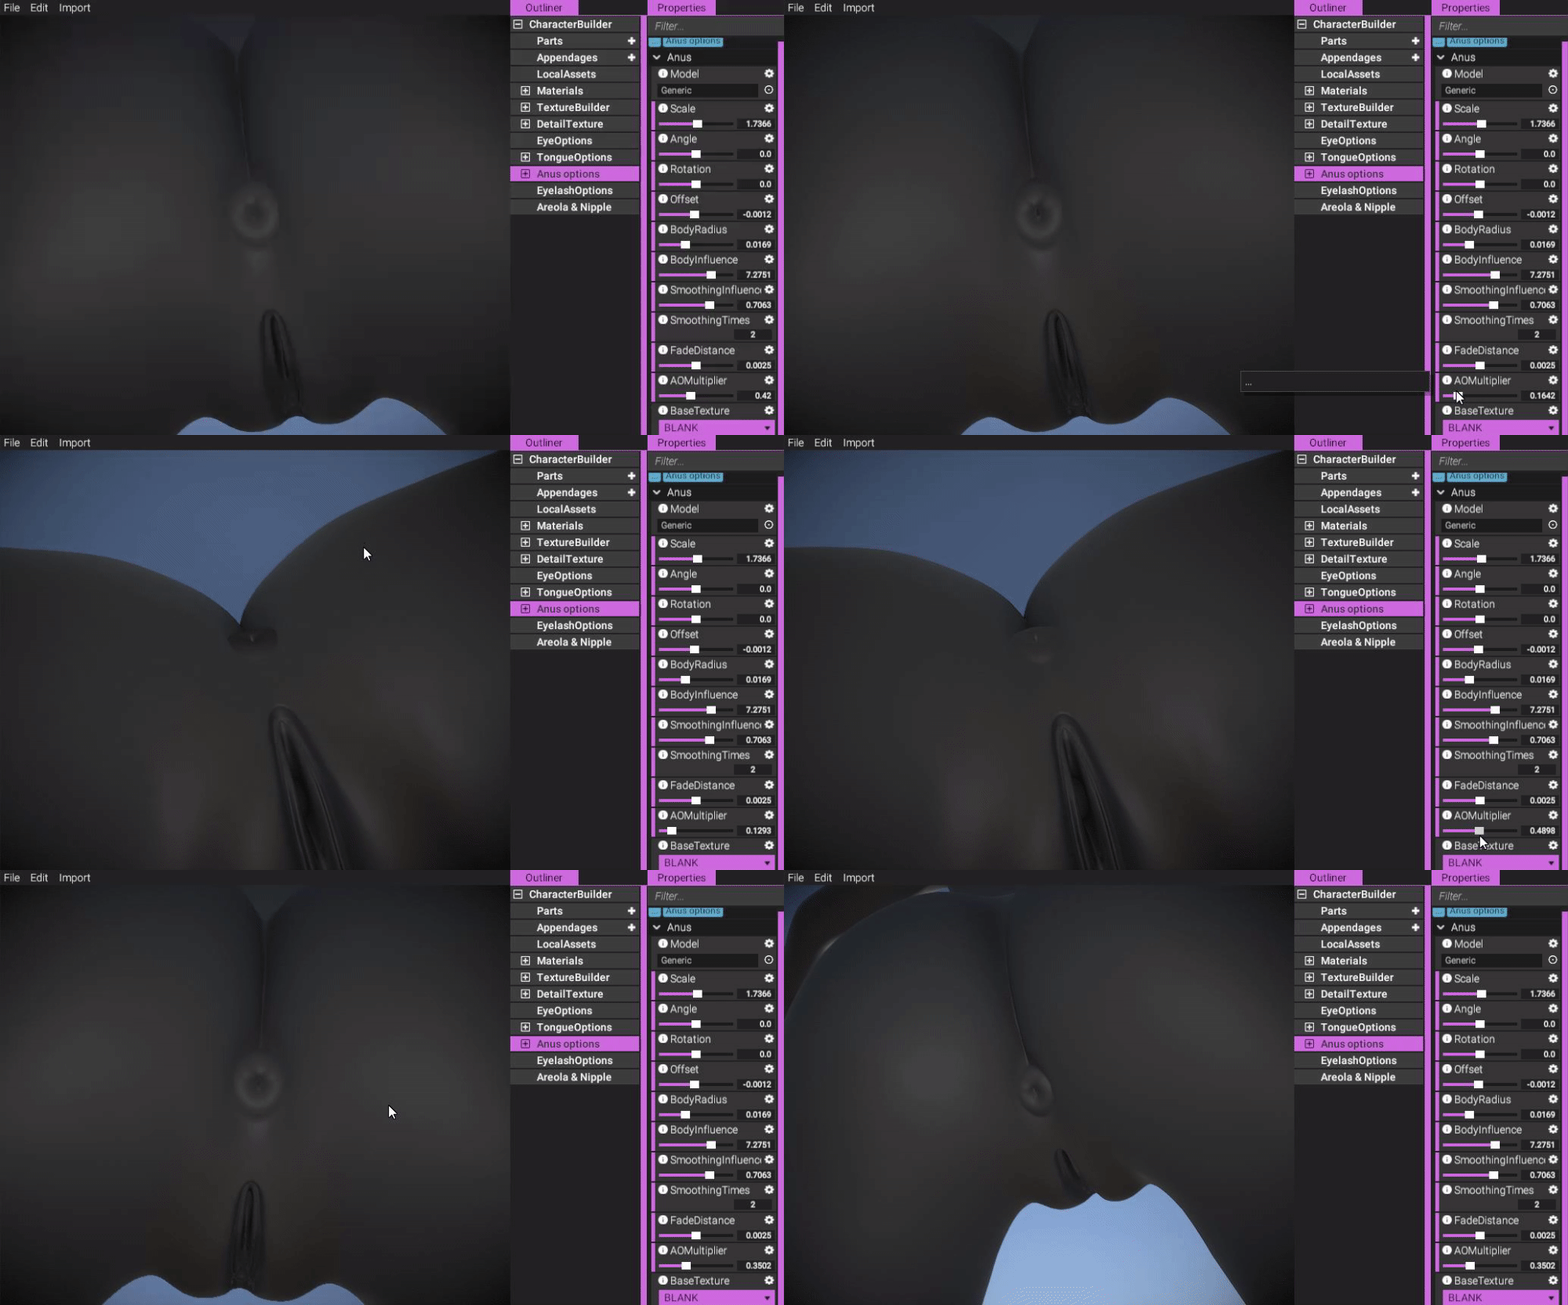
(Configure the shade of the object to make it fit better with the body.)
https://gyazo.com/c8d2e3836602eab15761ed584dfa74ed
The anus also has its own texture builder, meaning you are free to texture/color it in any way you like. Not only colors but normal and AO maps too.
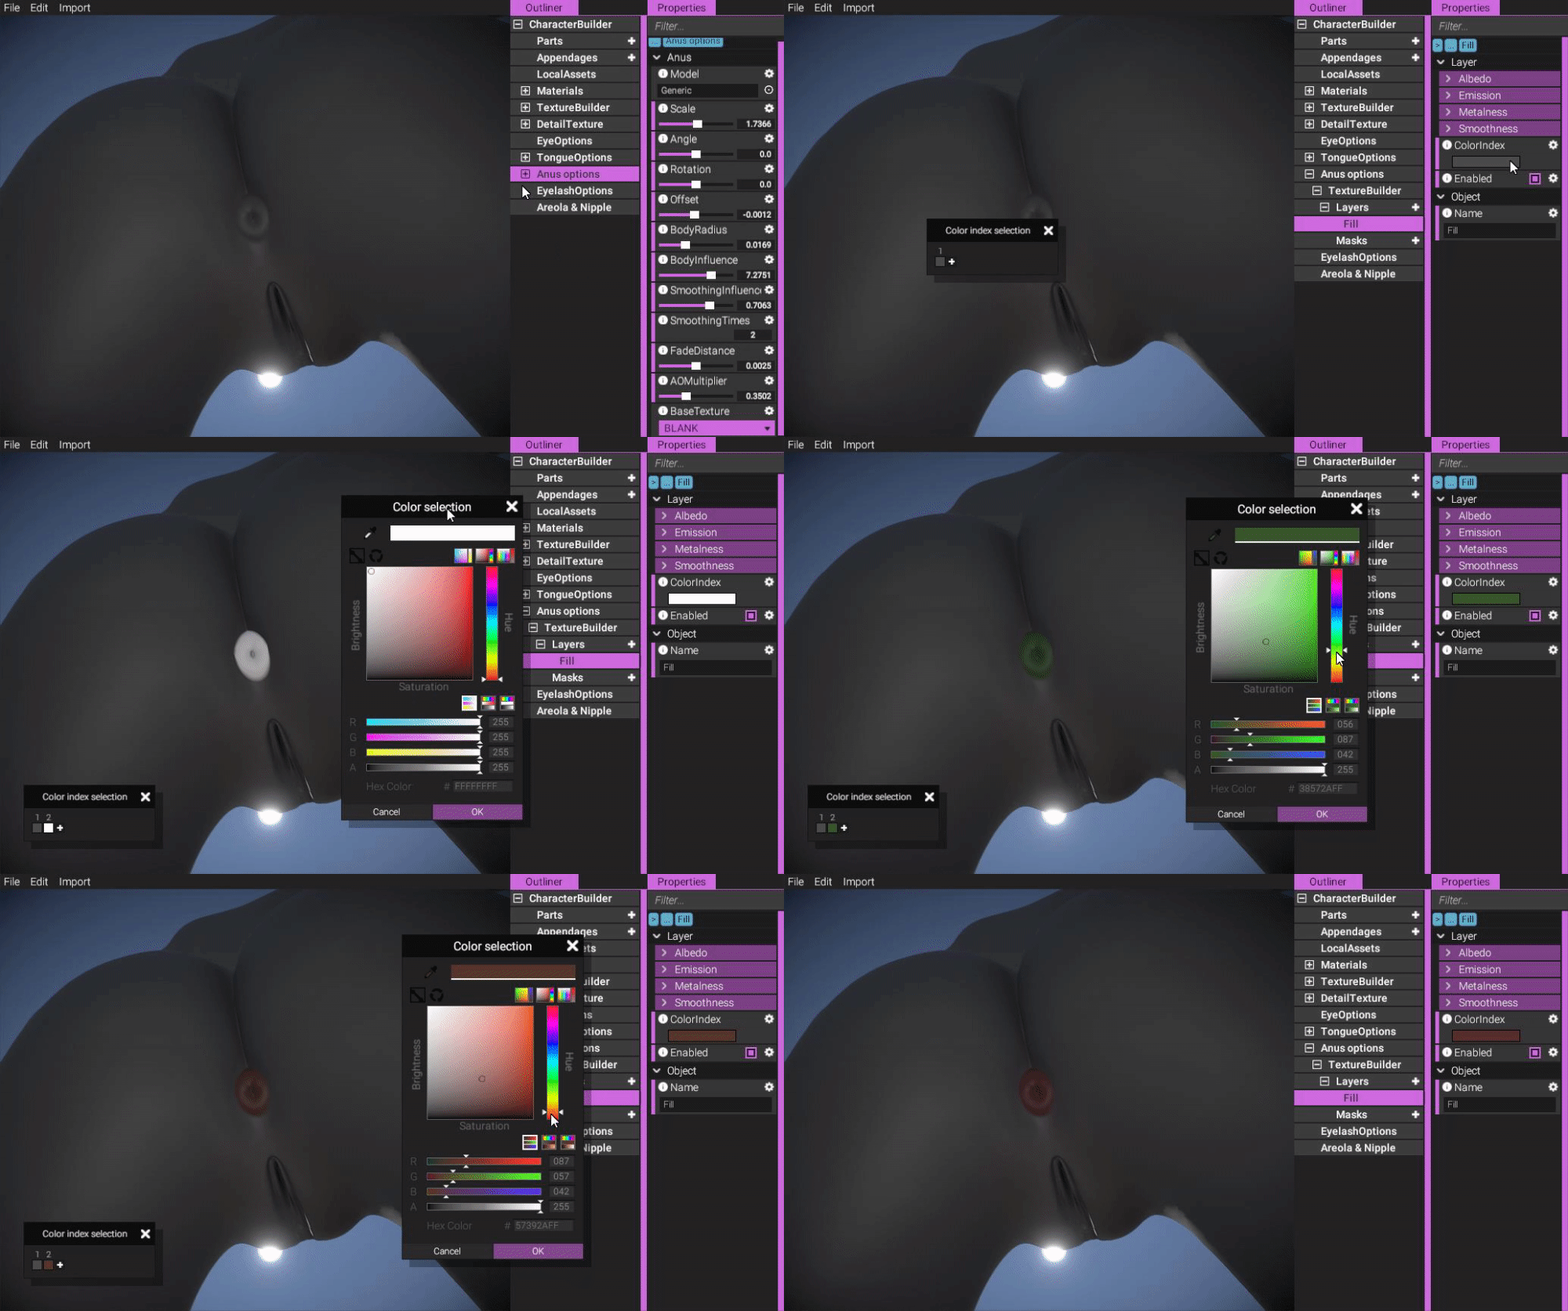
(As most objects in YL2, the anus has a texture builder component that allows you to texture it in any way you like.)
https://gyazo.com/74bbb32506a9b91eee9dab881272c527
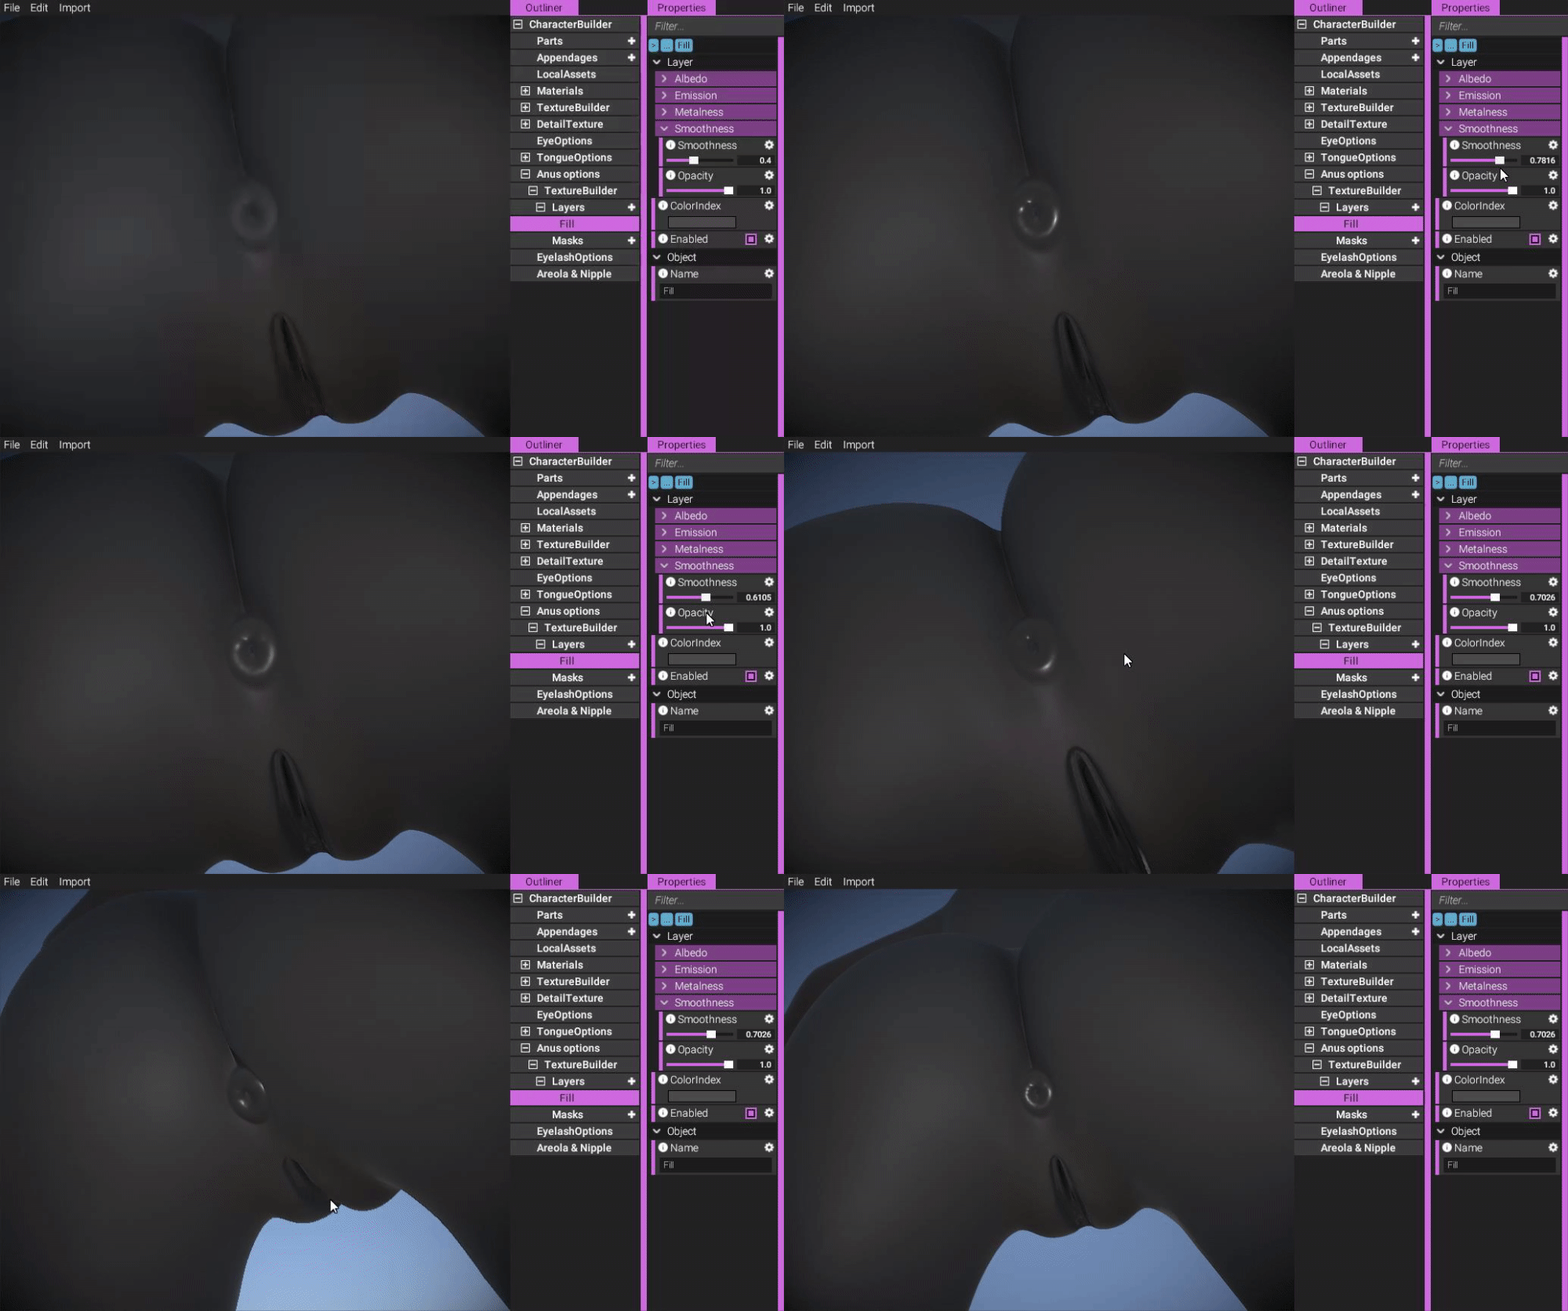
(Adjusting smoothness in texture builder for the anus.)
https://gyazo.com/88f9657ee4762a381e06e0813c92c0a2
Eyelash options
Recently dogson approached me and asked me about eyelashes. This was a topic that hadn't even crossed my mind, and with all the things still needing to be done, I wasn't to thrilled about having yet another task to complete. But dogson insisted eyelashes are crucial for the first release, and I let myself be persuaded. In retrospect I'm happy he brought this up, because I'm super happy with the implementation and I think it's a feature users will greatly appreciate!
So let's have a look how eyelashes work in YL2!
Eyelashes are generated from a set of parameters. You can configure the look of the eyelashes at both the top and at the bottom.
To configure the curving of the eyelashes at the top, expand the "Top" options in the eyelash object and drag the "Curve" slider:
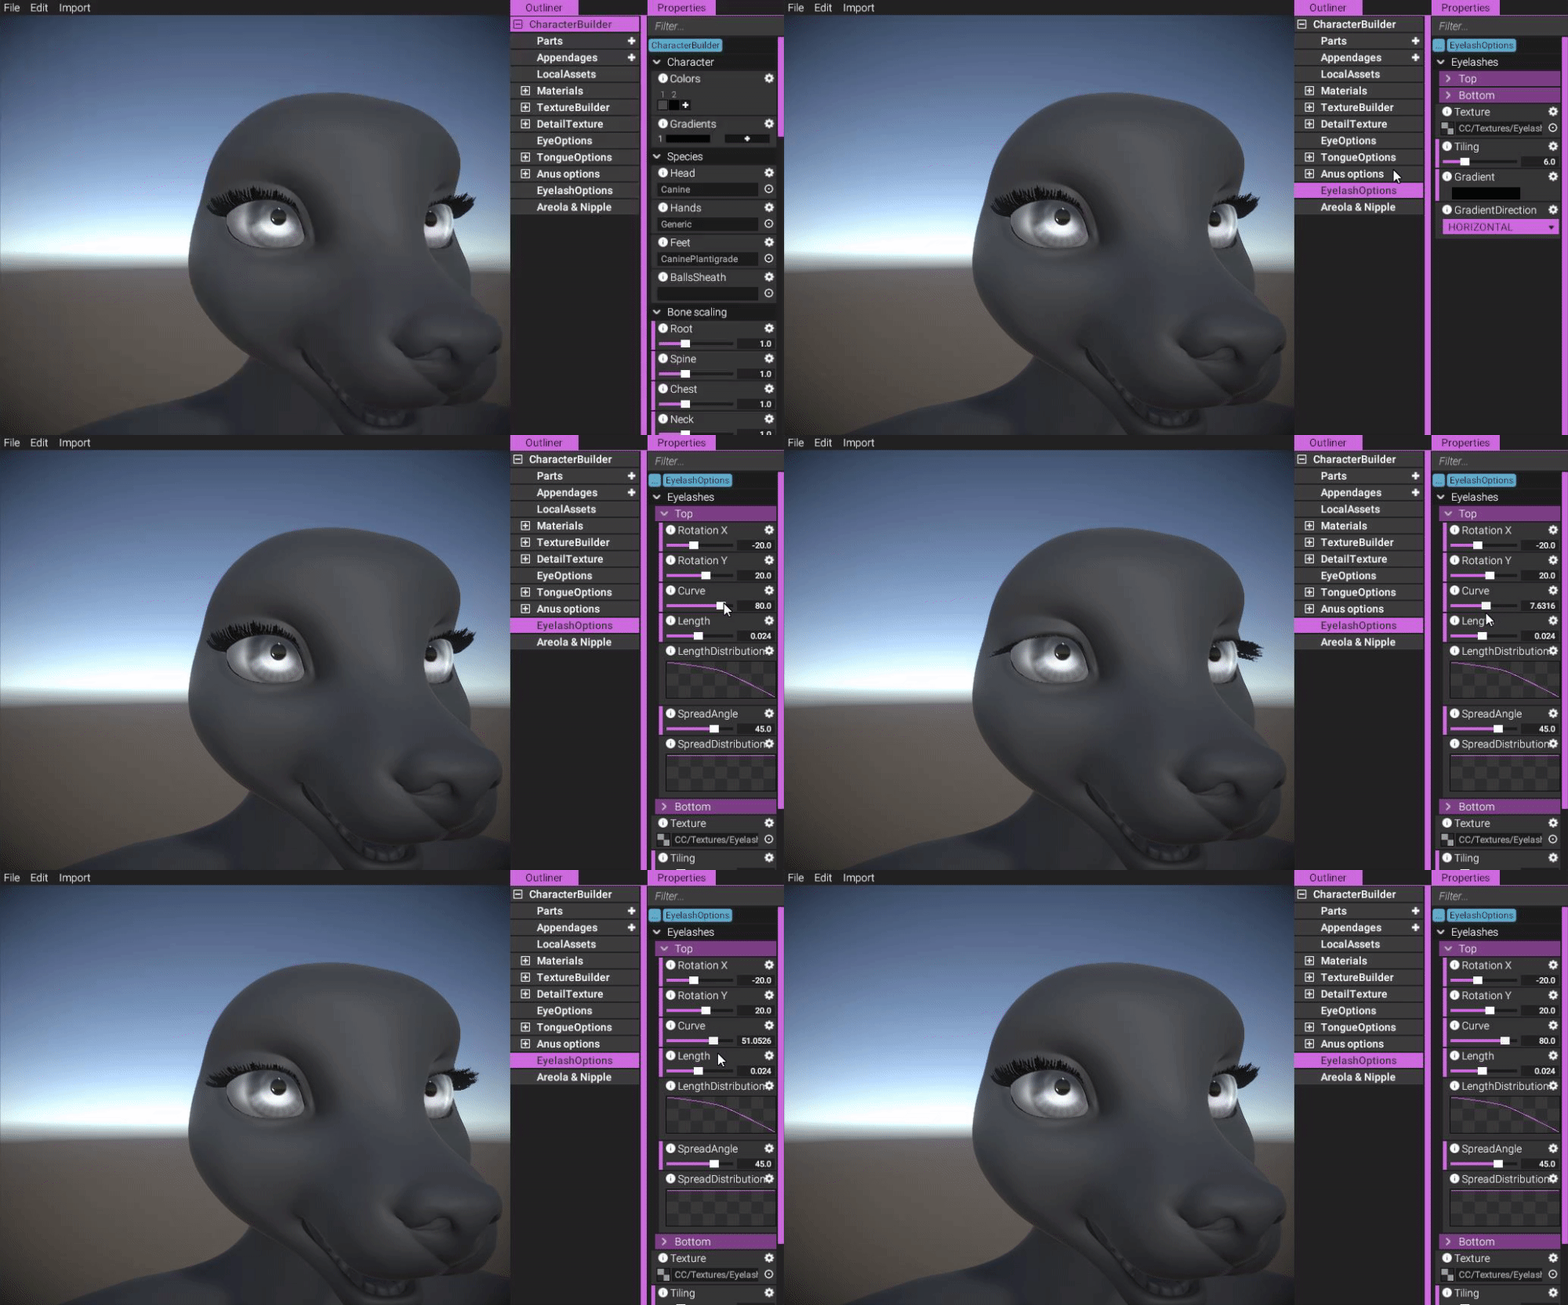
(You can configure how the eyelashes curve.)
https://gyazo.com/f4d1e08c79c3396f9b809862f0531853
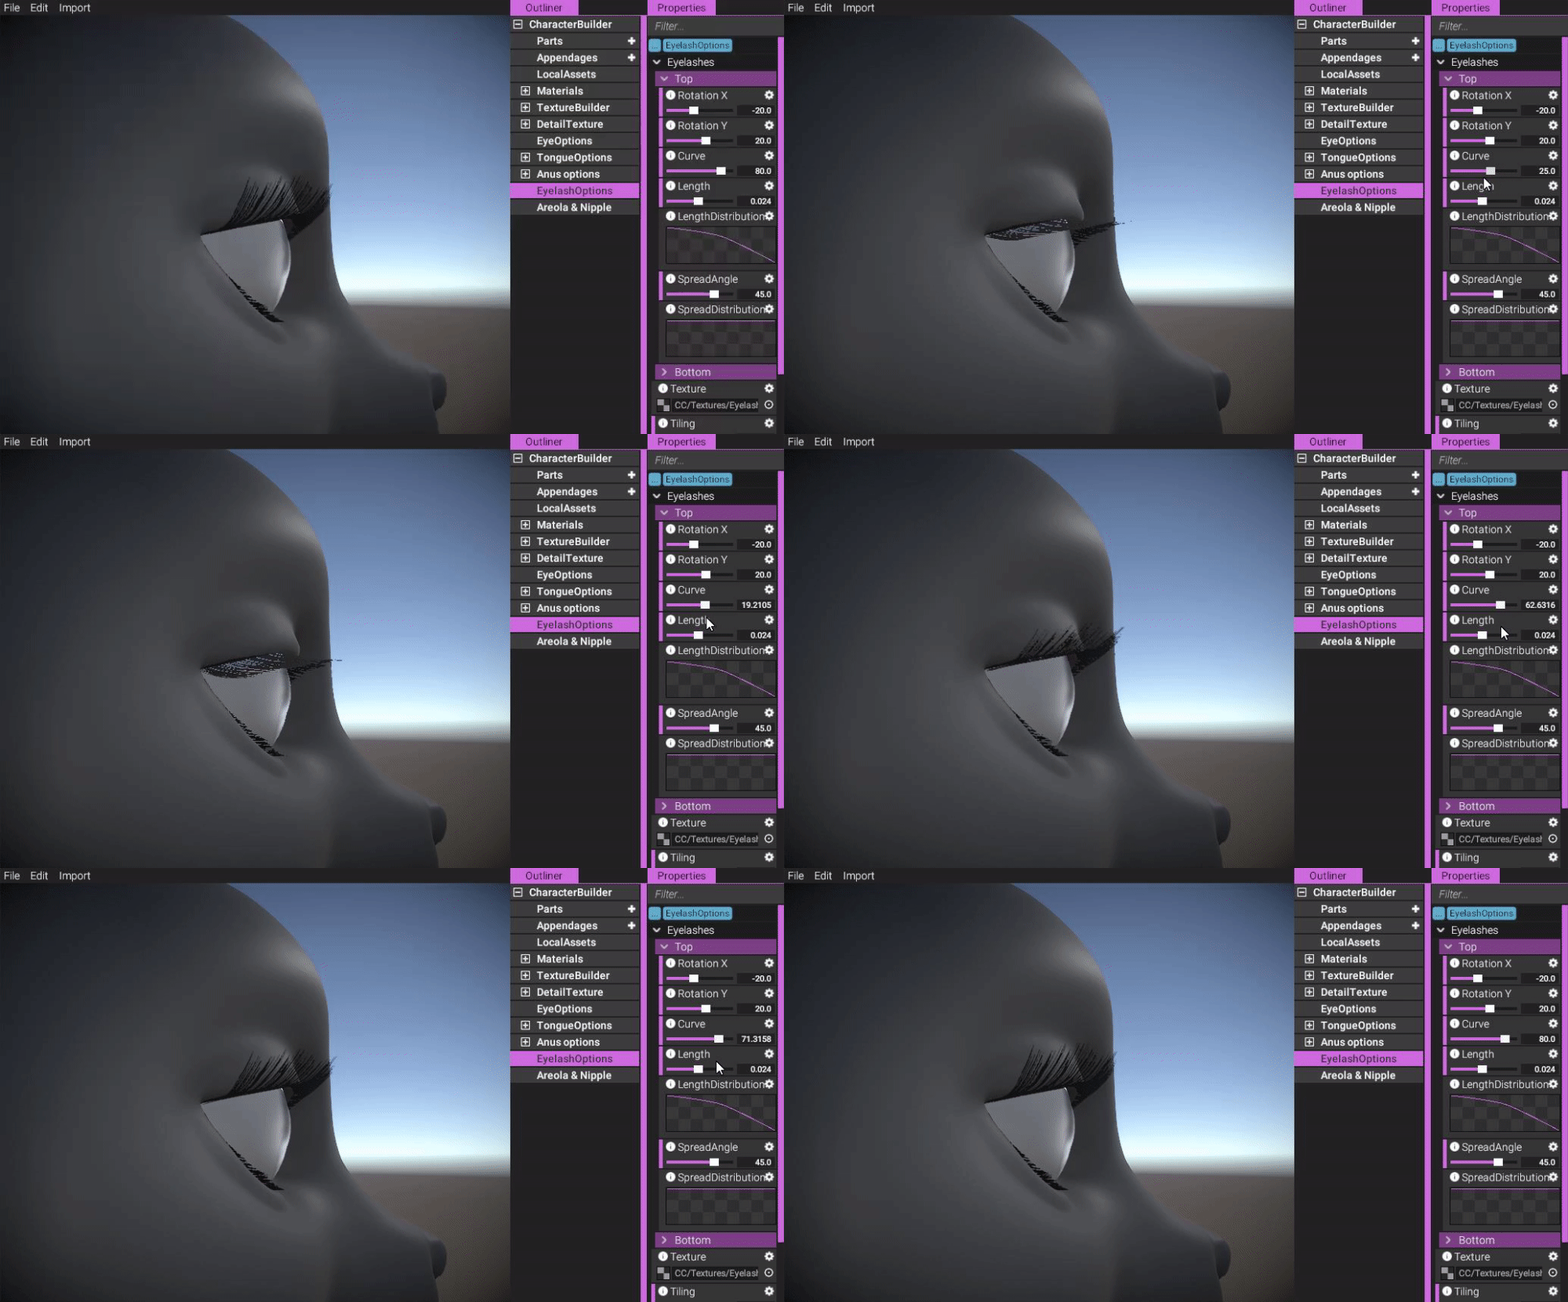
(Another view of the curve options.)
https://gyazo.com/827973ff3c85145a0e7ff8ff92d29d37
In addition to curve, you can also adjust rotation X and Y, which is the actual initial direction of the eyelashes:
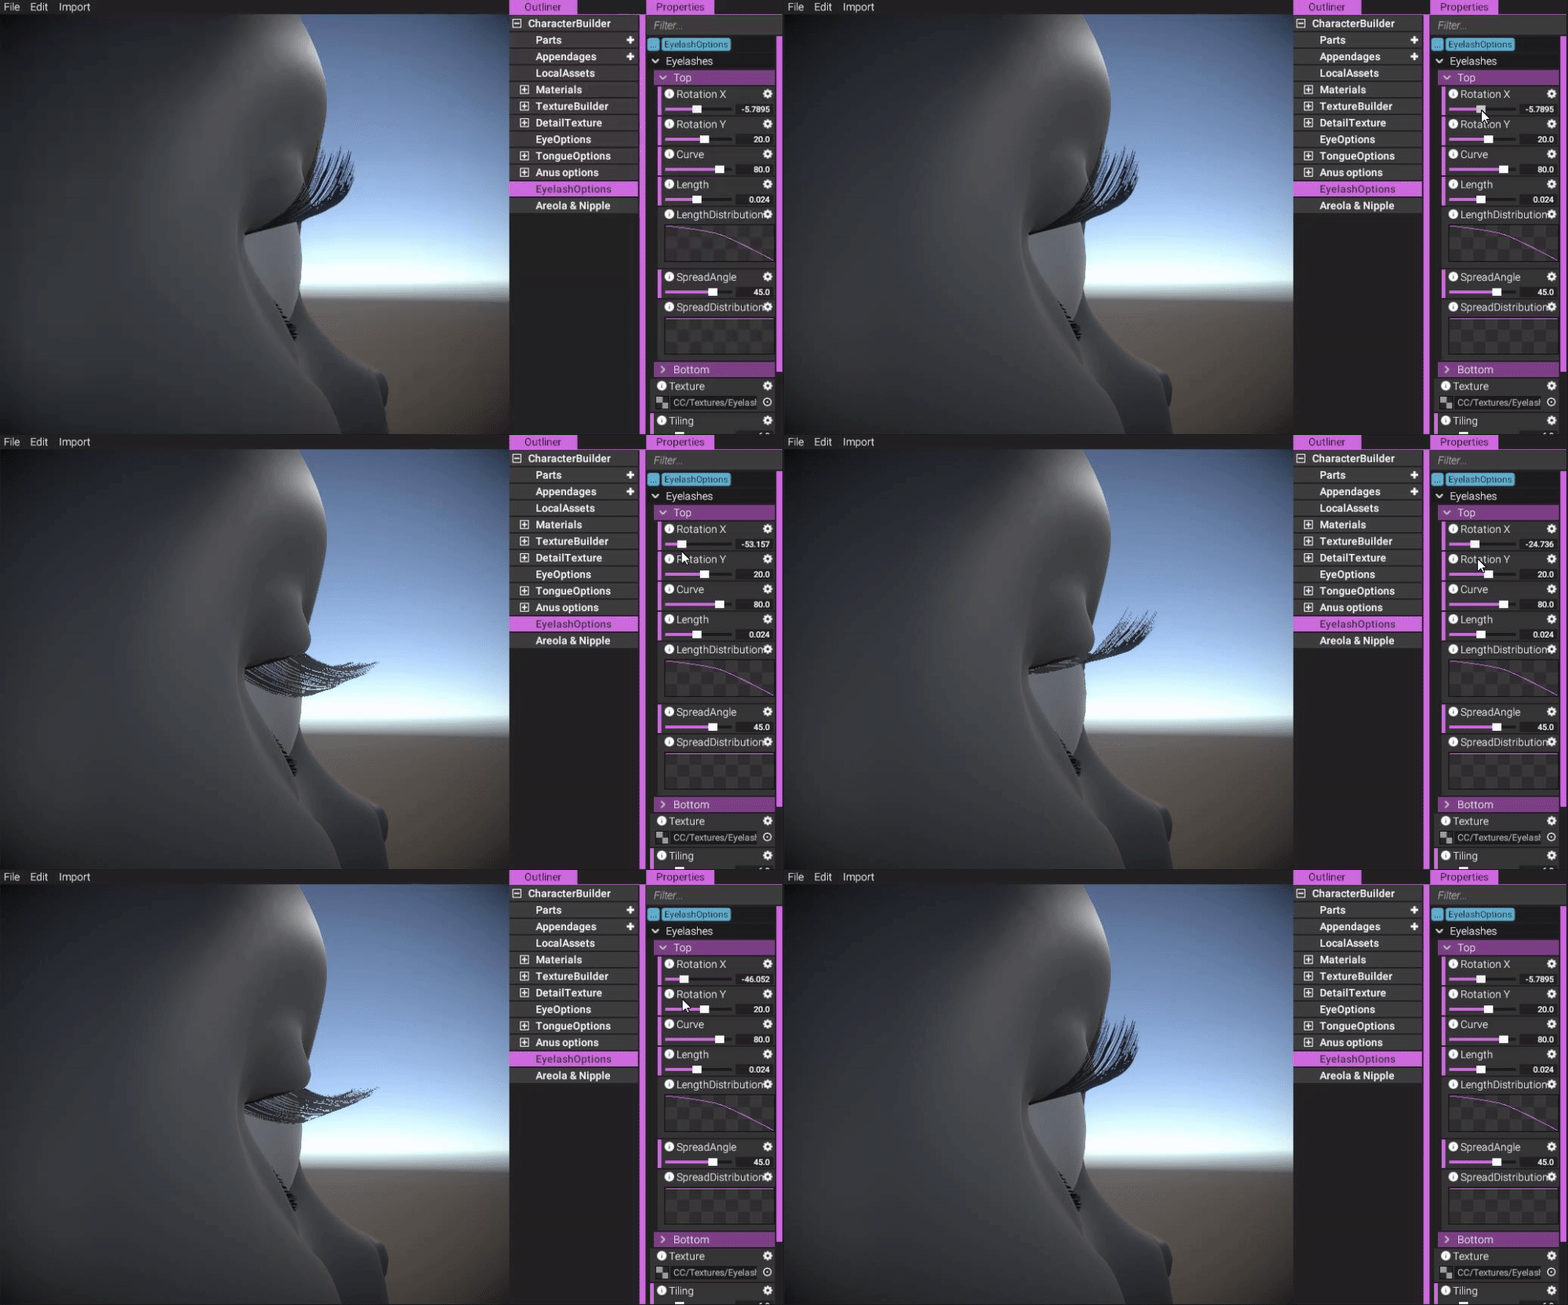
(Adjusting the direction of the eyelash strands along X.)
https://gyazo.com/b7d55c5dfb22d5437366ff52fffd986a
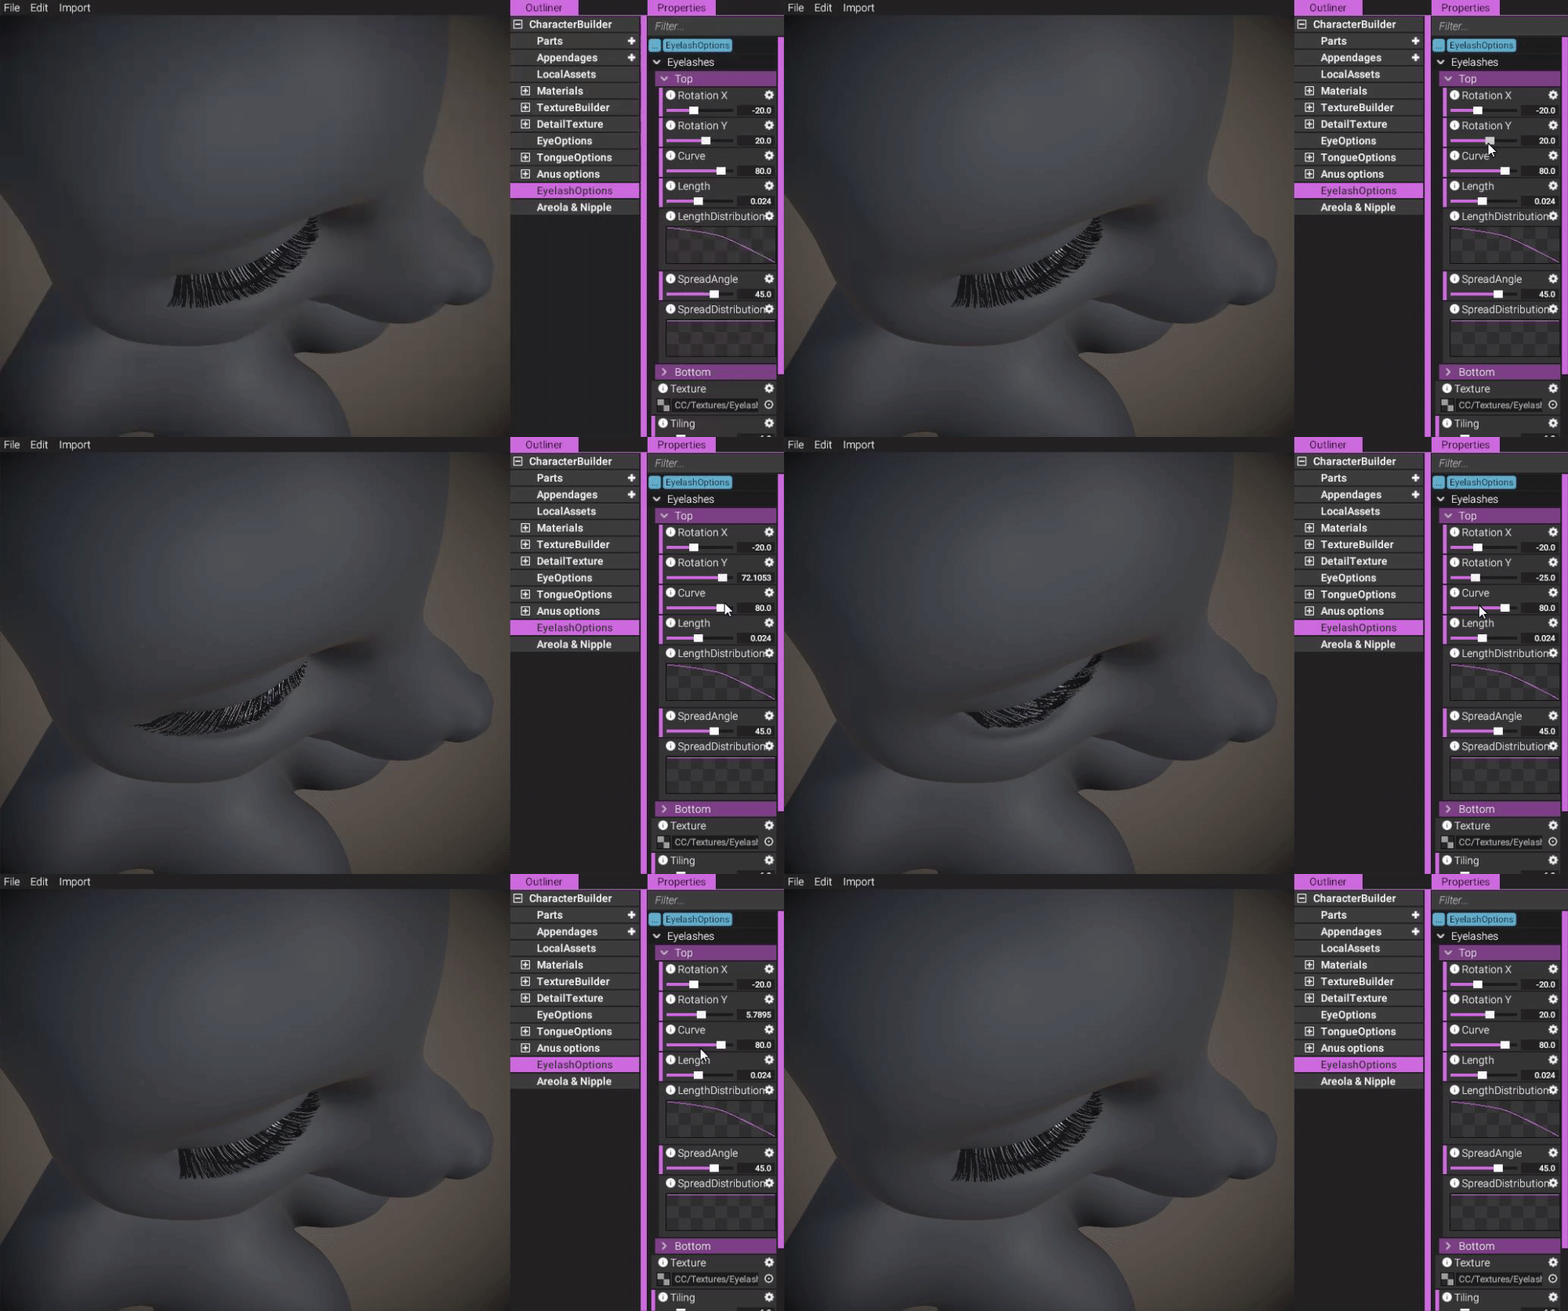
(Adjusting the direction of the eyelash strands along Y.)
https://gyazo.com/b05915f7664f7c8d28238357ab3574bf
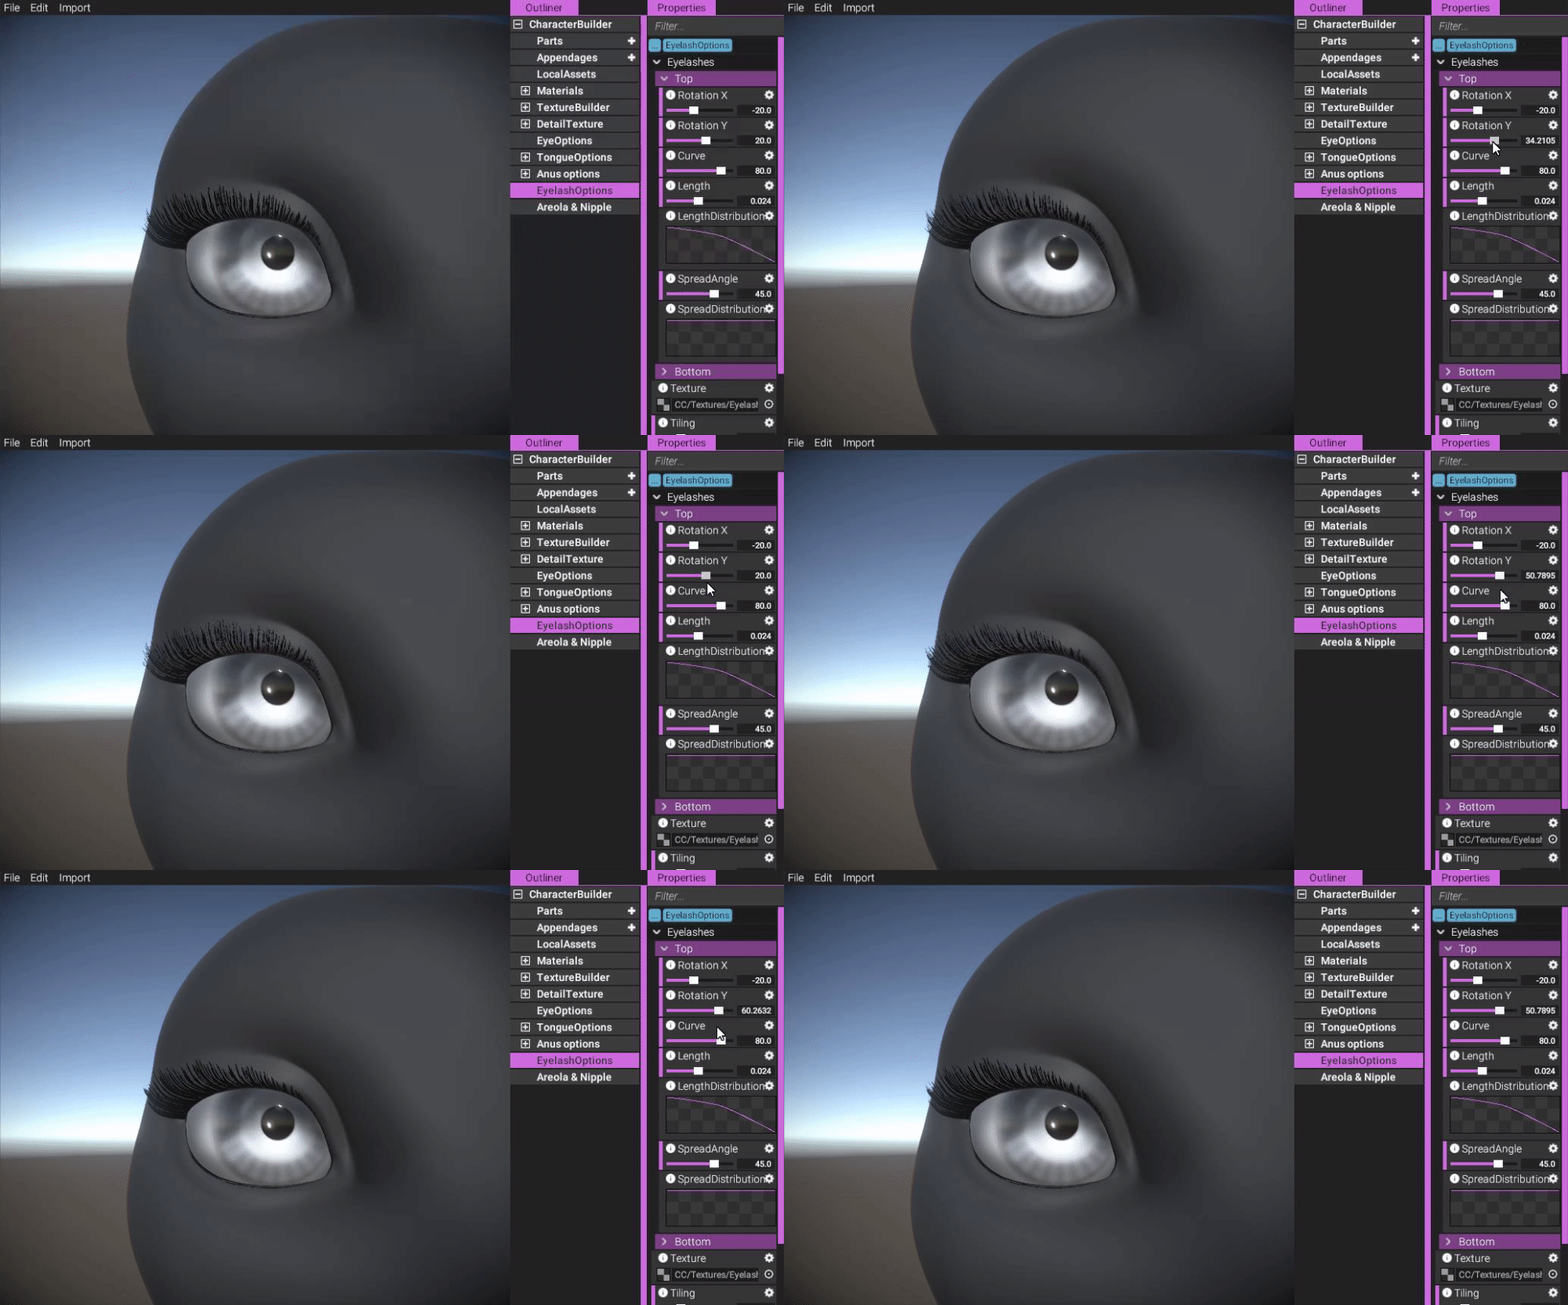
(Another view of the rotation Y property in action.)
https://gyazo.com/61ecdde1816ce99fc3961971a98ed1ba
Naturally, you can configure the length too, but not only across the whole eyelash mesh but also along with it, using the length distribution property:
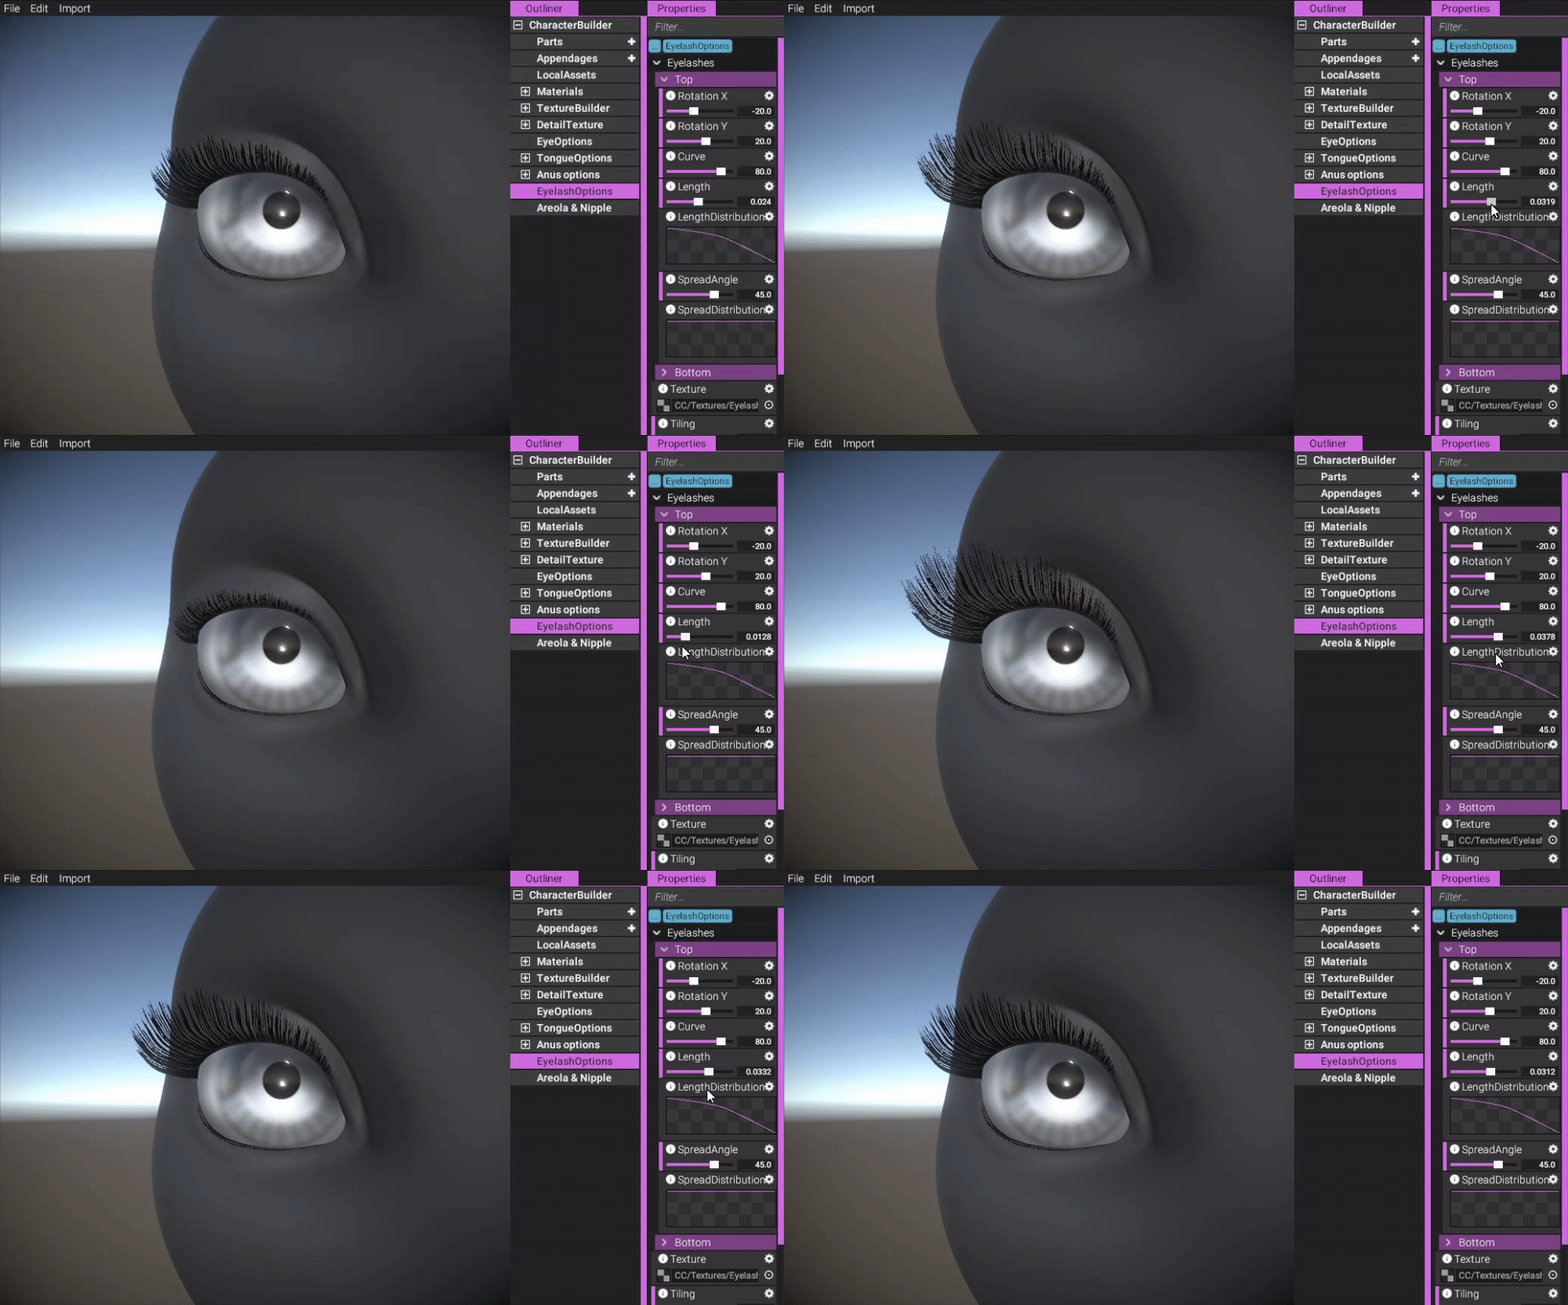
(Configure length.)
https://gyazo.com/8abe3b1eecc89dcb7505080ef21dff46
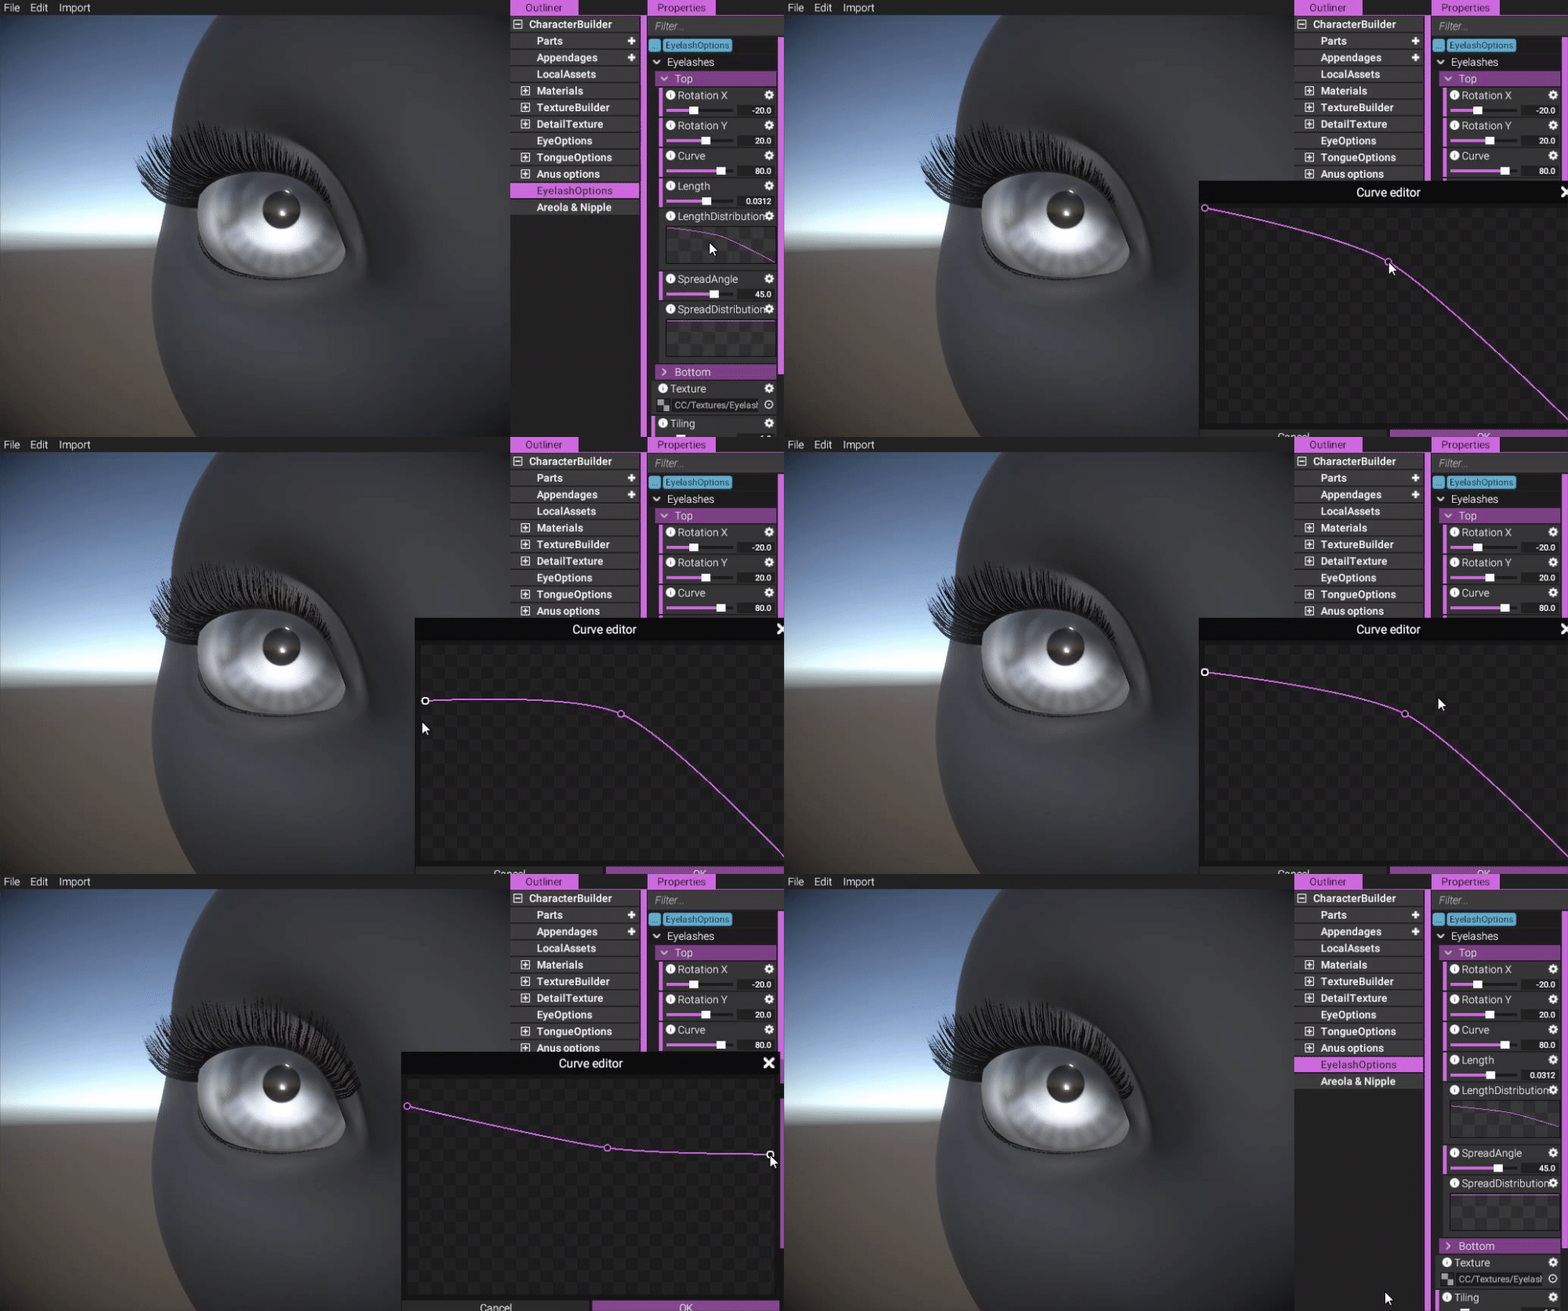
(Configure how the length is distributed.)
https://gyazo.com/d4cec5fb133702c33403033dc7a5629a
You can also configure how much the eyelashes will "spread", i.e. how much they rotate in Y across the length of the eyelashes:
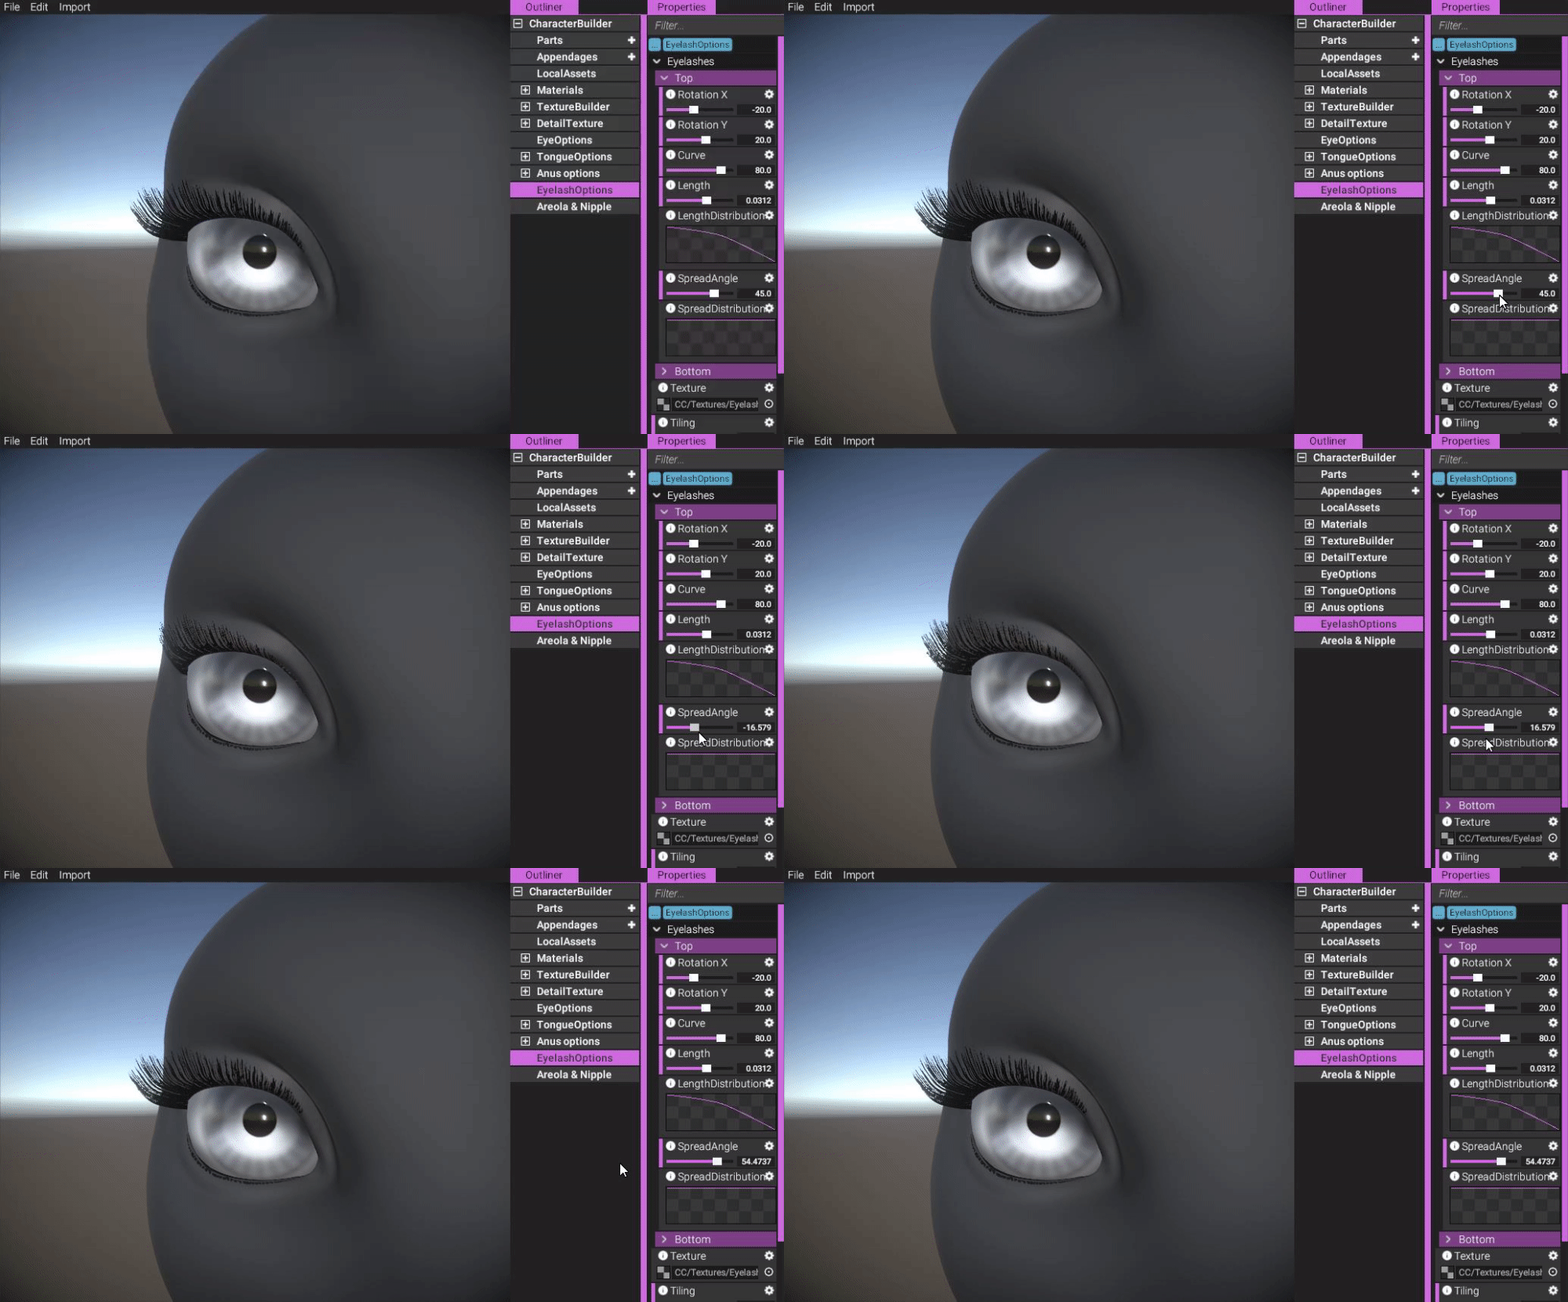
(Configure how much the eyelashes "spread".)
https://gyazo.com/d7a20bb288aa2158279b6d2631929ac6
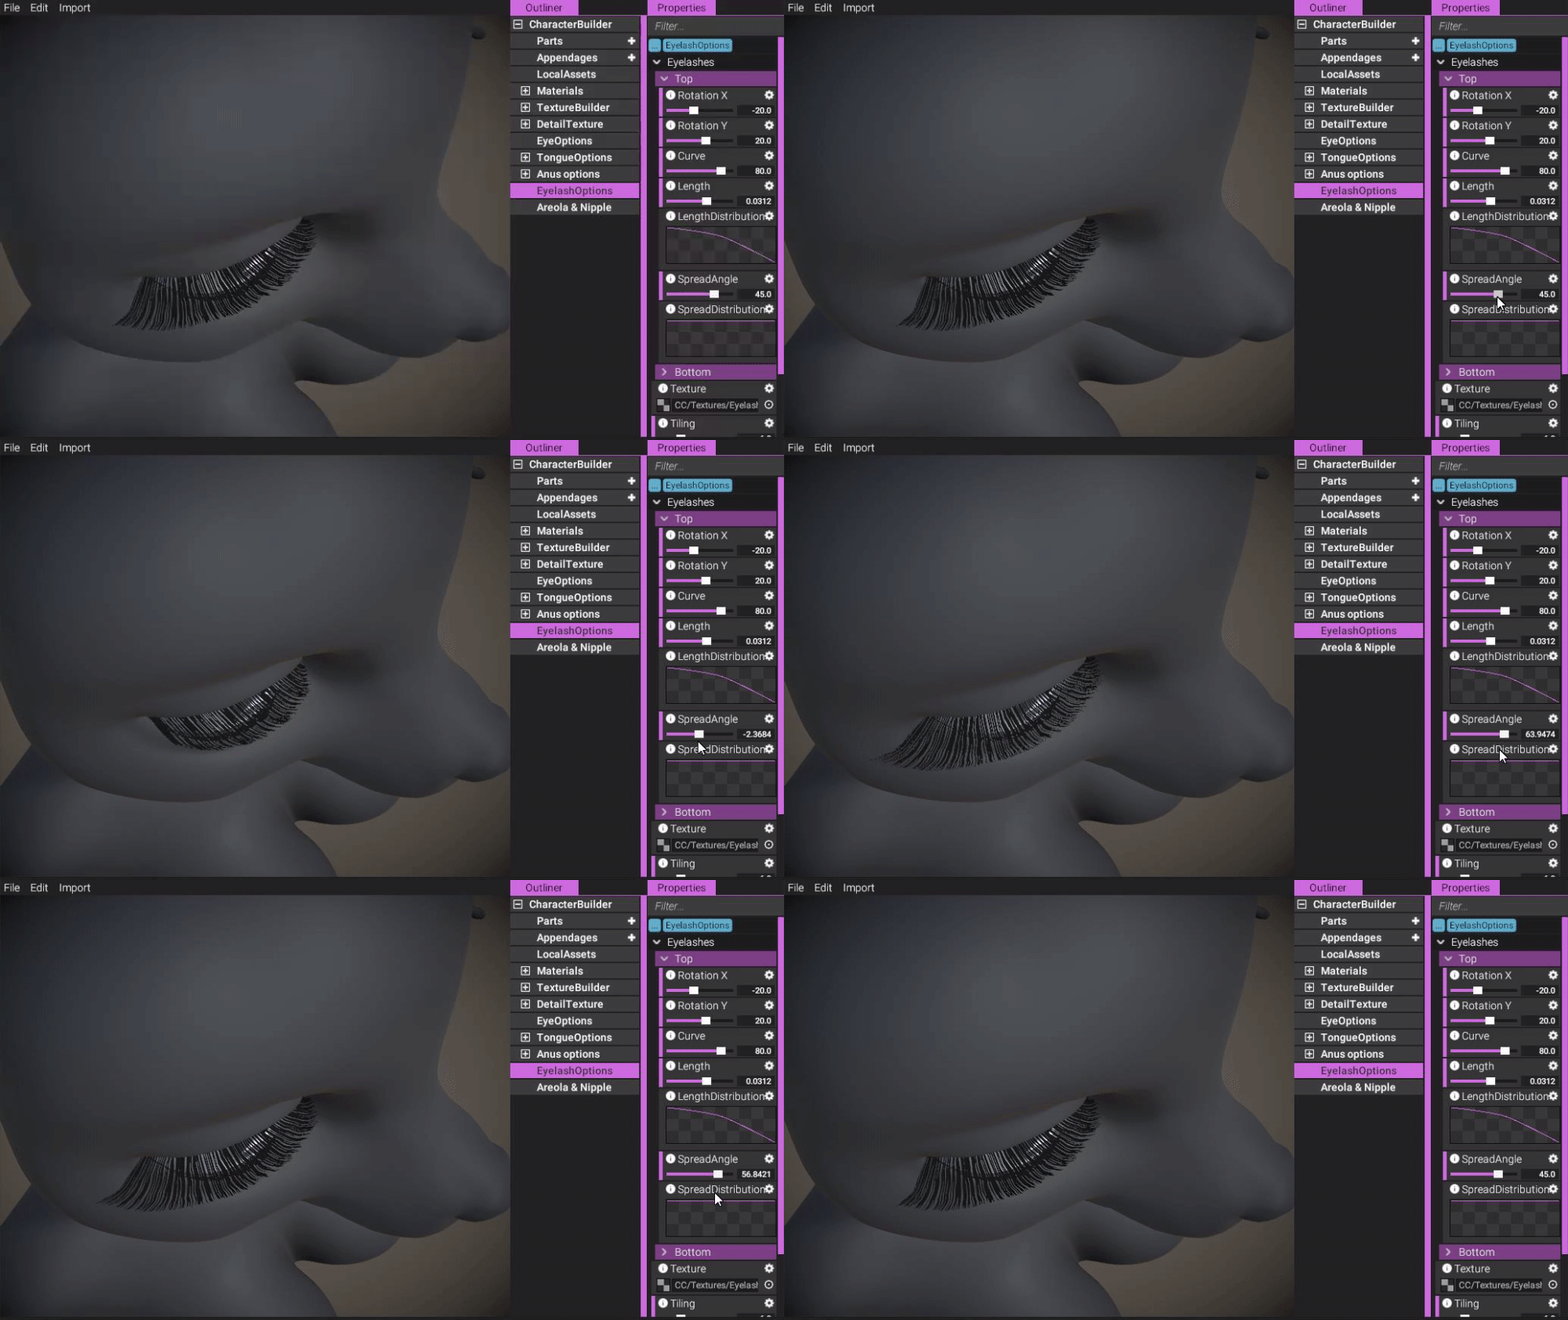
(Another view of the spread option.)
https://gyazo.com/edab56f708fe312eaf6c0286cdaed2db
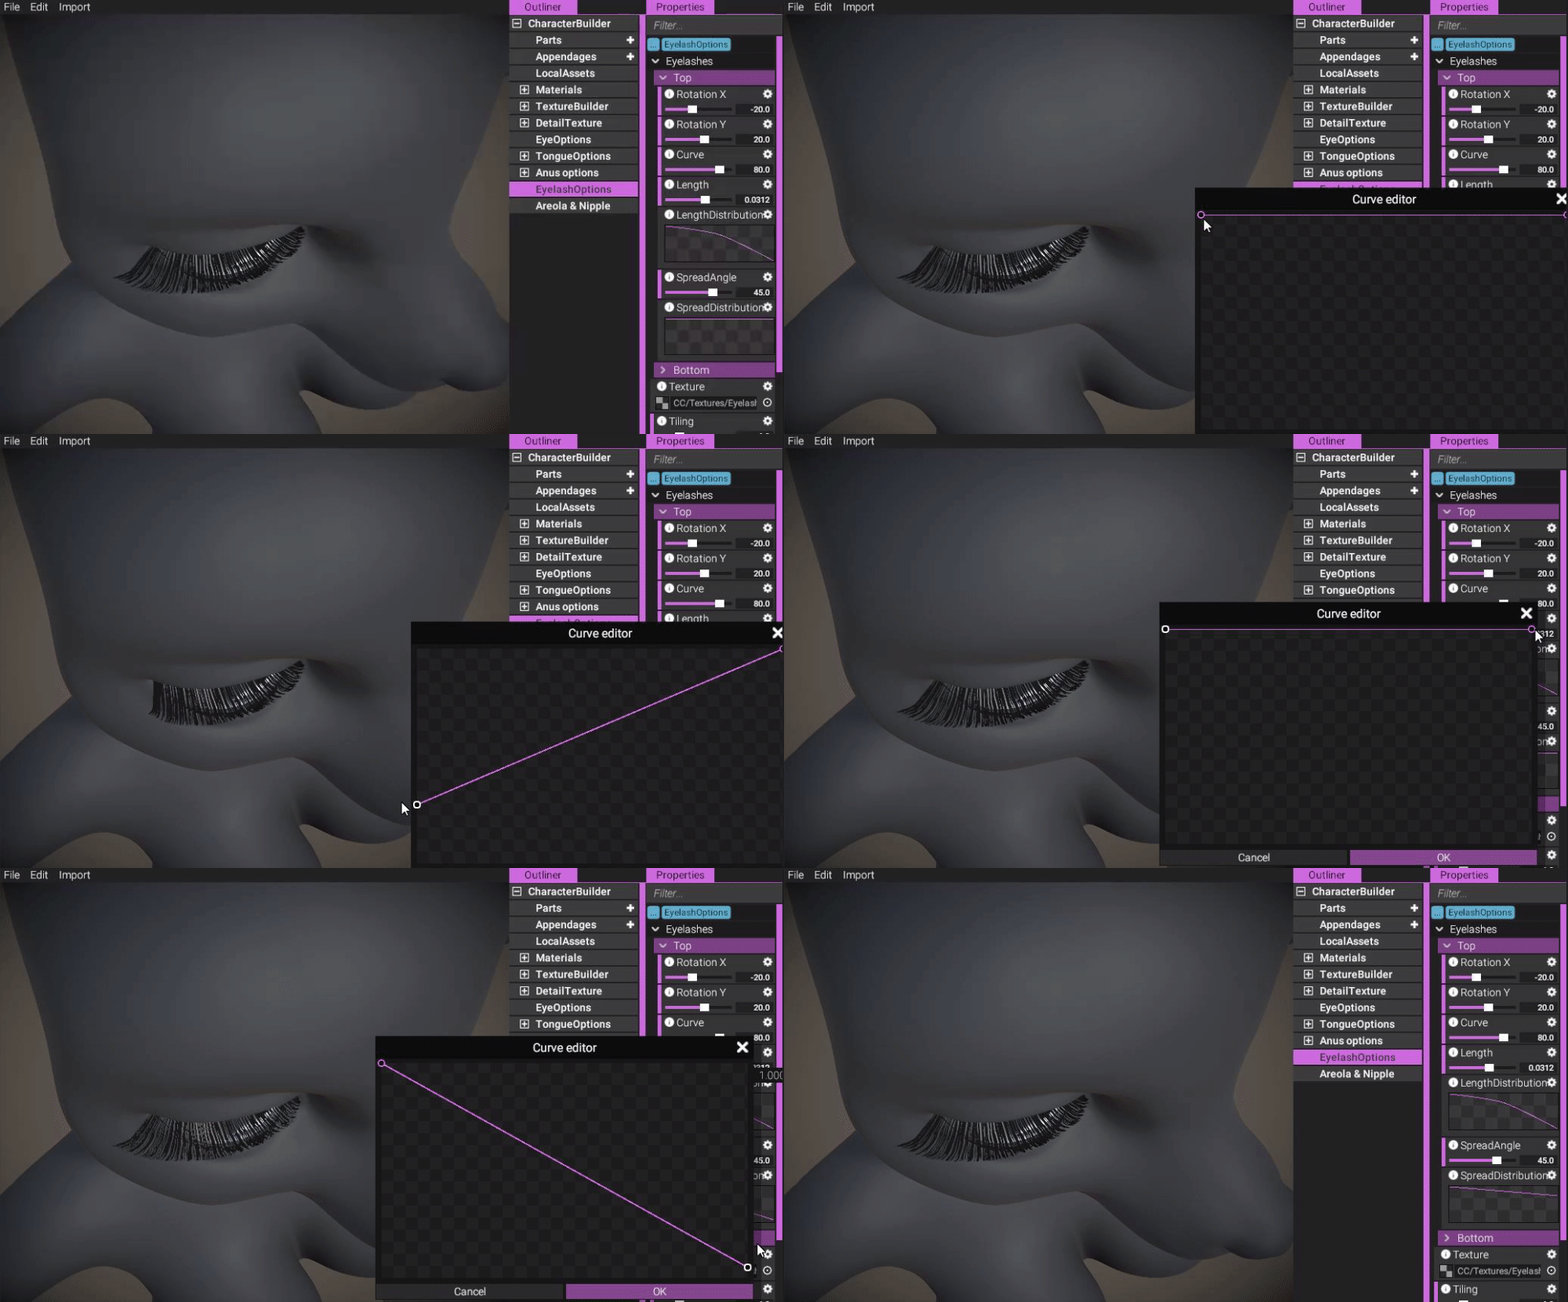
(Configure how the spread option is distributed over the length of the eyelashes.)
https://gyazo.com/af05e307508dfa04191e1188094d2ed7
You can also choose what texture to use for the eyelashes. You can use your own or one of the ones we provide. Currently we only have one but we will definitely try to get more in there.
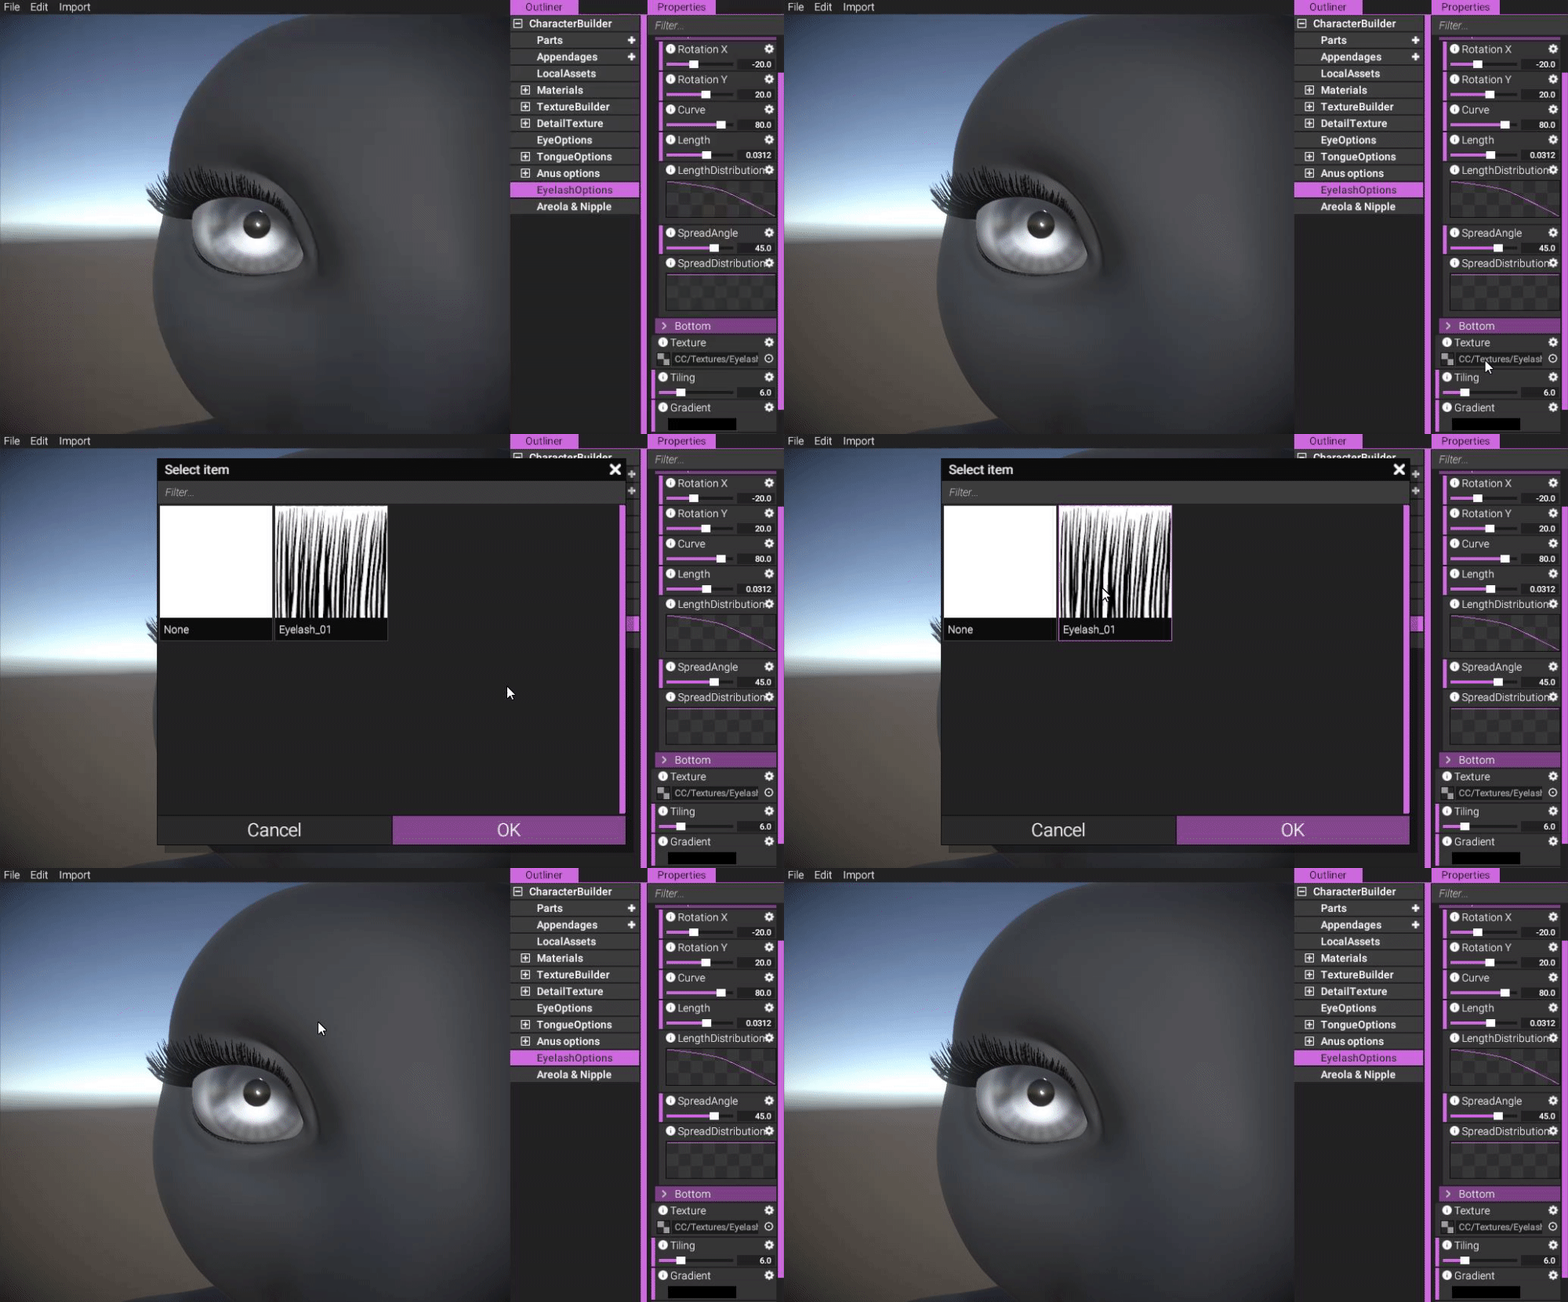
(You can select what mask to use for the eyelashes. Use your own or one of the ones provided by the app.)
https://gyazo.com/59e3ed65178719e4c0956d664ce965e8
Naturally, the tiling/density of the eyelashes is possible to configure as well:
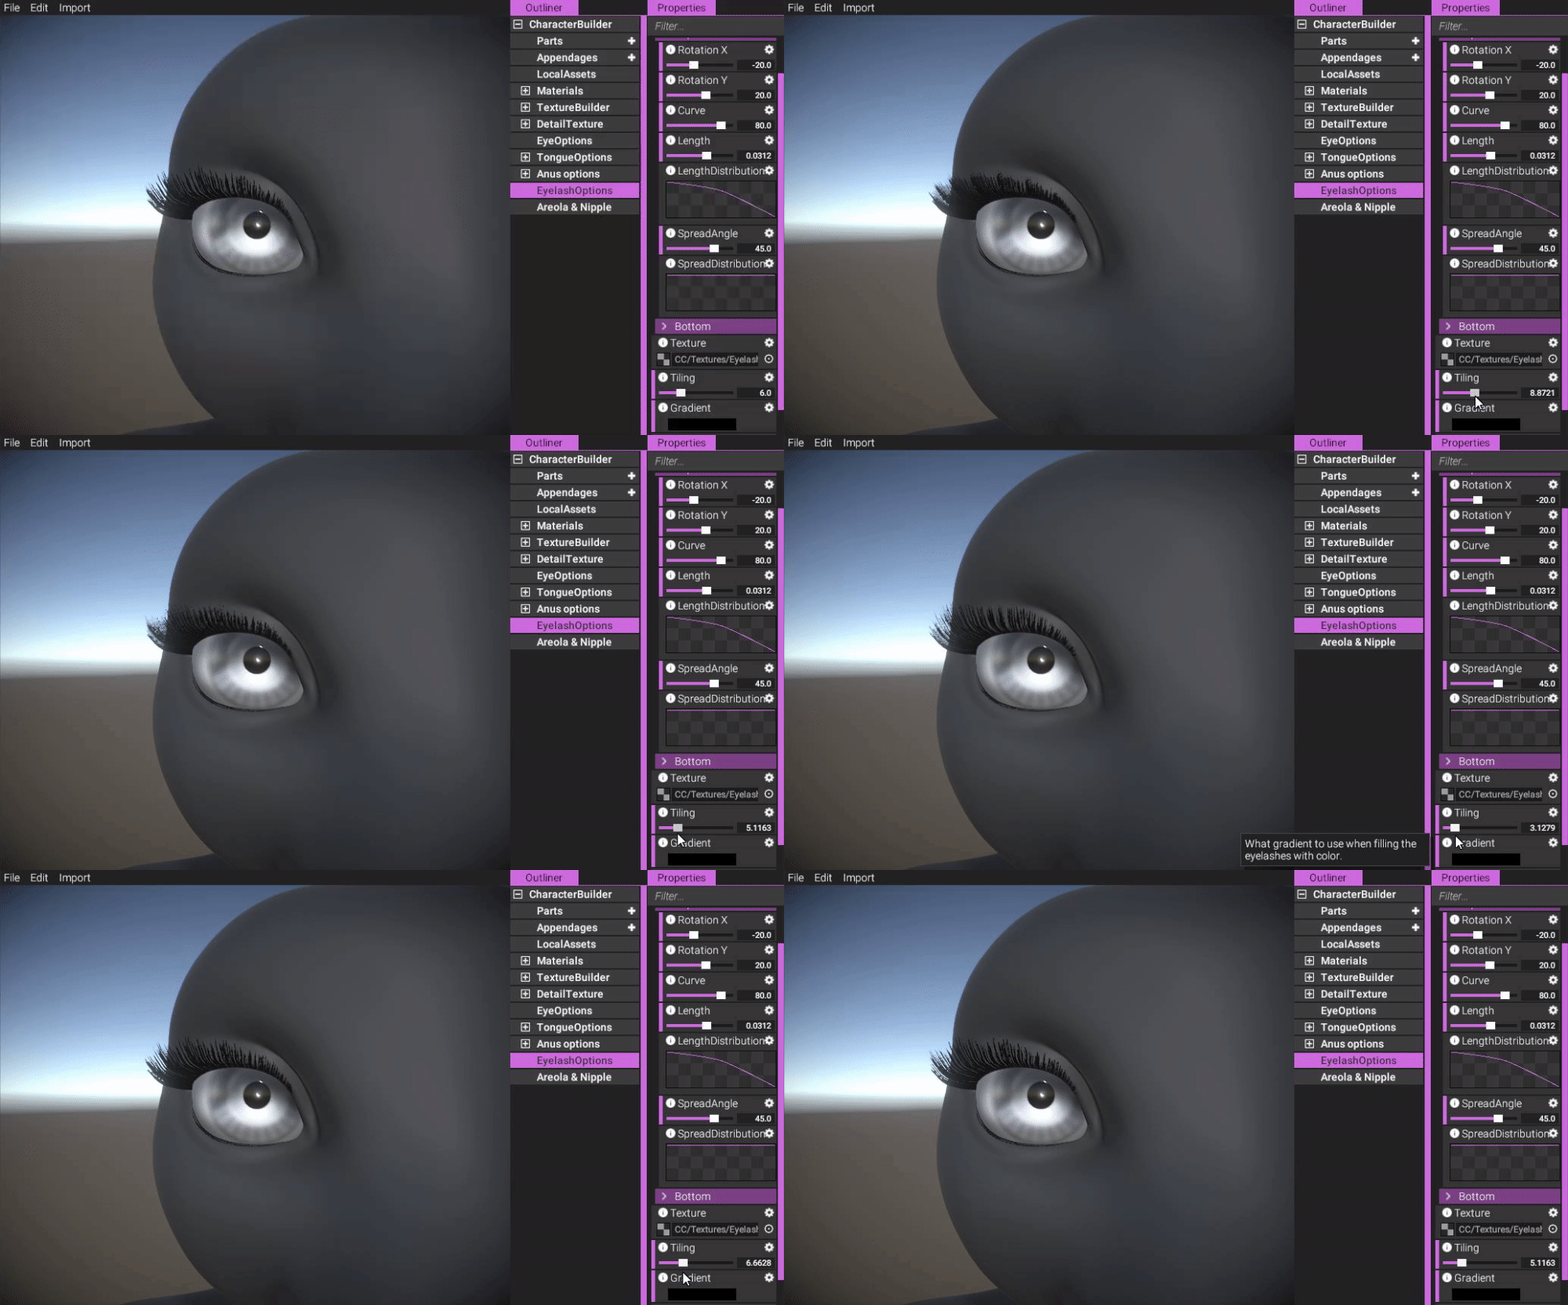
(Configure tiling/density of the eyelashes.)
https://gyazo.com/20bdda1f43da7c4fbd8c5989d44d1577
The options for the bottom section are identical to the top, so there's really no point in showing them off individually:
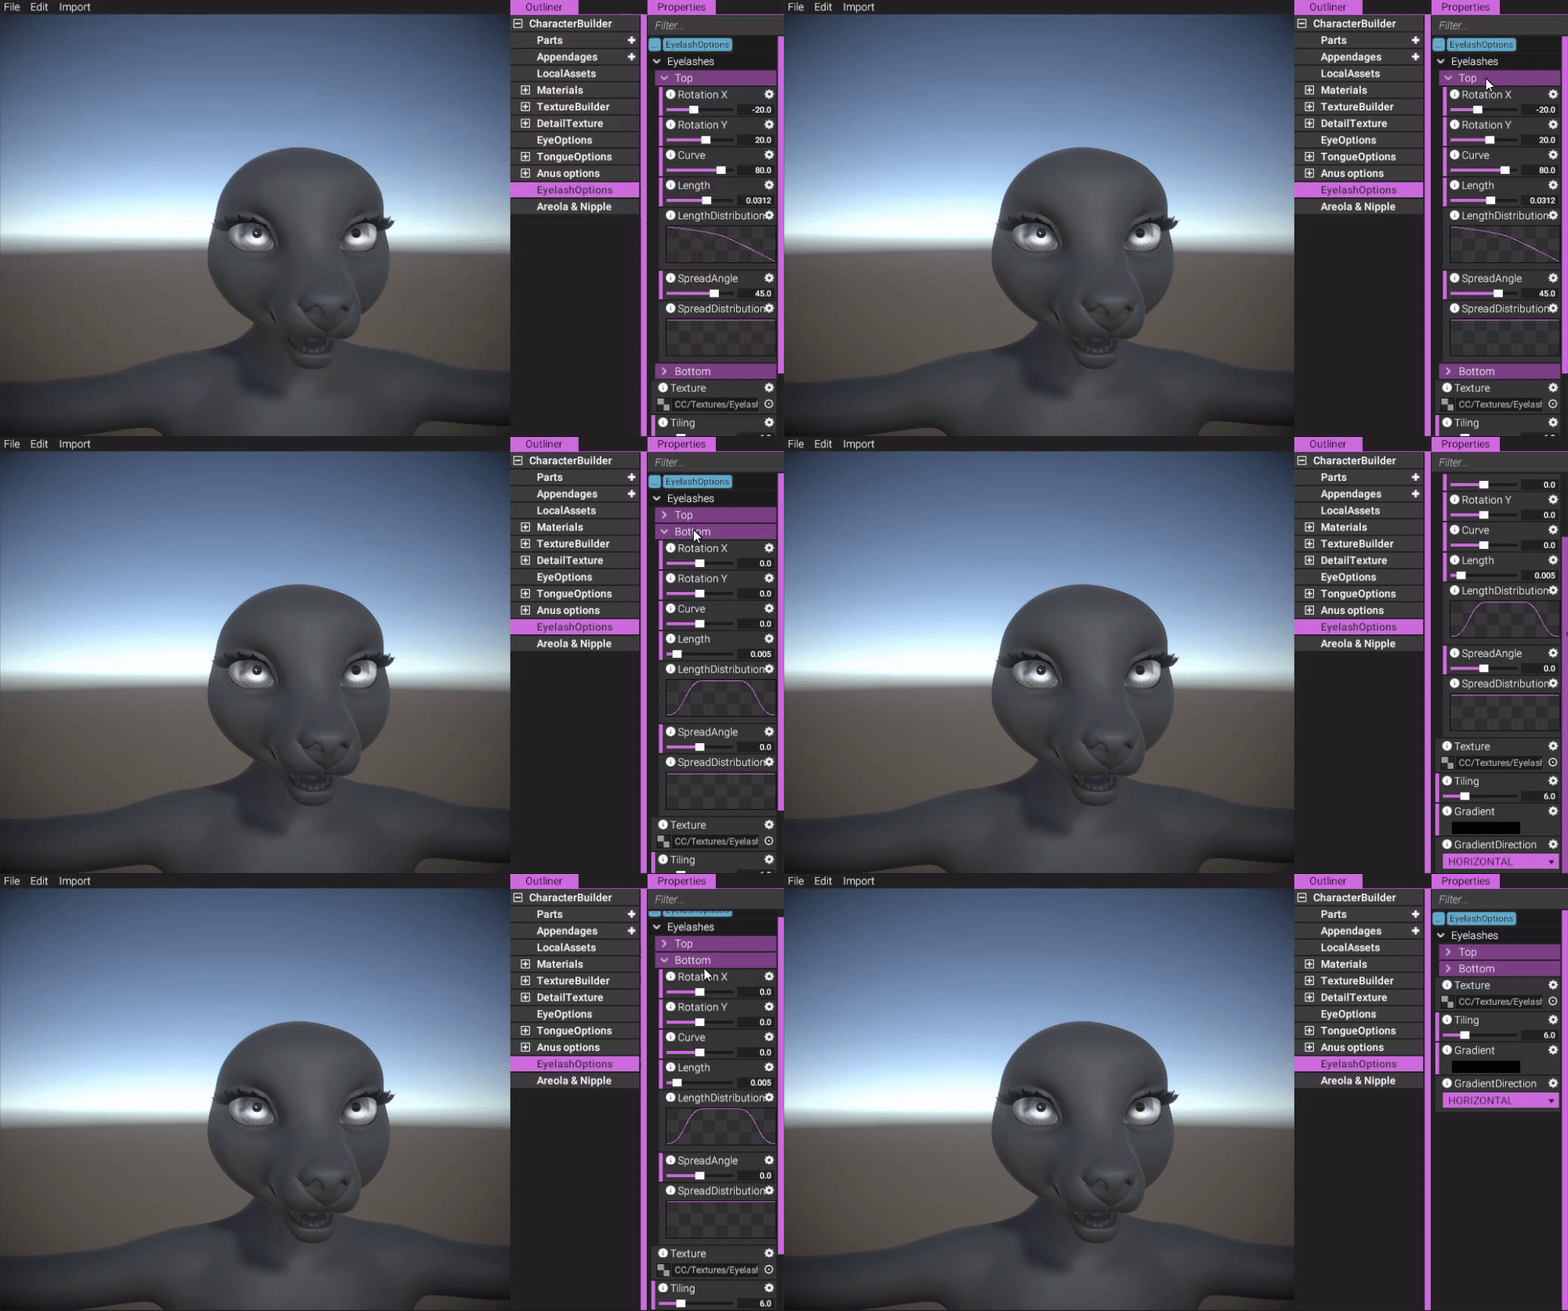
(Since the options for the eyelashes at the bottom is the same as for the top, there's no need to really go through everything again.)
https://gyazo.com/b9af4a06b4bb6a548b9ac298ed9c2957
Lastly, color is possible to configure. This is done with the YL2 color and gradient system. The way this works is that you select what color gradient to use. Then, the eyelashes are filled with that color - either along the length or along the width of the eyelashes.
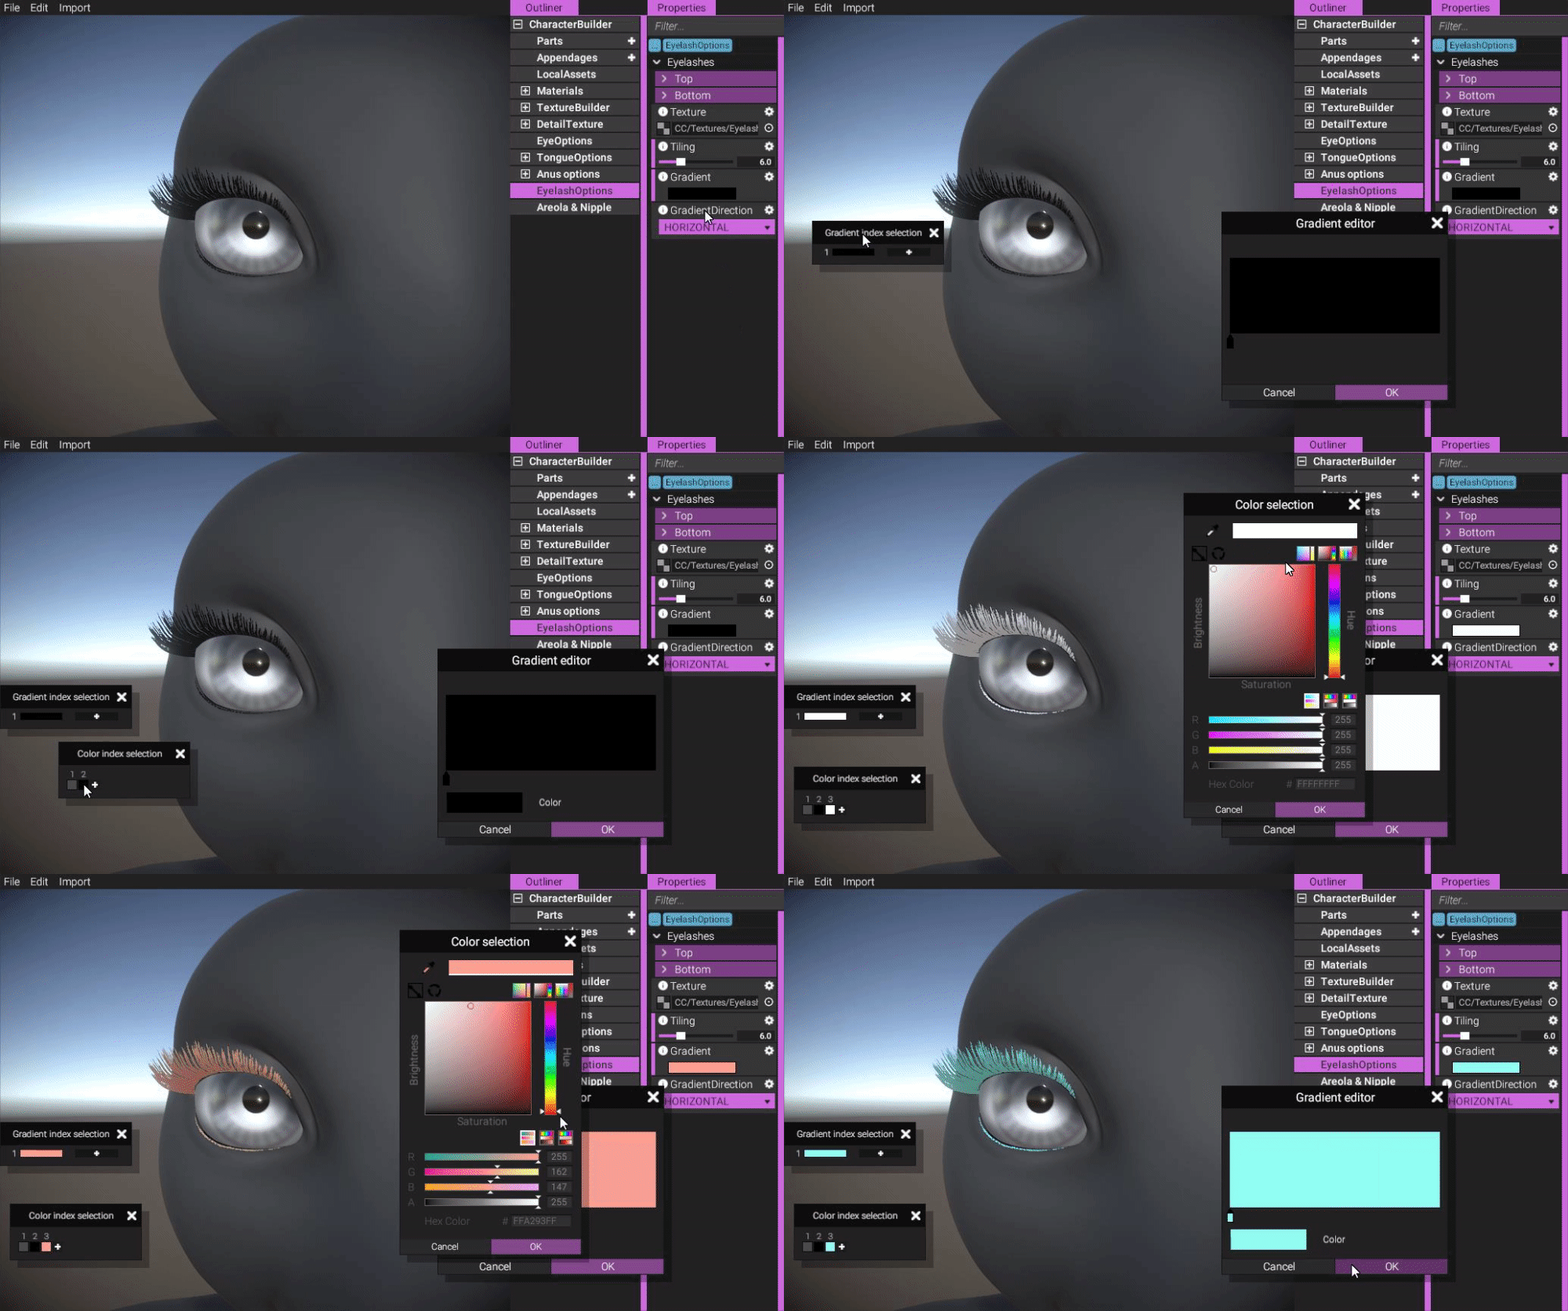
(You can color the eyelashes using the color gradient system in YL2.)
https://gyazo.com/1d675e1080b9e31fd5bfaff0587a96ad
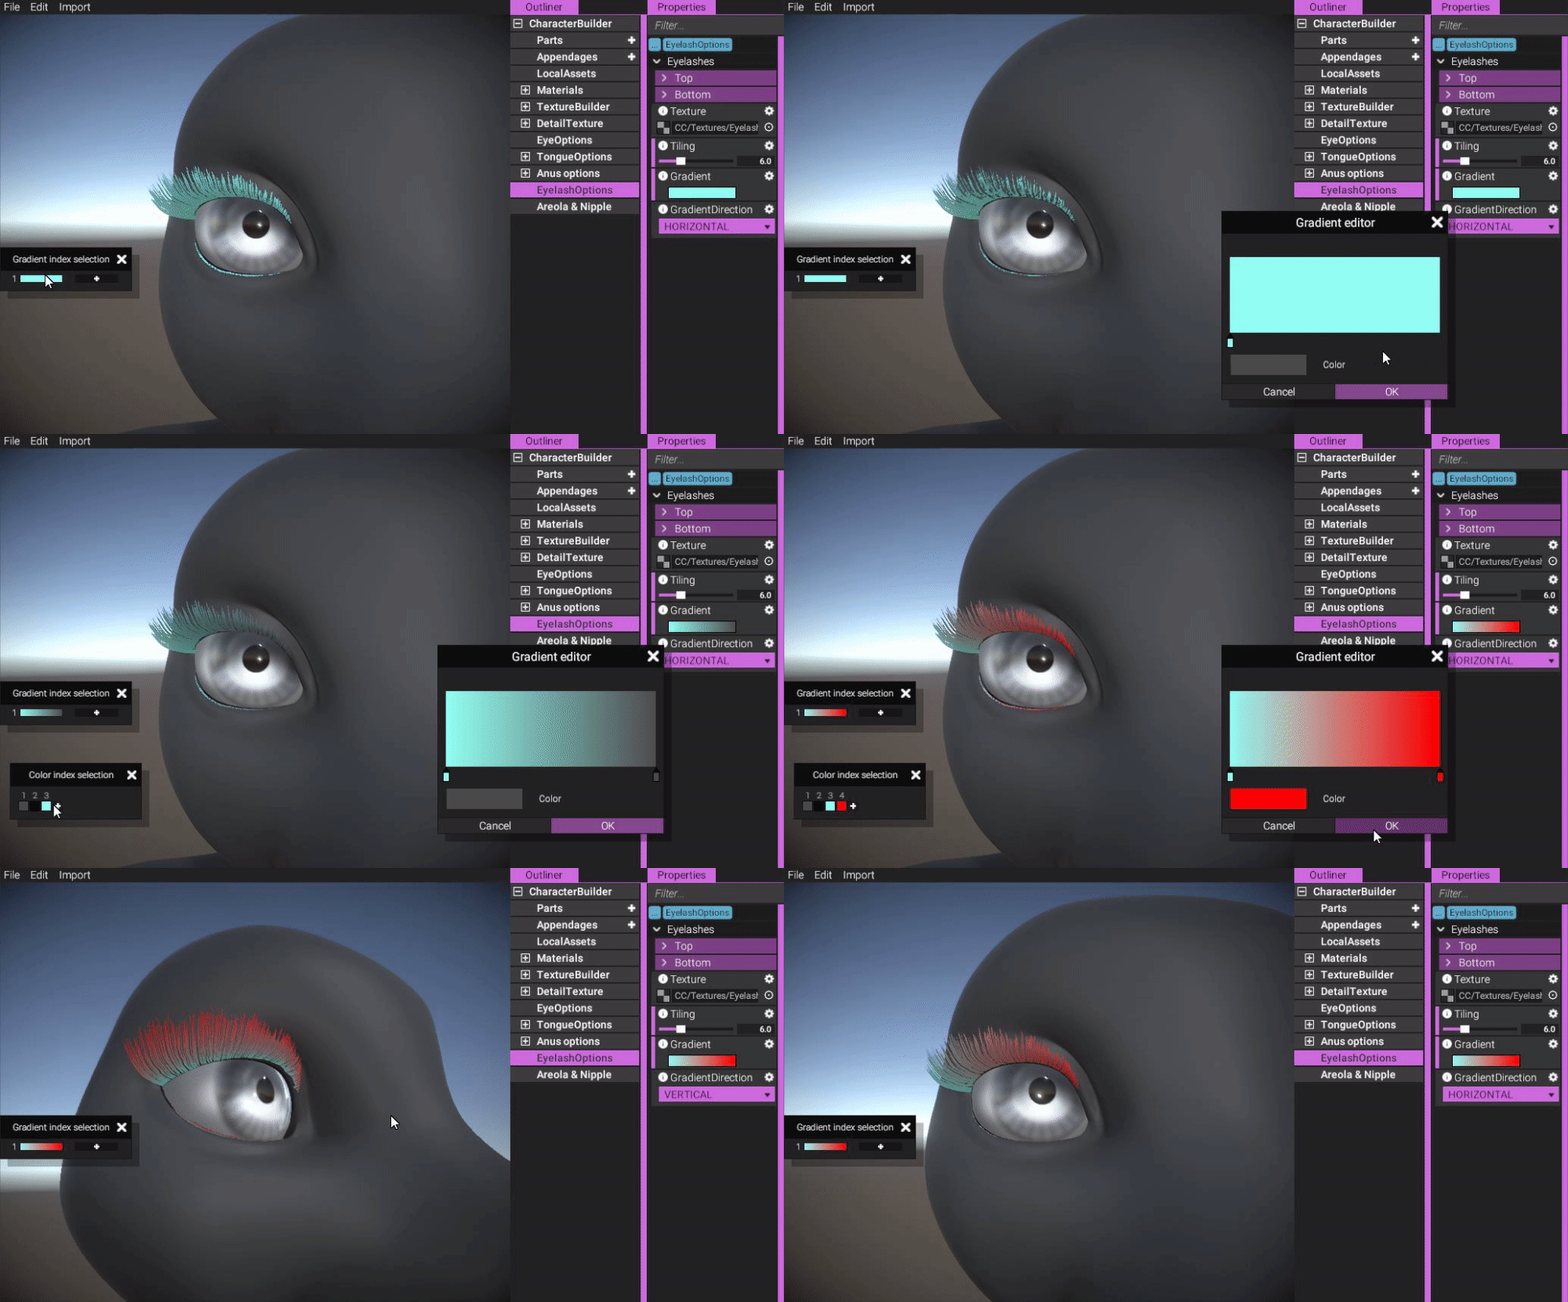
(Select whether the eyelashes are filled with the gradient from side to side or along the length of the eyelashes.)
https://gyazo.com/221b9518fc18f7d3da1968179936b3cf
The way gradients work in YL2 is that you go to the main character builder object, add what colors to use, then add a new gradient which selects which of those colors to use in the gradient. Then, this gradient is referenced in other places, for example the eyelash options.
Tongue options
Originally tongues were "hardcoded" into each head mesh, but this wasn't something we were happy about. Partly because adapting tongues for every body type is cumbersome to do and is preferably something that should be automated, but for the most part it was the lack of choice that bothered us. If you didn't like the tongue that was part of a specific head, there wouldn't be anything you could do about it! Clearly, this wasn't good enough.
We now have a system in place for selecting and configuring tongues independently of head models. The way this system works is that we have a spline defined in our authoring software for each head, along which a tongue model (of your choice) is adapted. The points of this spline are automatically adjusted as the body type is changed, using the same tech as our skeleton refit technology, meaning we don't need to do any extra work to adapt any tongues or splines to each body type. So it's a win-win for everyone! Less work for us and more choice for you.
So with all that explained, let's have a look at the tongue options in YL2!
To select tongue model, click the Model property in the tongue object:
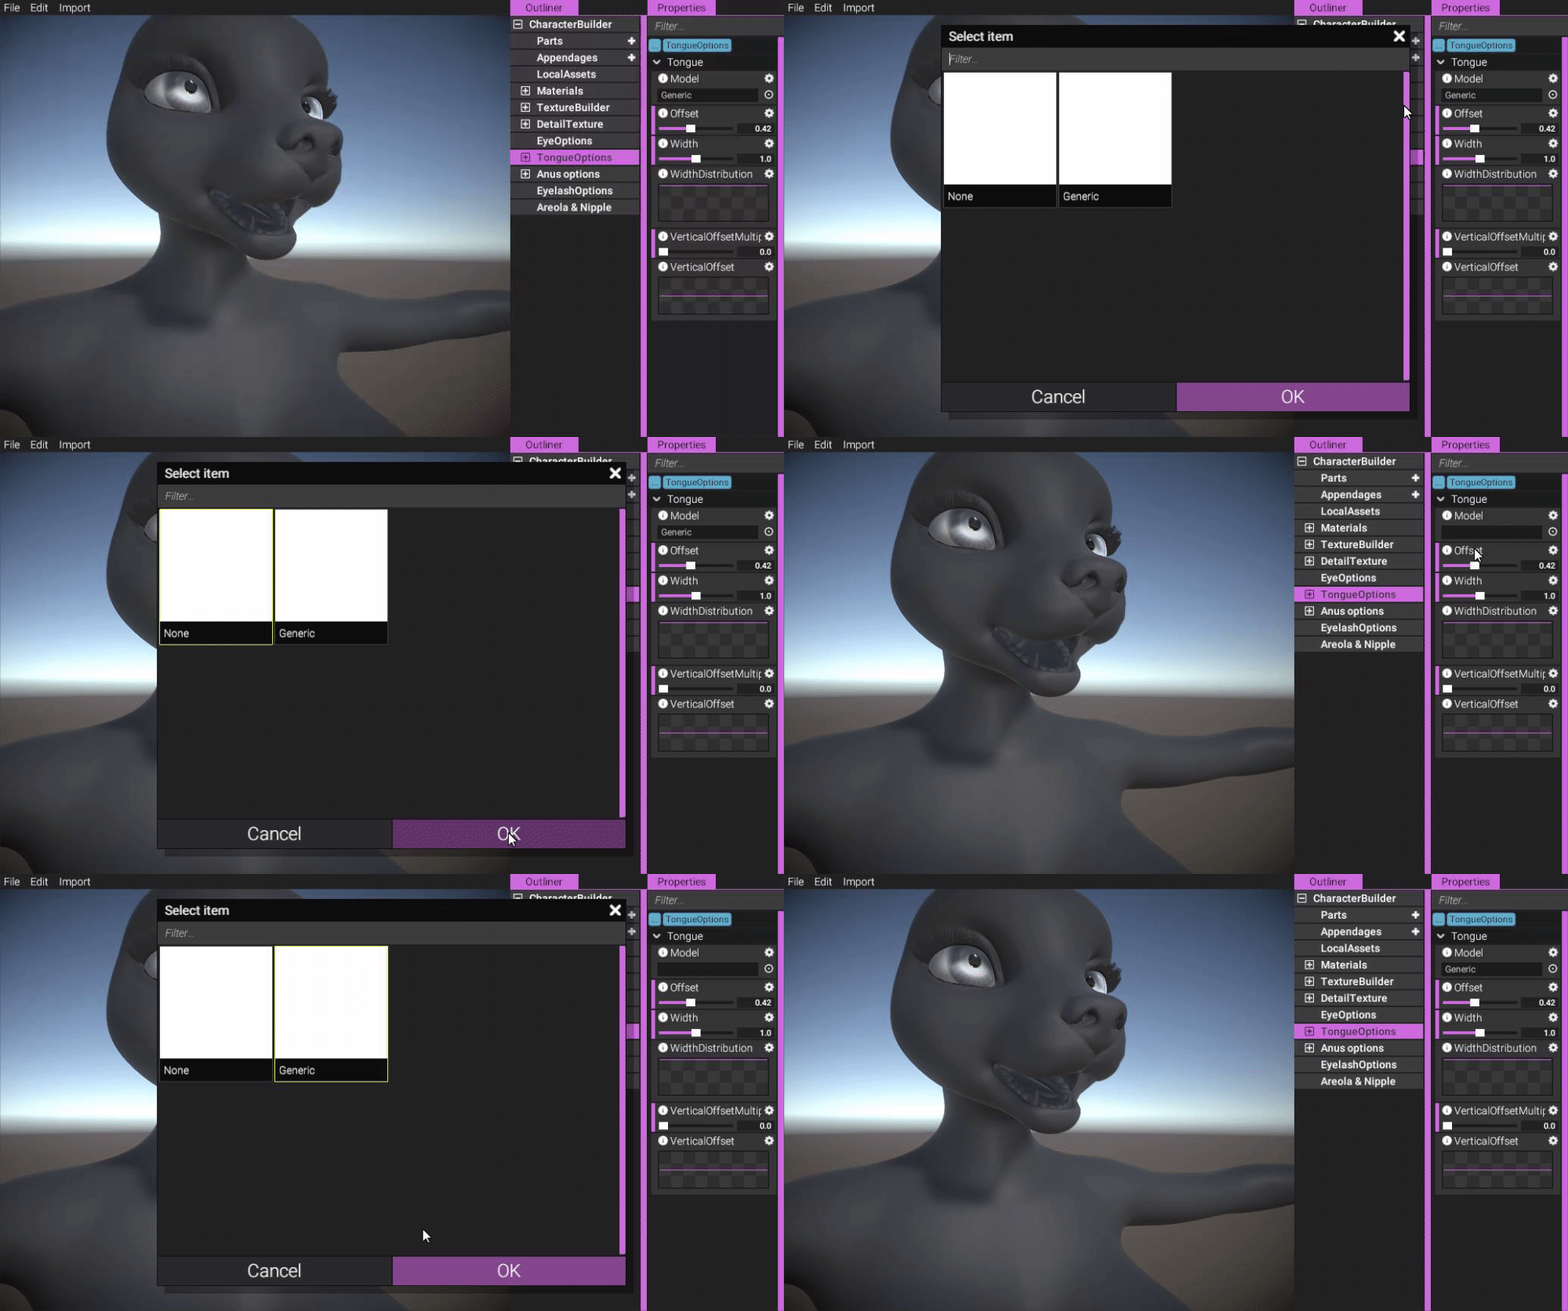
(Choose what tongue model to use, or none. Right now we only have 1 tongue model, but we will probably add more with time.)
https://gyazo.com/ea7c6de0f299500128974552e8b309c6
You are able to configure where on the curve the tongue is placed using the offset option:
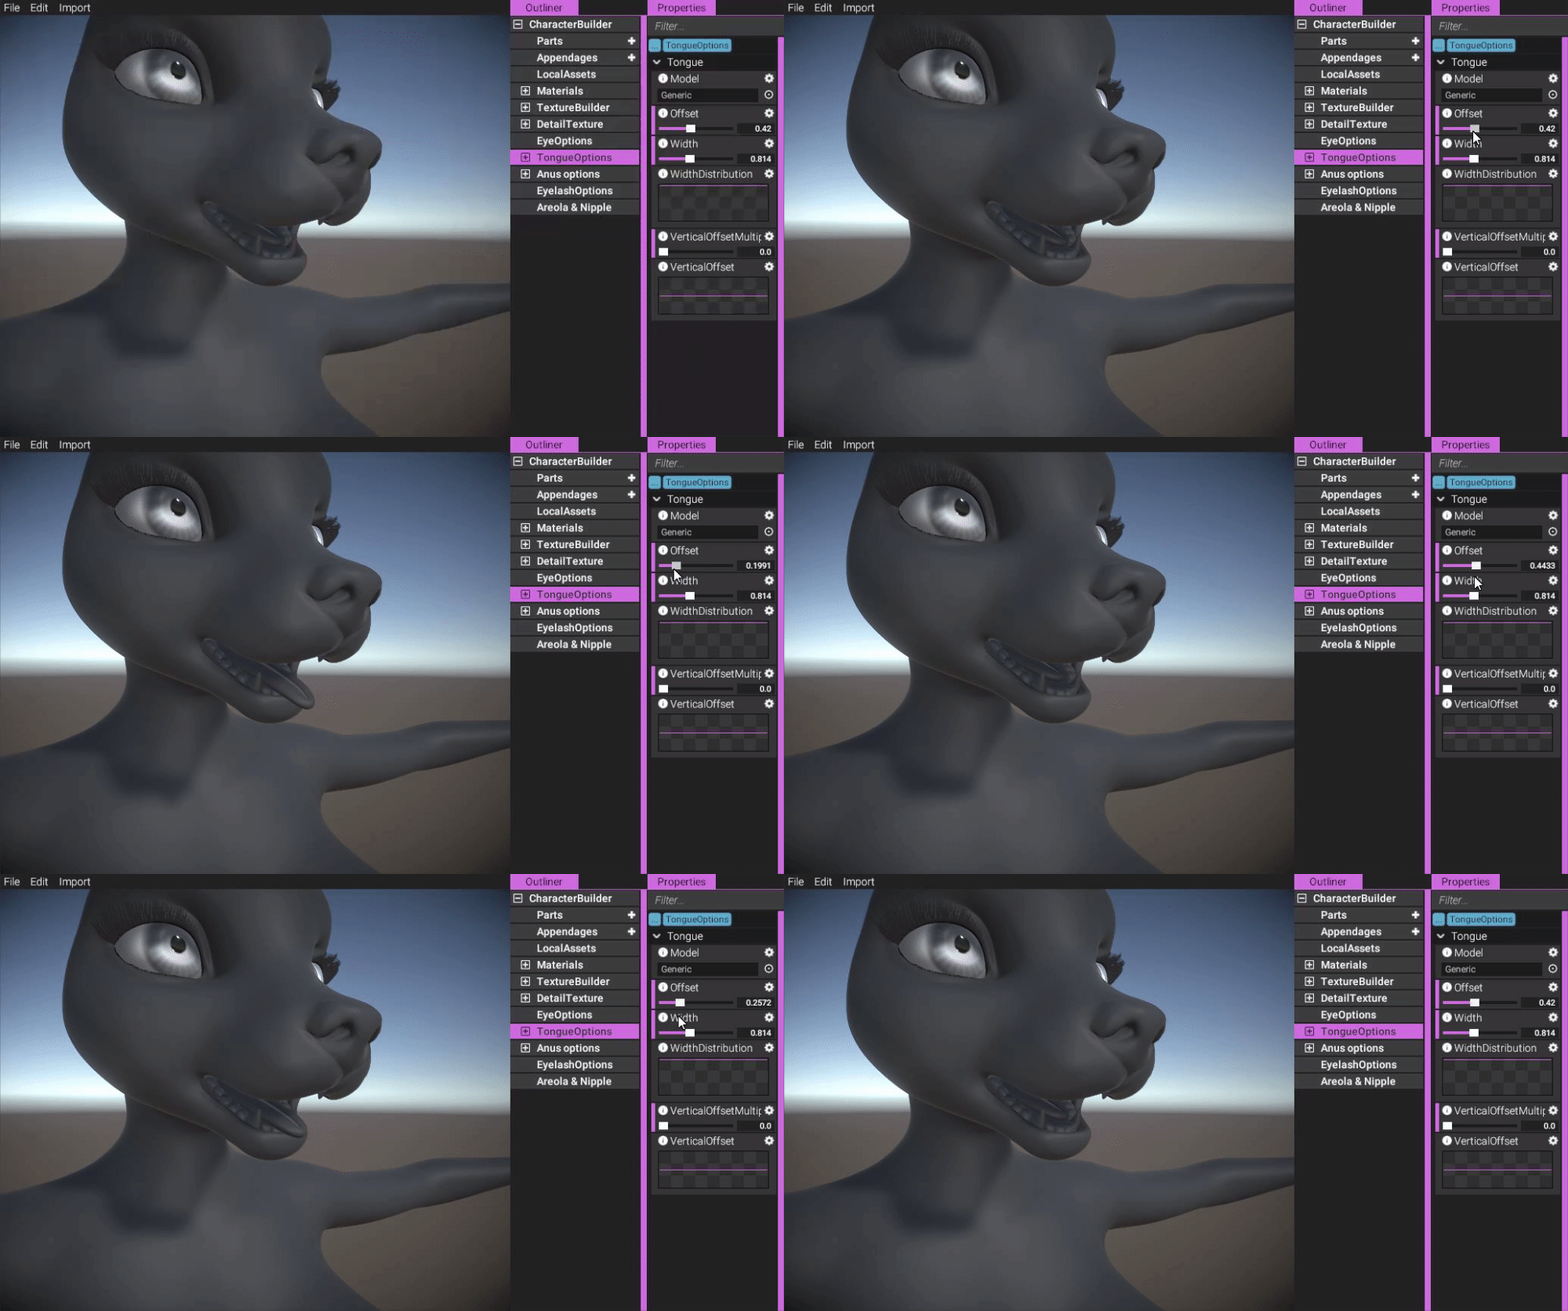
(Configure where on the curve the tongue is placed.)
https://gyazo.com/21030ee9aeba42002d290ca8792d3e75
You can configure the width of the tongue:
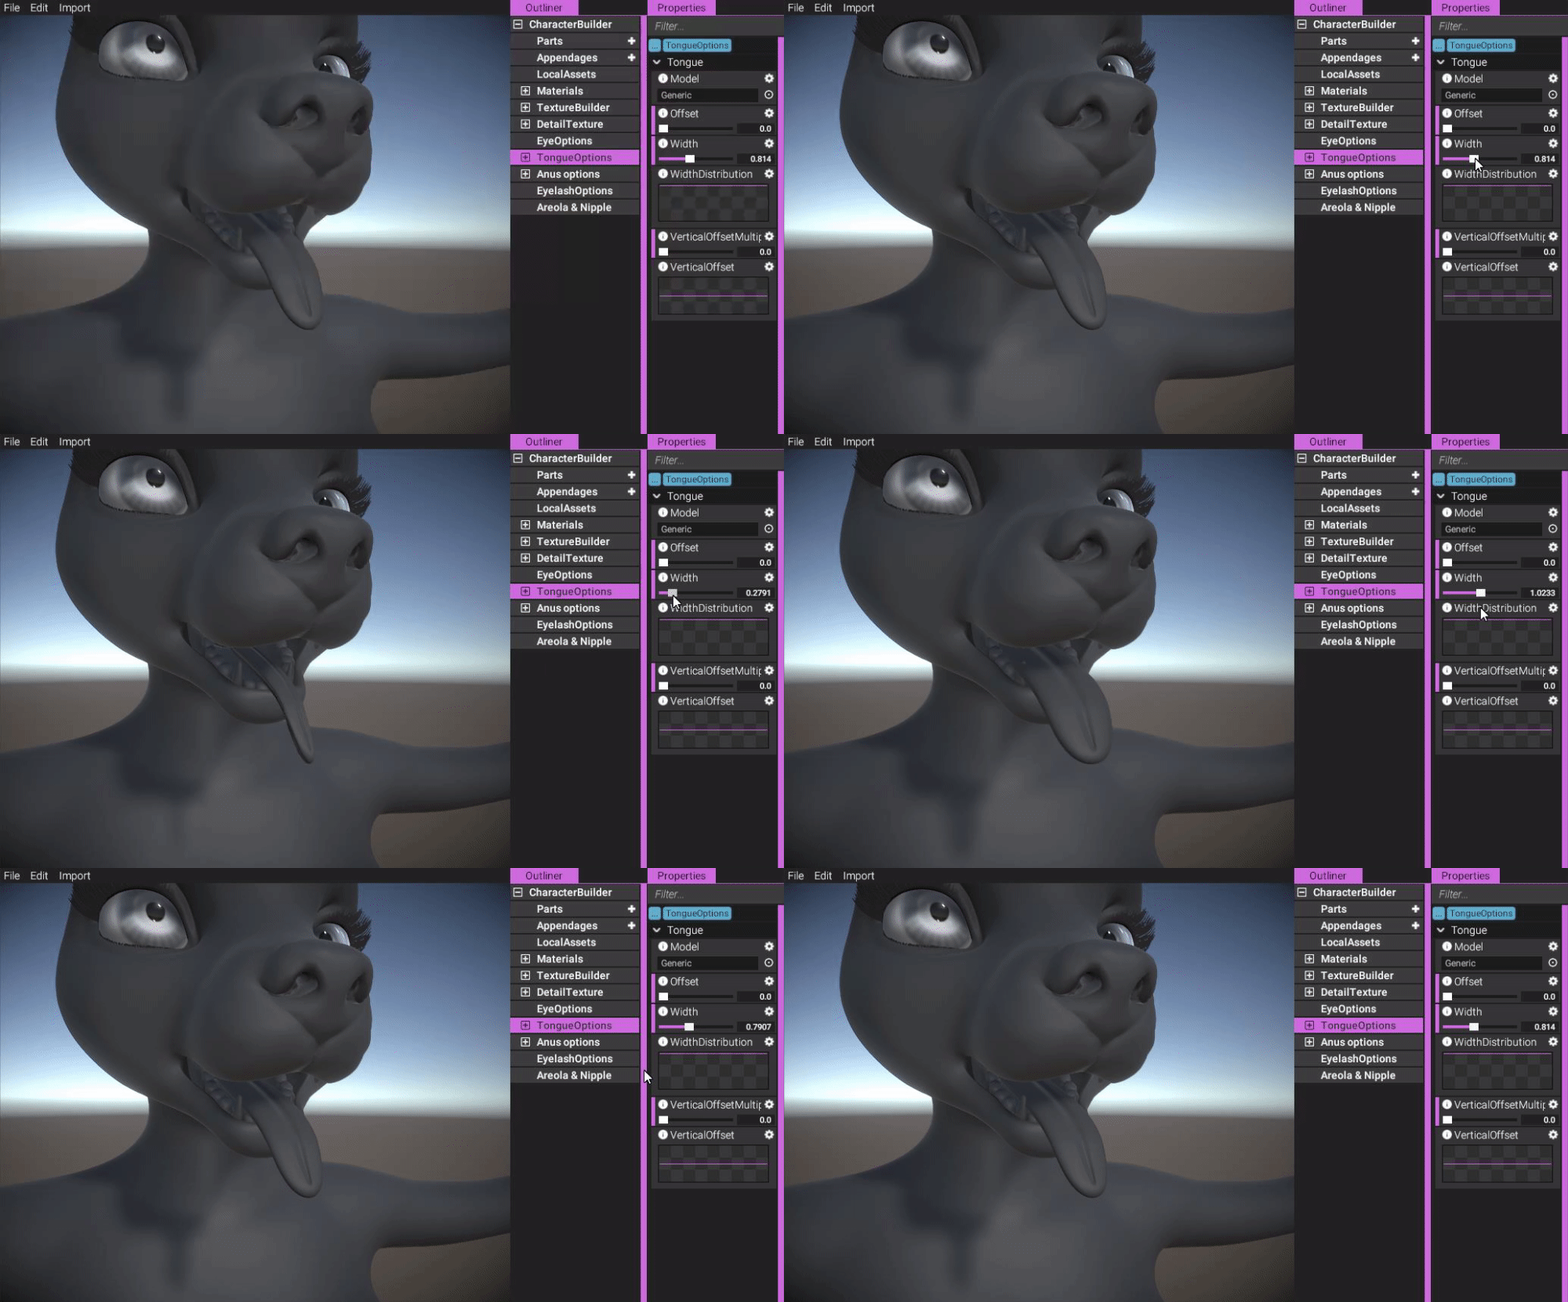
(Width slider.)
https://gyazo.com/8e2a51191fce2caa01909cdf54af0b4d
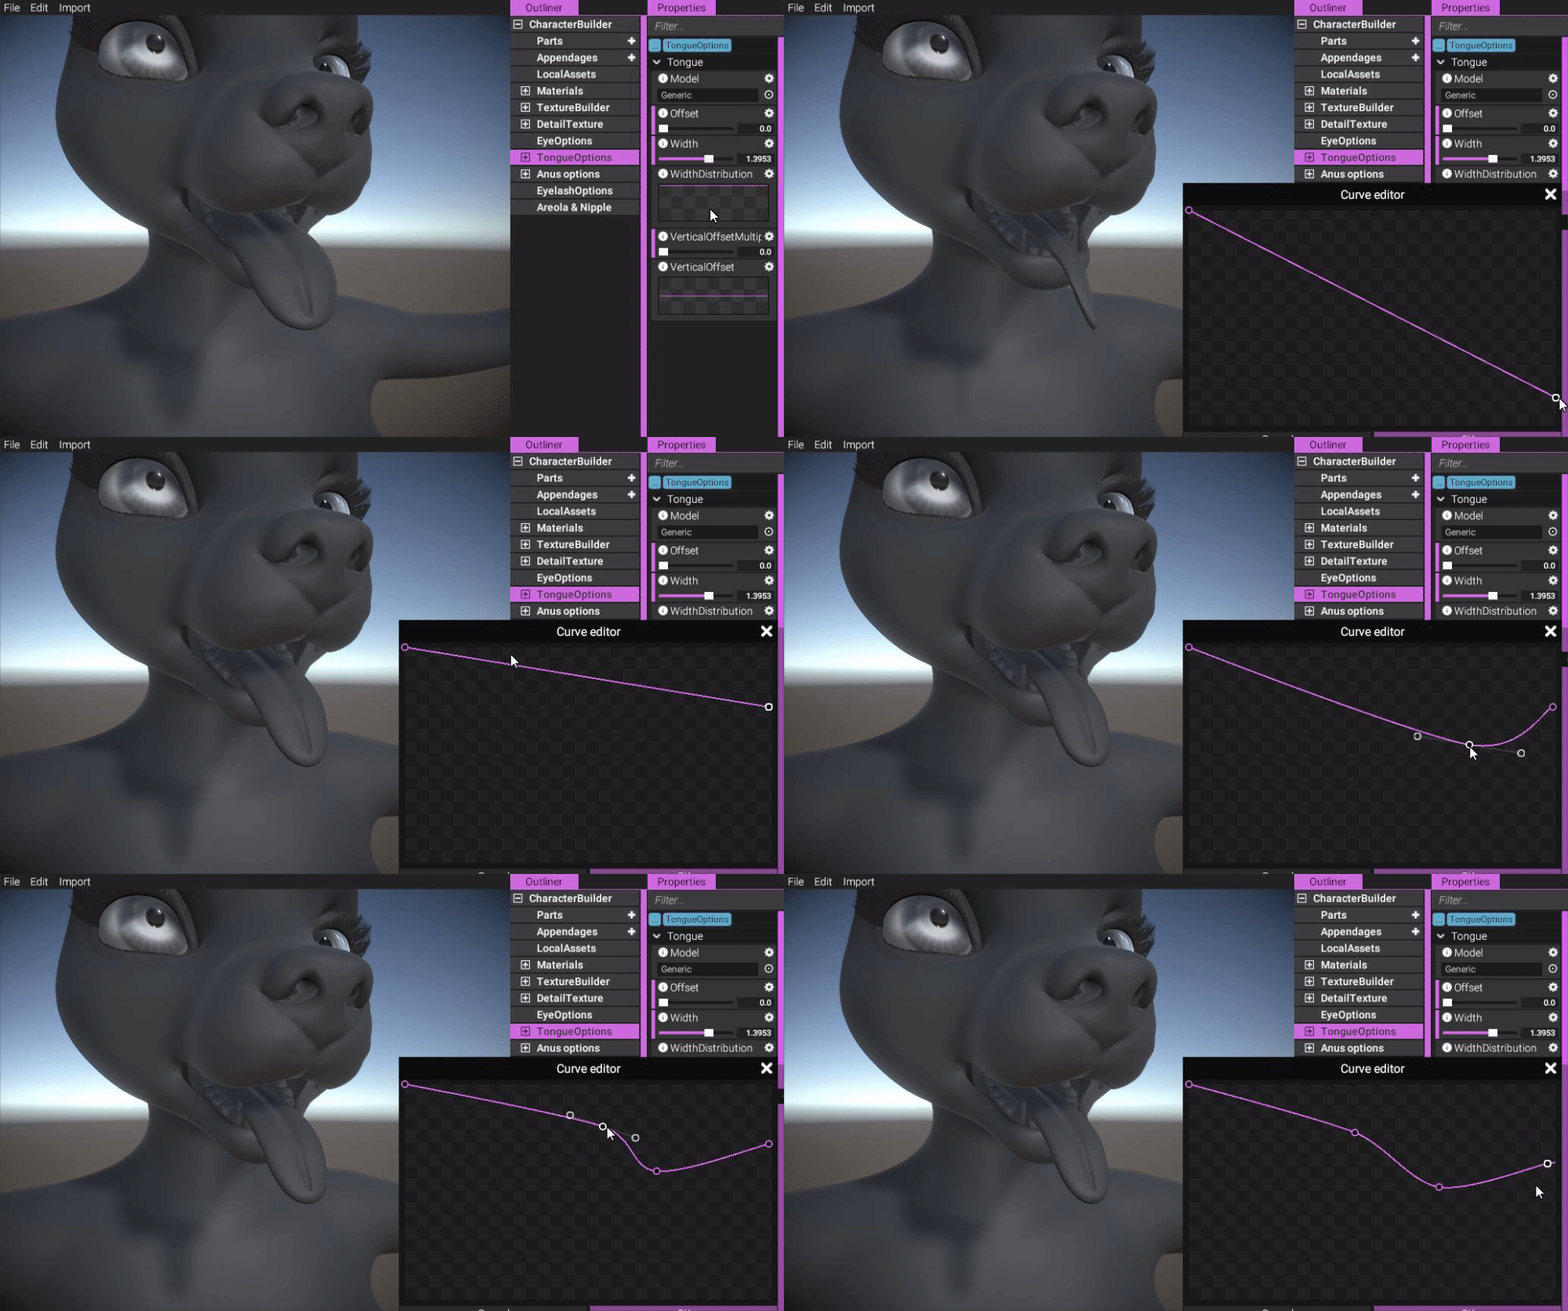
(Using the width curve property, you can configure the width along the length of the tongue.)
https://gyazo.com/961ccbbc46c1813a2f0994d2699673d8
You can also configure how much to deviate away from the predefined spline using the vertical offset properties.
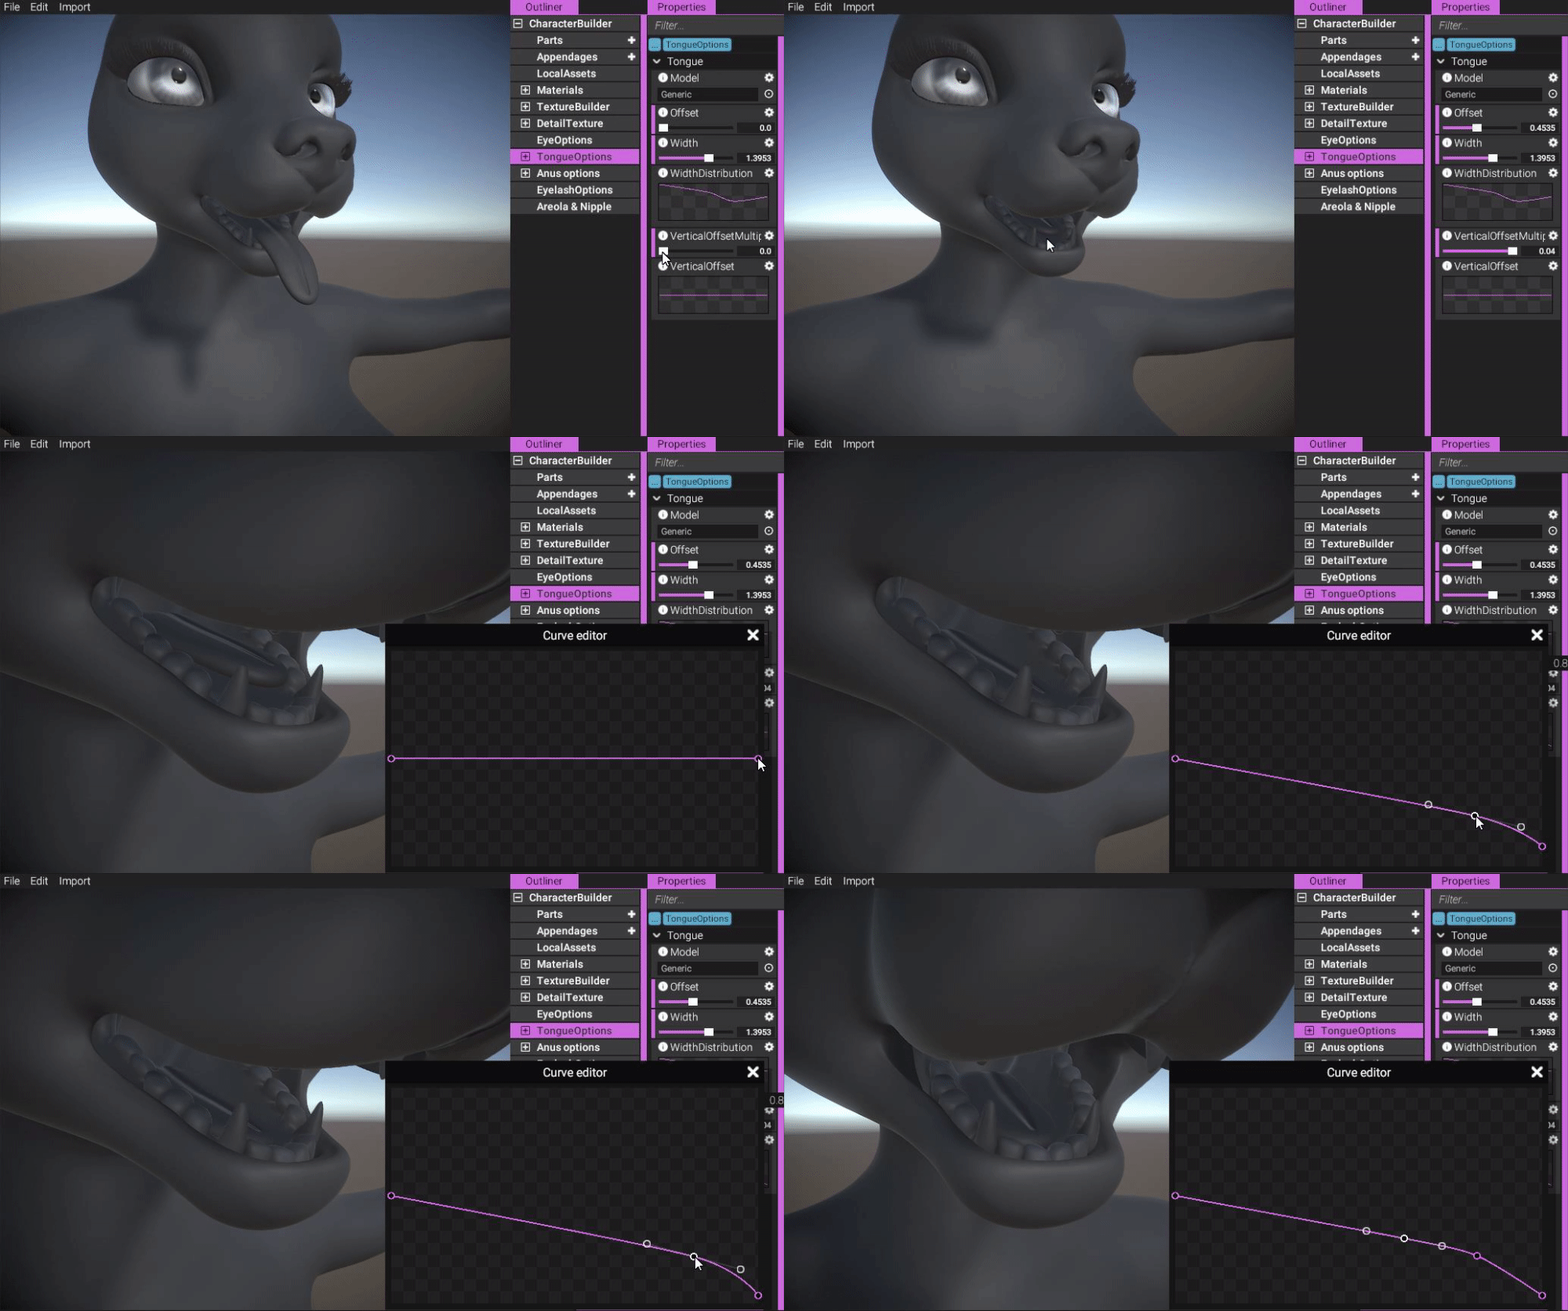
(Configure offset from tongue spline in spline normal direction.)
https://gyazo.com/9719cede17e608883a99822c4de4e2fb
Both vertical offset curve and multiplier depend on eachother. If vertical multiplier is 0, then the curve won't do anything.
What's left to do
We need to finalize the actual content (body types, parts, textures). This is something we'll do meanwhile implementing the remaining systems we're describing below.
We need to create systems for saving and loading characters. Much of this work has already been prepared, but actually finalizing it will take some time. Given the complexity of the app, there's no knowing how many problems we will run into.
We also need to implement a system for publishing as well as browsing through characters that people have uploaded (essentially implement the backend/cloud service of the app).
Furthermore, we want to get a simple pose and simulation mode into the app from the very start, because otherwise the characters would just stand still in a T-pose, and that's quite boring. Since models are modeled in zero gravity, i.e. with tits standing right out etc, we think this mode is necessary to help users understand that the T-pose and zero gravity are just temporary things present during authoring, but that's not how the characters will finally look during actual simulation.
There are some question marks regarding how corrective shapes for tits in different angles should be authored. Previously we have authored these manually, but that was before the character creator, body types and skeleton adaptation tech, which make authoring such shapes manually much more complicated this time around. We want to explore ways to automate this shape generation process altogether, and we don't know how long that will take or if it is even possible at all.
A shader for hair is another thing we need to get into the editor.
We also want to create some example characters that you can learn from. We think this is very important. It's my personal belief that learning from examples is the most efficient and straight forward way of learning.
Lastly, we need to test the app thoroughly and polish it before we feel ready to release it for our patrons.
Summary
We're sprinting through the last bits. With anus, eyelash and tongue options implemented, we feel like we have enough features to start wrapping everything up. No more character option systems will be implemented for the initial release. There are still some more systems we need to create such as saving, loading and publishing, but we're getting very close to a first release.
Comments
Greetings. I've been a follower of your project for quite some time and I'd like to say that you've made a fantastic work with the first project. It's unlike anything I've seen ever before.
However I do have a few questions regarding the development stage.
Out of curiosity, how many "heads" or rather, species of heads will there be implemented in the game? Various types from the Canidae and Felidae families will be implemented into the game no doubt. However will less popular animal species like eels, eagles, penguins and the likes be available?
I also understand that this is first and foremost a furry game with a specific target demographic, but is there a slim chance that non-furry things will be available? Things such as faceless monsters, hybrids or maybe even human faces? Just curious.
Thanks!
Thank you for the reply! The fact that there is no limit for the implementation number is wonderful news, however I'm not so sure about the voting system... Not to diminish the idea of course, but I've been around the furry fandom long enough to know that the popular things prevail most of the time.
(Some of the most obscure fetishes that were brought to the face to the fandom are still there and largely there's still some stereotypical "sexual behavior" that's intertwined with more mainstream species. Female bovines always have bigger breasts, foxes are always submissive, bigger and meaner carnivores are more likely to be dominant e.t.c. Which is why people usually rely on the generic rabbit and wolf votes.)
I don't know, feels like a lot of potential creativity and possibilities will be lost if animal species, or rather animal classes are decided through a popularity vote. I don't have anything against that, it's just a tad unintuitive in my eyes. Heck, I'd rather just have you decide the species. It is your game after all.
Nevertheless, amazing stuff so far.
Also one more question, I like the faceless designs of the prototypes you guys made. Will something like that be available in the finale? I'm weird...
Sure, I understand. Catering only to the most popular vote wouldn't be a good thing, but a voting system can be a good way to better understand what exactly it is our fans want to see. Sometimes we may implement the most popular thing, and other times perhaps something else. Ultimately, it is we who decide what we implement.
Thanks again.
Orifices will be dynamic and adjust to shafts inserted into them. We may implement some form of default/automatic gaping, but if not, you will be able to tweak it yourself through sliders.