Howdy, Stranger!
It looks like you're new here. If you want to get involved, click one of these buttons!
Categories
YL2 - Balls & body proportions
We hope you're doing great!
We've managed to take some great strides this month. Let's just jump right into it!
Blending tech deferred renderer adaptation
In our post detailing our struggles with achieving mesh blending, we explained that we had to abandon the deferred renderer in favor of the forward renderer in order to make the tech work as desired. This was however never something that sat well with me, as a deferred renderer is simply just more efficient than a forward renderer (especially if you have multiple dynamic lights), and if there's something I value in games and apps, it's performance.
For the initial release, Pegashis has been working on a new environment that has yet to be shown to our fans. (It will be somewhat of a surprise.) This environment is quite intense, and so it pushes hardware a bit. When I finally got my hands on this map and started making tests, I discovered to my dismay that the forward renderer simply wouldn't be a viable option for us. When using the forward renderer, we were essentially cutting the framerate in half compared to the deferred one. Clearly this was unacceptable. And so, it was back to the drawing board for me, trying to figure out a way to make mesh blending work in the deferred renderer.
After lots of testing and frustration, I'm happy to say that we finally have a mesh blending tech that works with the deferred renderer. Below, you can see proof of this:

(Our new mesh blending tech now works in the deferred renderer. The framerate is capped and the scene is nearly empty, so in this case it doesn't make a huge difference. But for bigger environments, it does make a big difference in performance.)
This is great on so many aspects. Not only are we gaining frames from using the deferred renderer in itself, but we also no longer have to render character normals in a custom pass, as this is essentially given to us for free by the deferred renderer. So with that, we have additional frames saved. And as if that wasn't enough, we were also able to eliminate the grab pass from the mesh blending tech, making it even more efficient and saving even more frames.
I don't think I can adequately express the joy and relief of achieving these things!
Kickass bone scaling
Revamping bone scaling was always something I intended to do before initial release, but it wasn't something I had originally intended to do this month. However, one day I didn't wake up quite as well rested as one needs to be in order to work on new and difficult things, so instead I chose to revisit bone scaling, which seemed like a simpler task. And then work sort of just continued on that path. It turned out to be a slightly more complex task that I first anticipated!
Originally, bones were only possible to scale uniformly, i.e. you couldn't make a leg shorter without also making it thinner. This severely limited the amount of things you could do with it, and actually making any meaningful use of it at all for limbs was difficult if not flat out impossible, as demonstrated below:
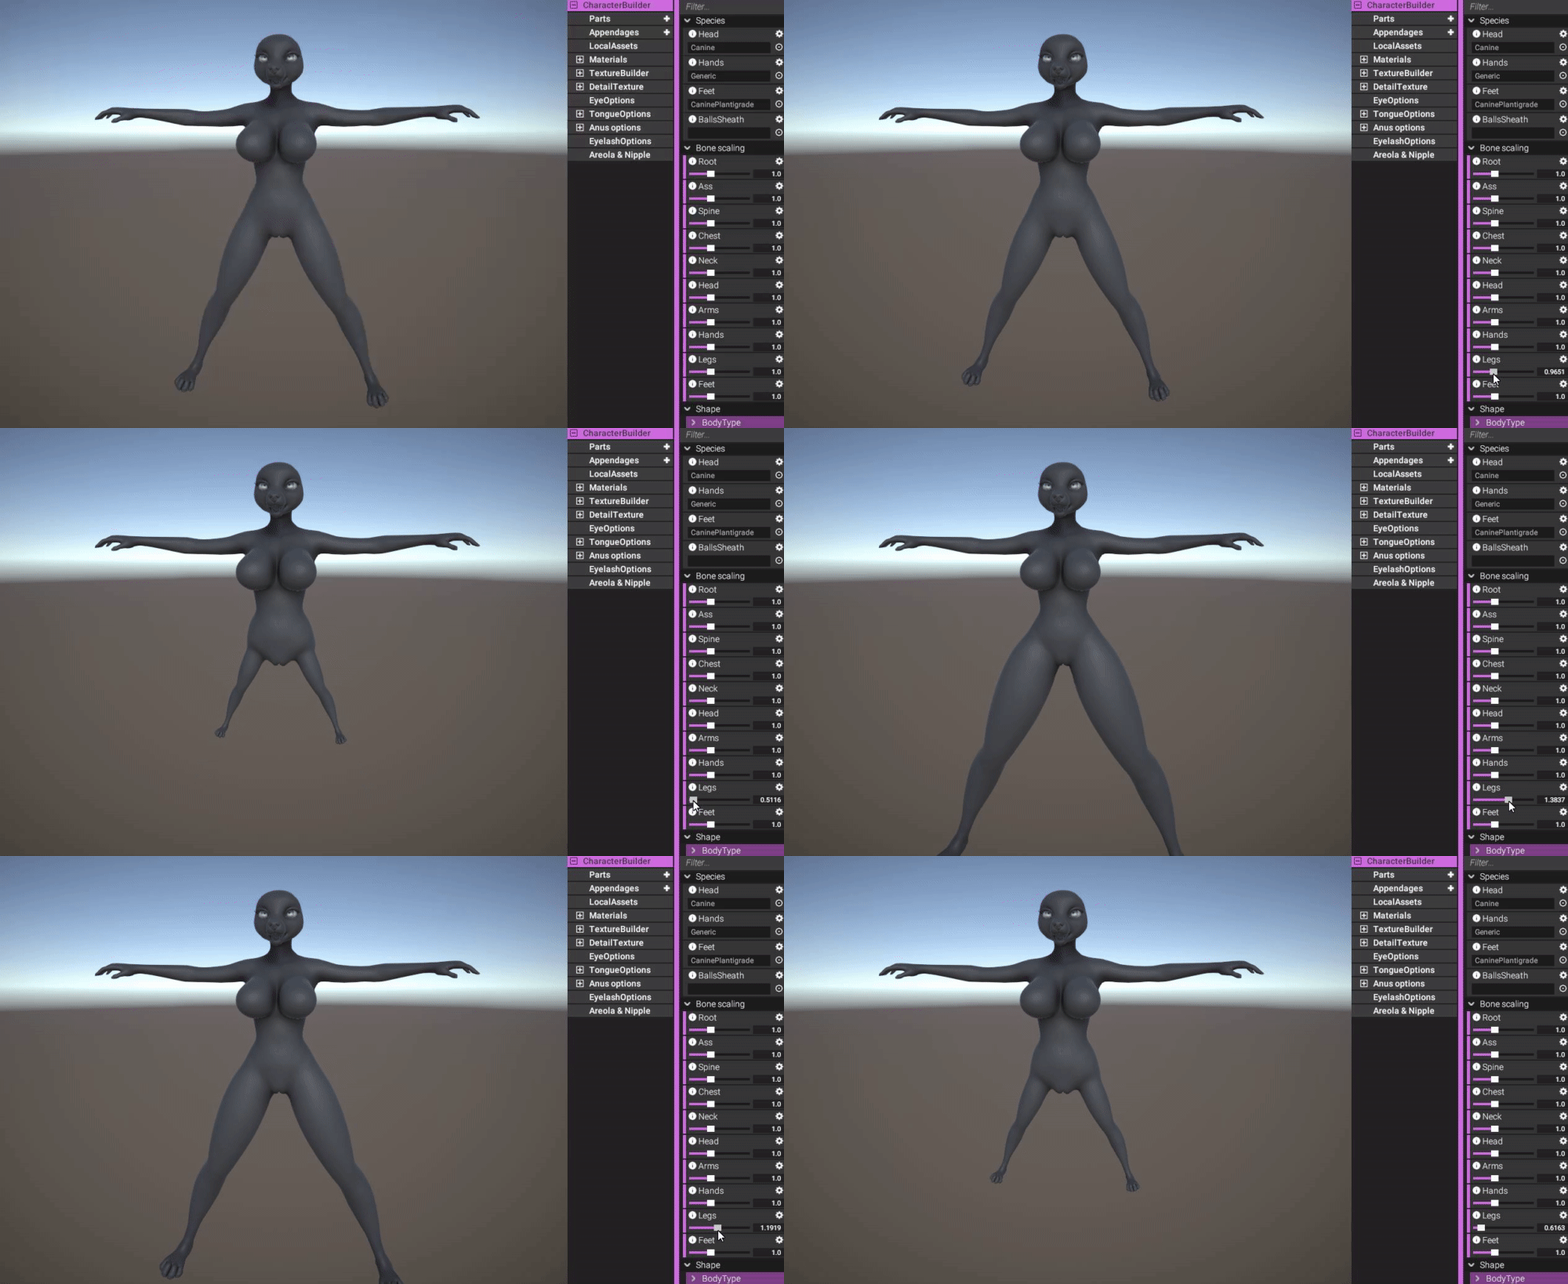
(Our old scaling method. Since it's uniform, it's hard to use it in a meaningful way.)
https://gyazo.com/6ec537b1f4a79a544e4d9bc19c5a6954
So for starters, what we wanted to do was make it possible to scale bones on each individual axis (X, Y and Z). This would not only require us to rewrite the bone scaling tech itself, but also implement visual elements for the display of these types of properties as well as implement their behavior.

(A new cell view for Vector3 properties.)
It wouldn't be enough to do just that however. Since bones reside in a hierarchy, it means if you scale a bone that is the parent of another bone, then both bones will be affected. When using uniform scaling, this may not even be that big of a problem (albeit a bit annoying, since it would force you to go back and re-tweak bones at the end of the hierarchy if bones higher up in it were changed), but as soon as you introduce non-uniform scaling, the parents' scaling may affect lower hierarchy bones in an undesired way:
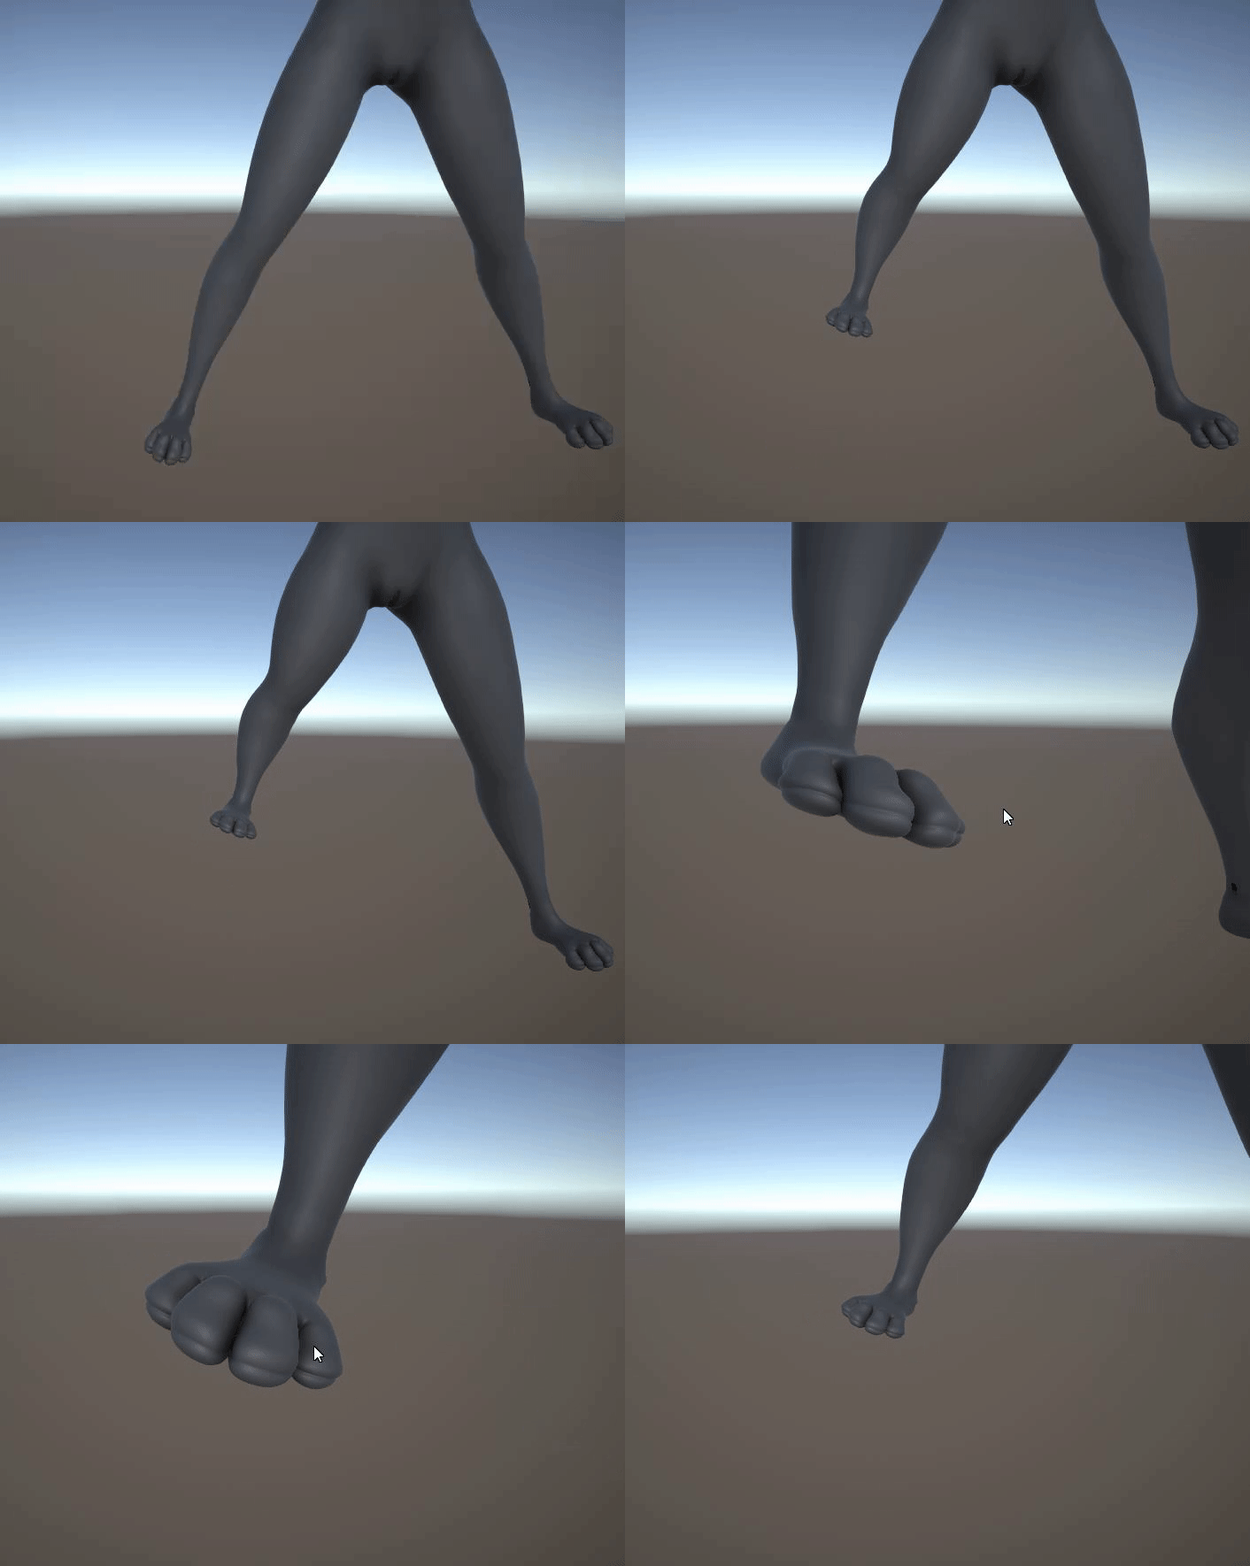
(When scaling the leg, the feet are affected too since they're part of the same hierarchy. This is undesirable.)
https://gyazo.com/05ed743d531085e0d432e9bc5780c613
This isn't necessarily a huge issue, since you could just scale the bones at the end of the hierarchy (in the case above - the foot) to "undo" the parents' scaling. Again, it would be a bit annoying, but still doable:
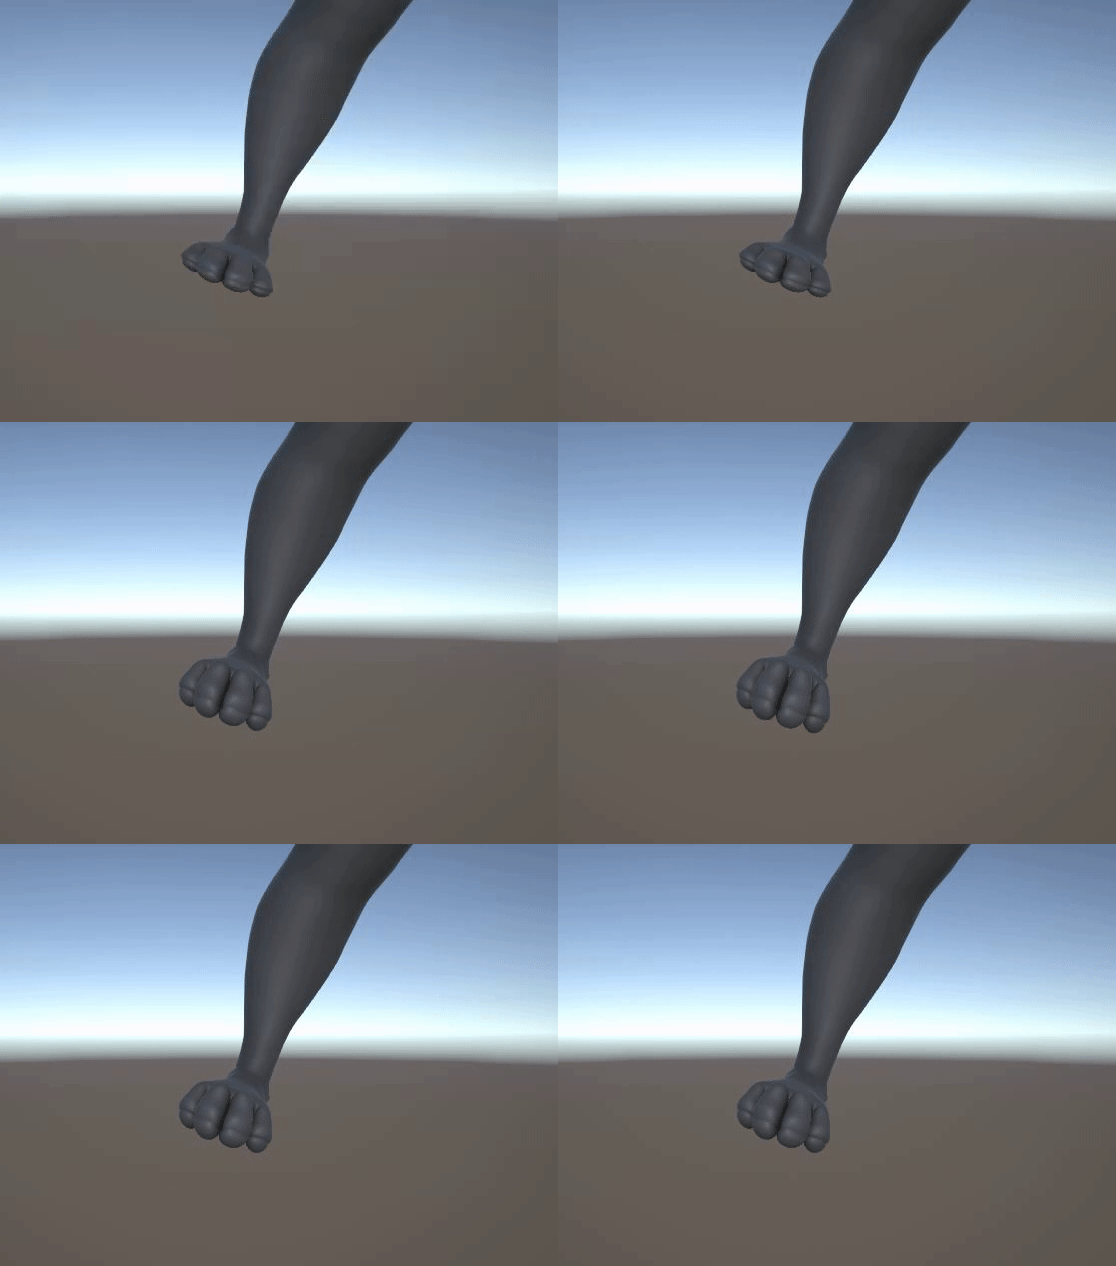
(By scaling the foot after scaling the leg, we could undo the parents' undesired scale. It is however a bit annoying having to do this.)
https://gyazo.com/cbf2a0ca5fdd056cf37f5dc08dcf1e56
Our solution to this is quite simple - we move all bones outside of the hierarchy and scale each one separately. Only when all bones have been scaled do we move them back into the hierarchy again. Then we won't have to scale any bones manually to undo the parents' scaling:
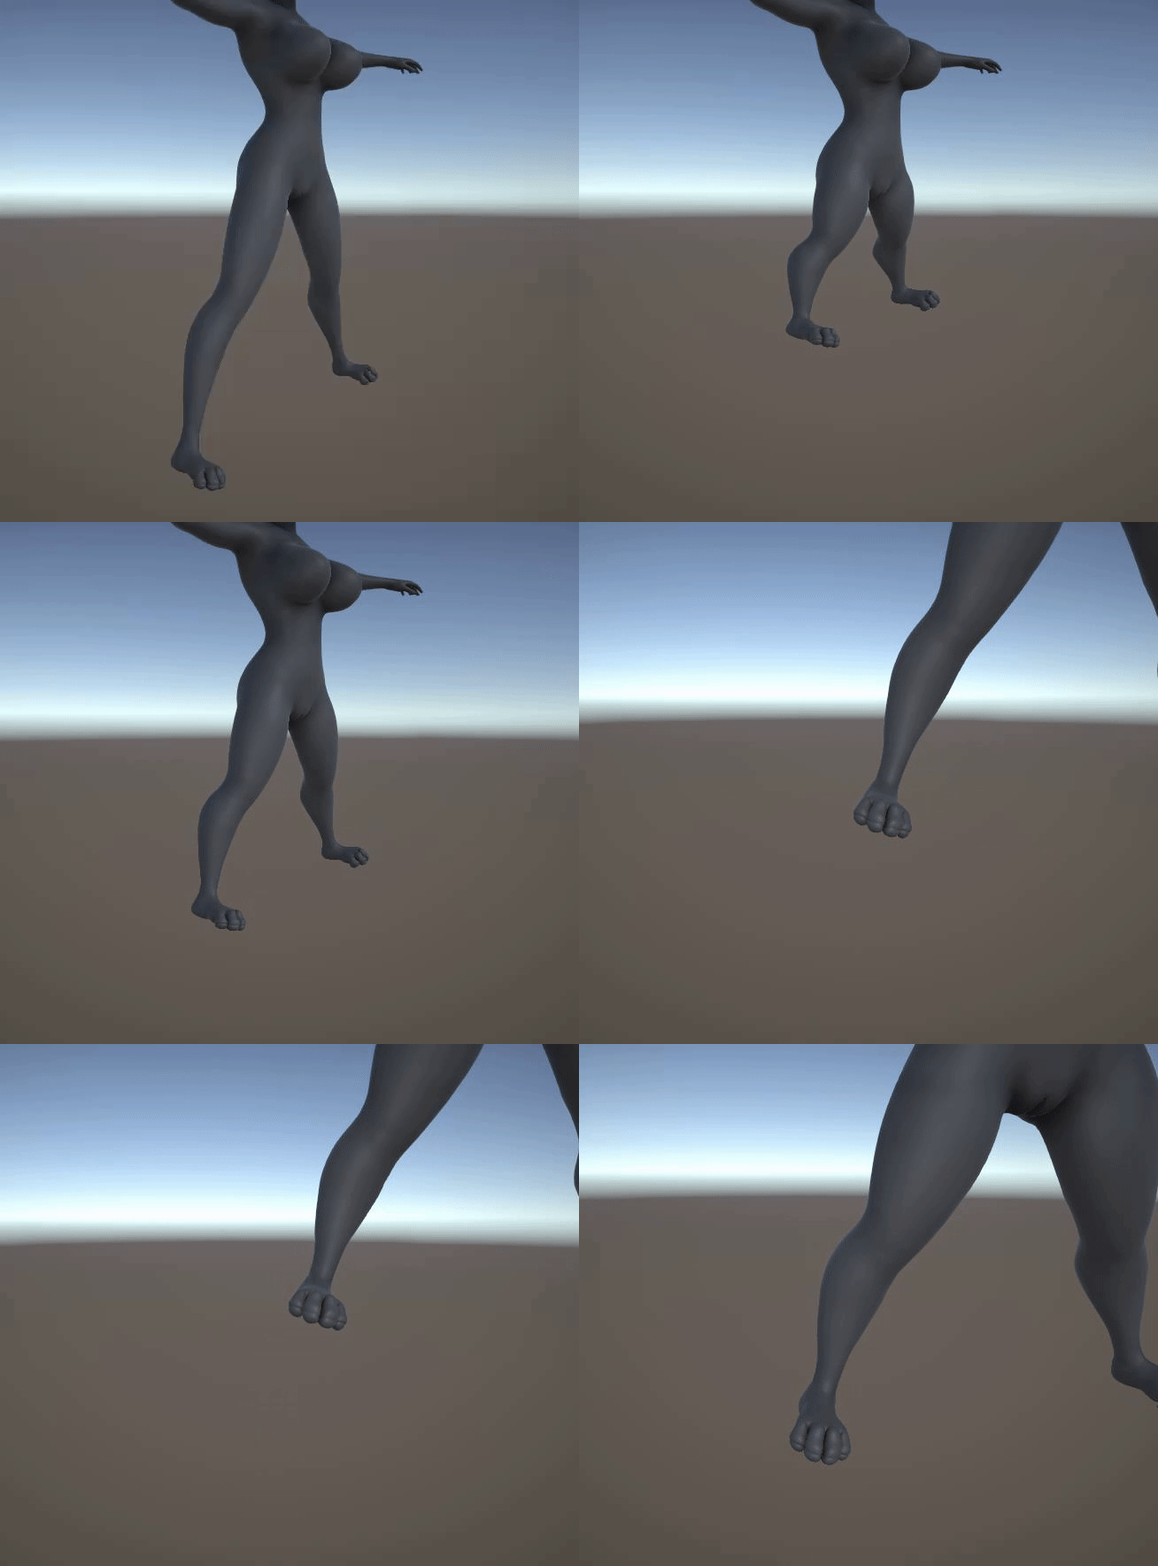
(By scaling bones outside of hierarchy, we can undo the children being affected by their parents scale. In this case, the feet remain unaffected even though the legs are scaled.)
https://gyazo.com/93ca74580f9d7f0d6f801dcd243d1eab
HOWEVER, this only works for hierarchies where bones have semi-aligned axis. Look what happens if we scale bones non-uniformly in this fashion in a hierarchy where bones aren't aligned (axis wise):
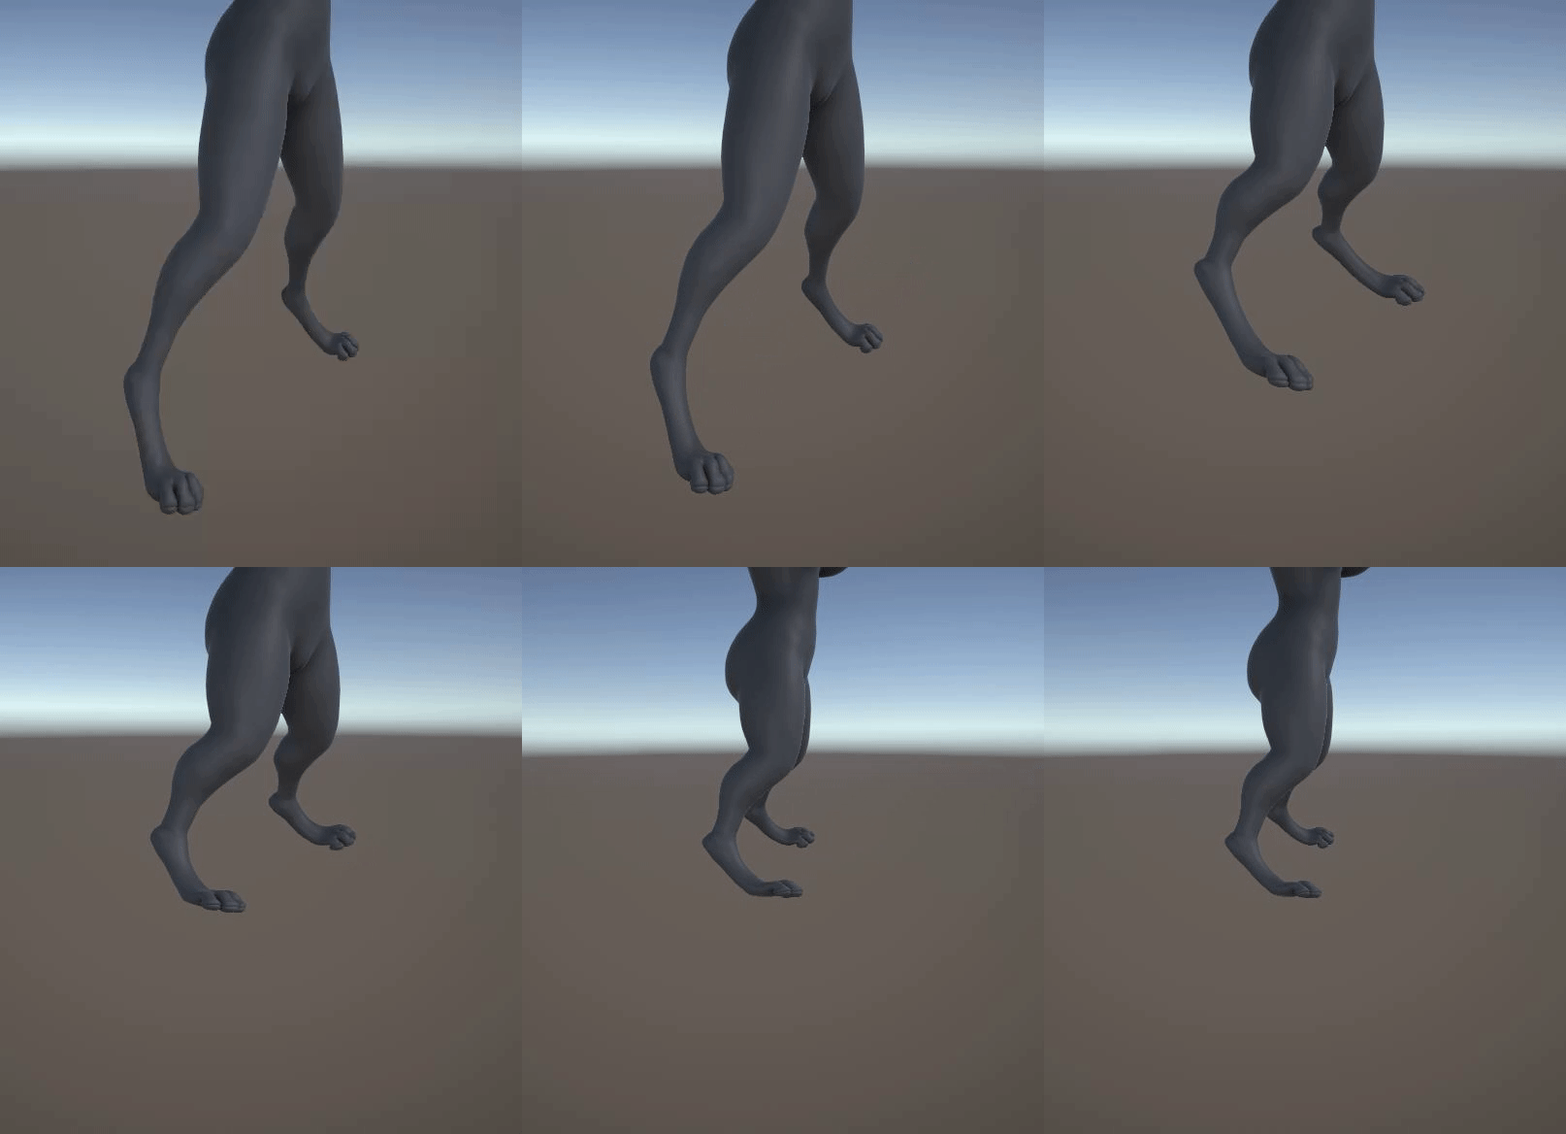
(Since the bones aren't aligned, the children are distorted in a way that is impossible to correct using solely the children's own scaling.)
https://gyazo.com/da4ce5048763248f910706ca25d3994d
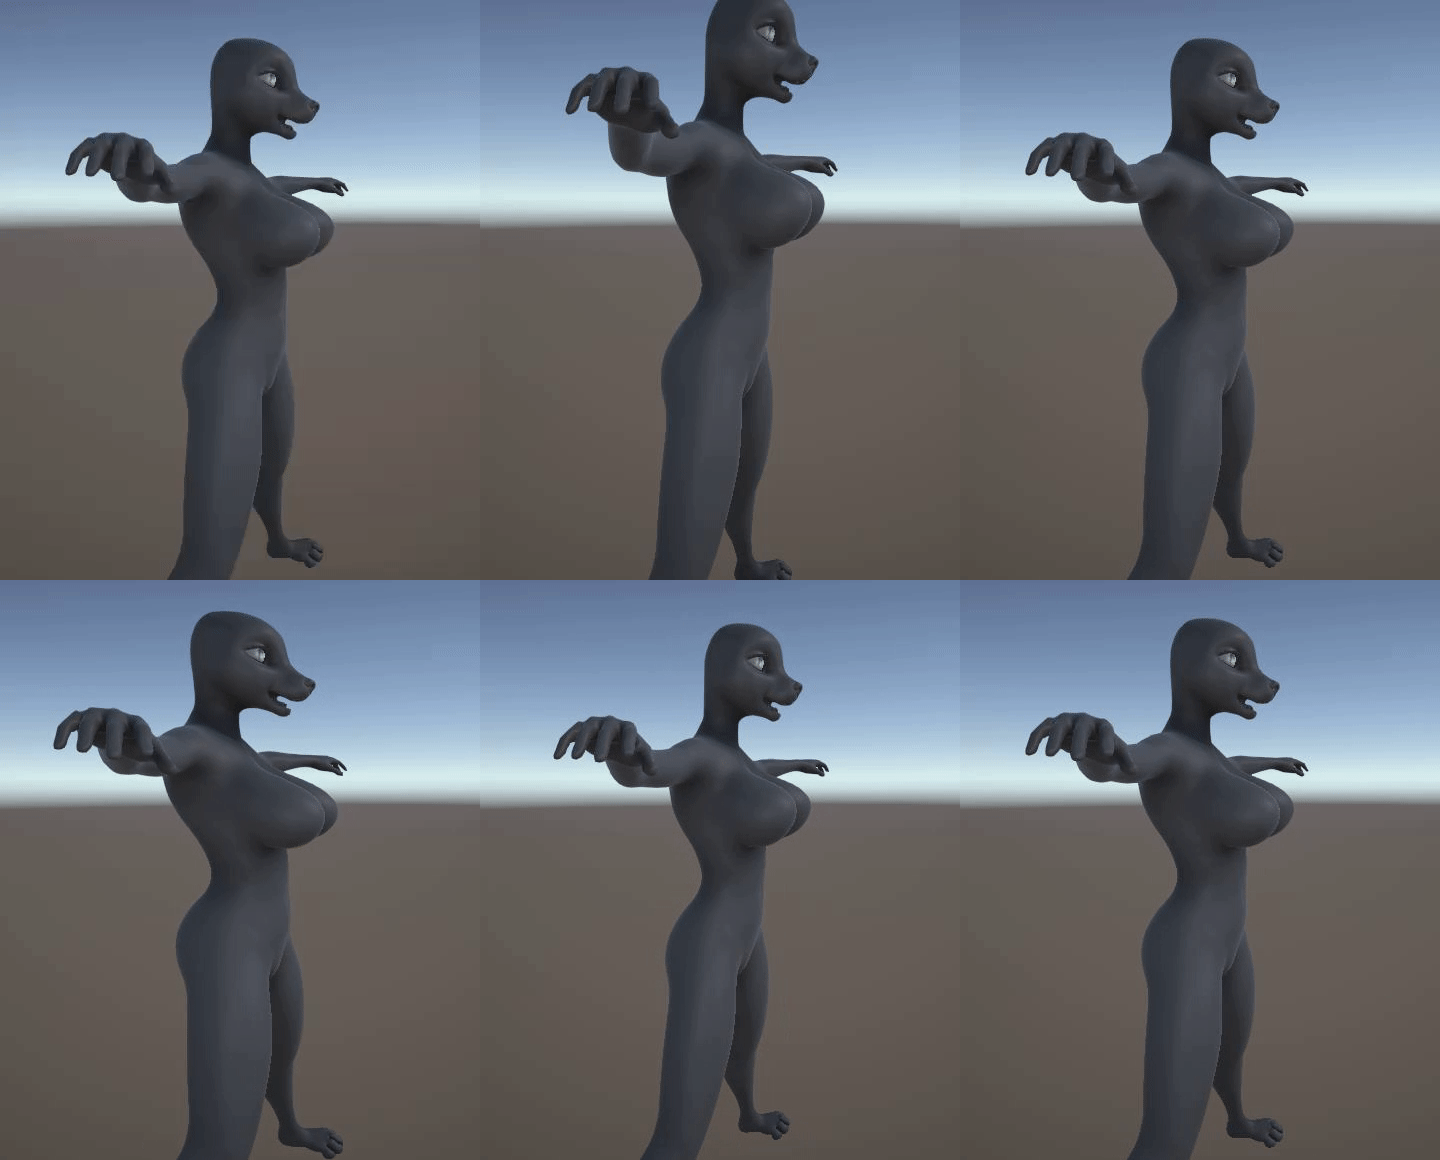
(The whole body is distorted when scaling the pelvis bone.)
https://gyazo.com/09d1bf6d568770aa4ebab9d9f6bfbabe
As you can see, the results are horrific. The parents' coordinate systems distort the child bones in ways that becomes impossible to rectify in the child bones, since the axis aren't aligned. And this is what I meant when I mentioned that this turned out to be a slightly more complicated task than I first anticipated.
I'm happy to say we've been able to work out a solution to fix this problem. So now we're able to not only scale each bone individually without affecting the child bones' scale, but we can do so without causing any distortion. Let's see this in action!
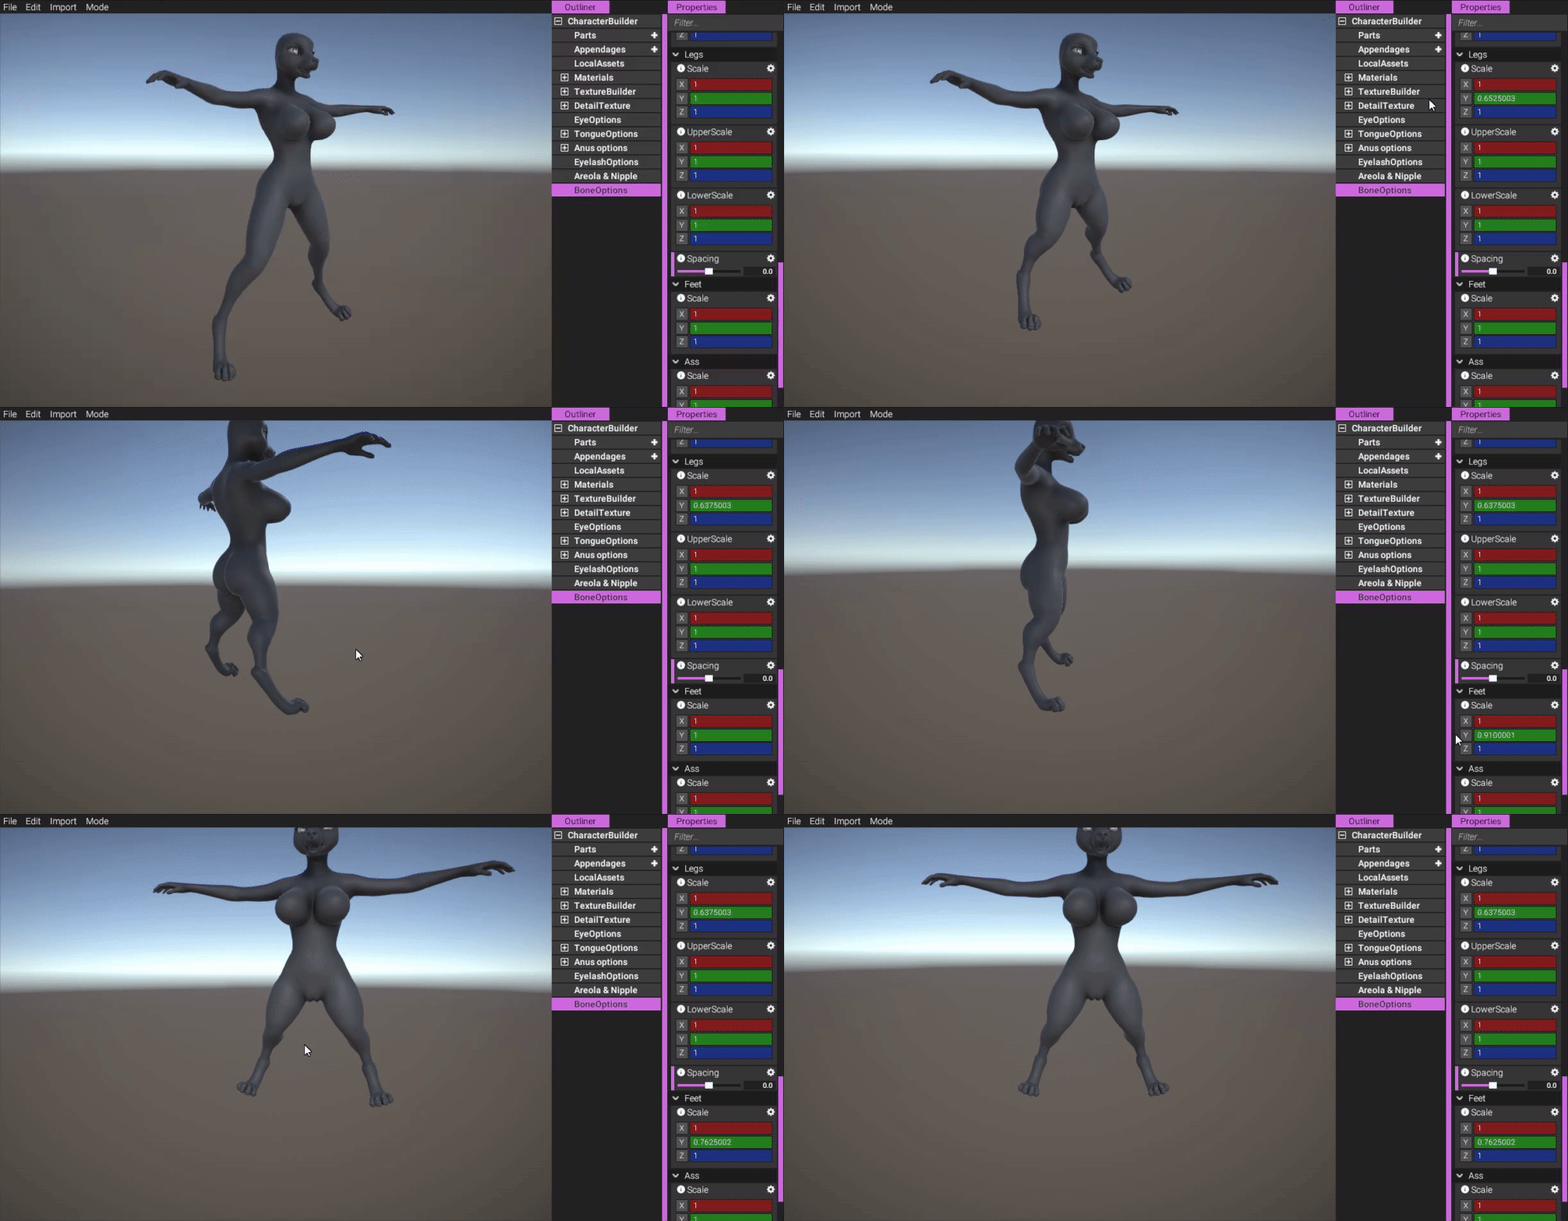
(We're scaling the legs. As you can see, the feet are unaffected and undistorted. Then we can scale the feet along their own axis.)
https://gyazo.com/08ad16678eab639eac6cfd524630ecae
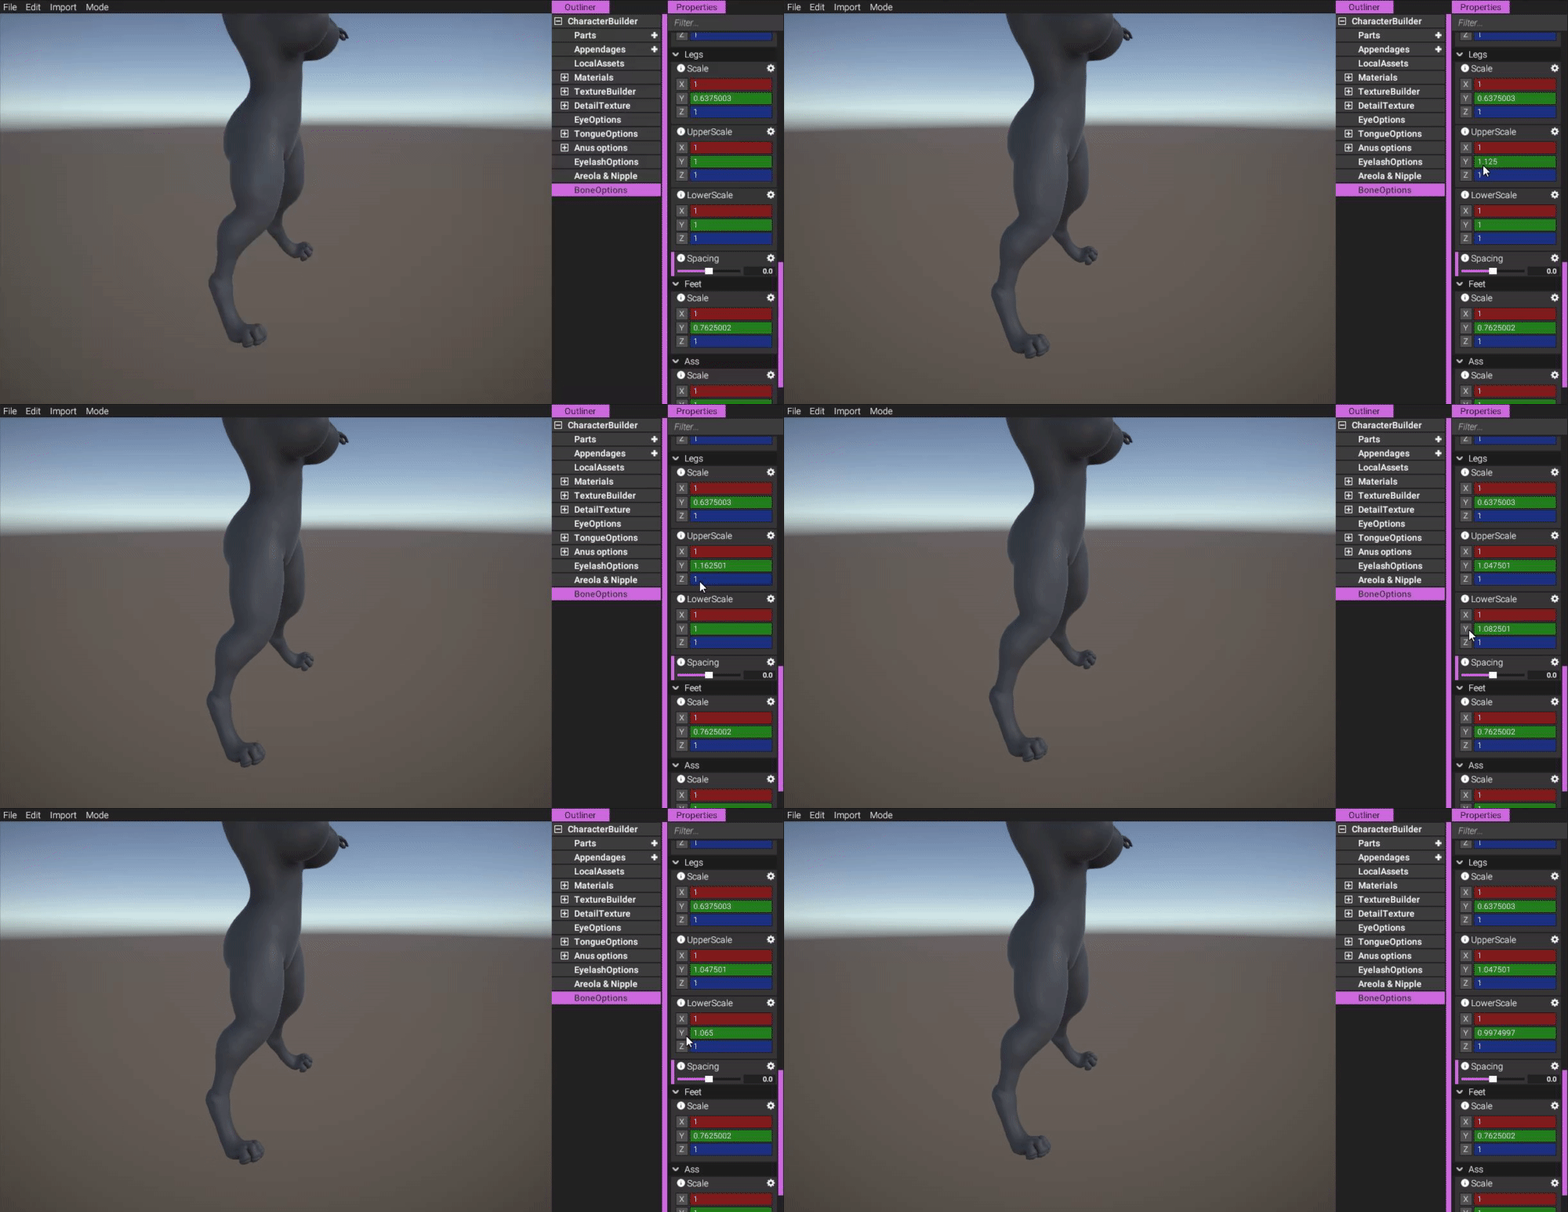
(You can also scale the upper/lower legs separately, if you'd like.)
https://gyazo.com/ec73f0a82906f3f96a61beeb94fcc5d8
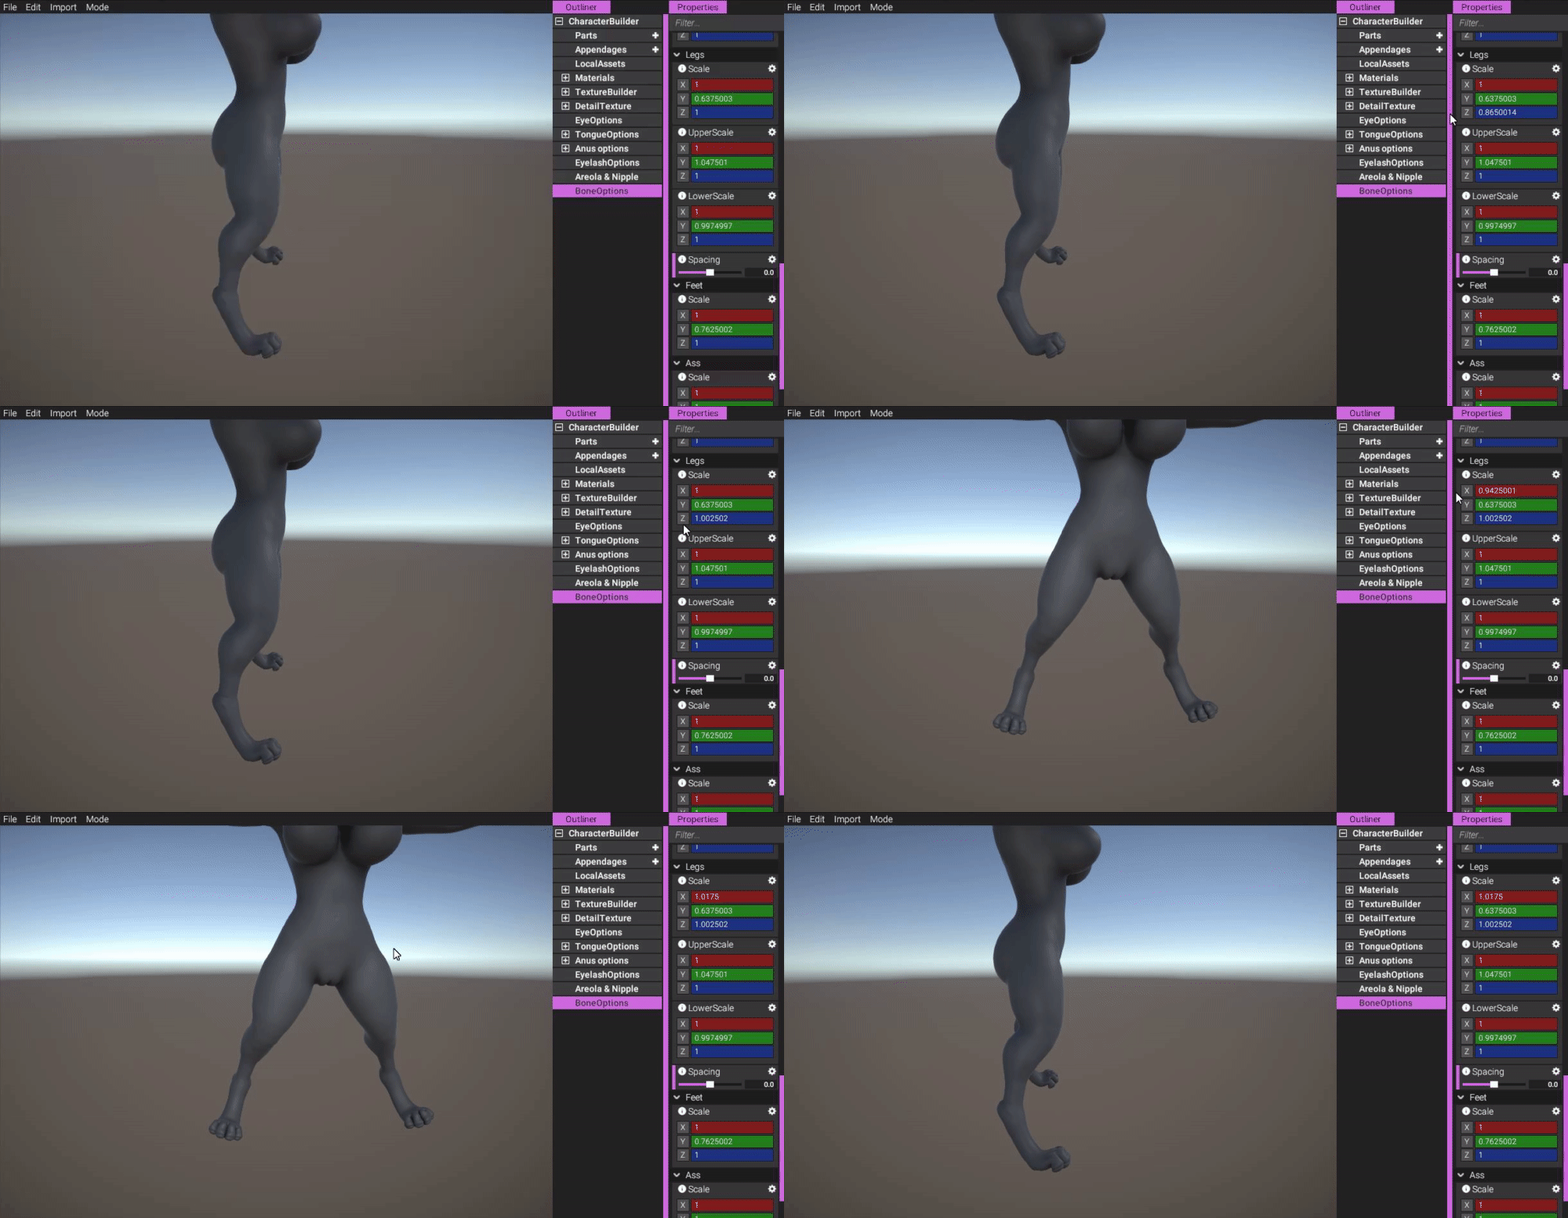
(Naturally, since you've got access to each component in the scaling vector, you can scale bones on other axis as well.)
https://gyazo.com/14ec3cea01d1ca77662f690b9bcb0a5f
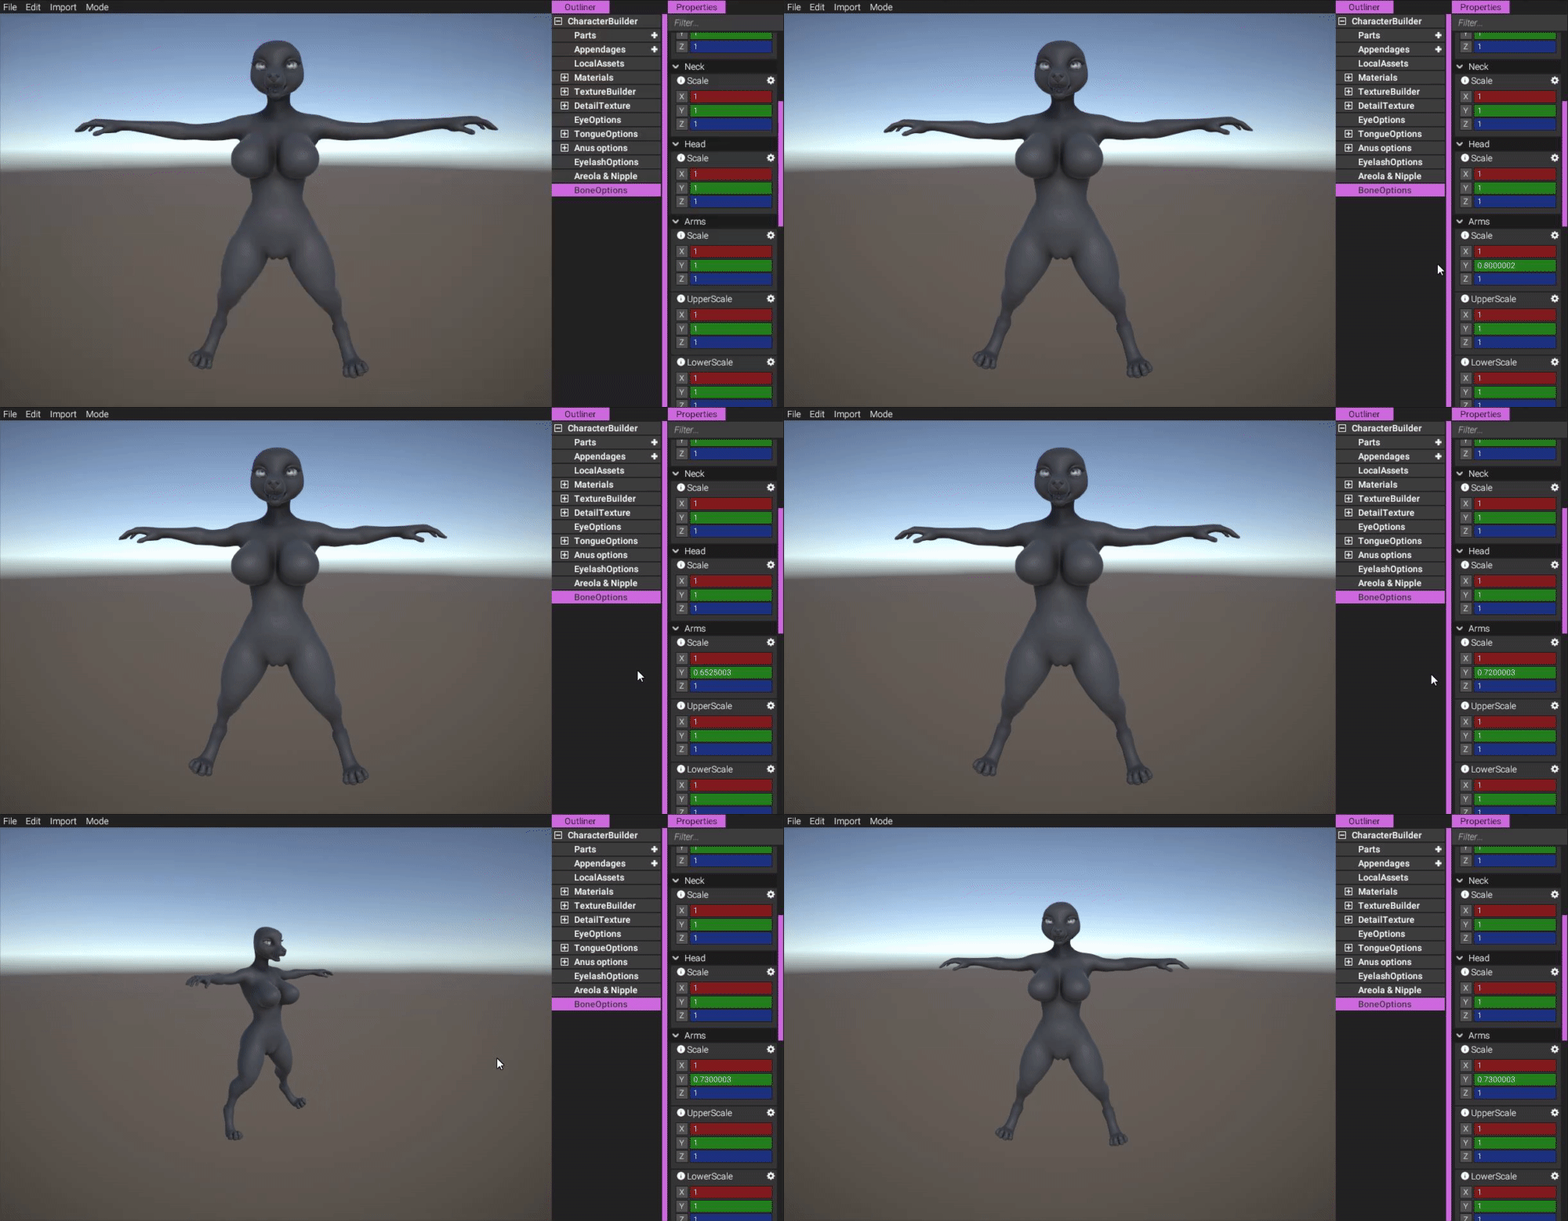
(We're scaling the arms to match the legs.)
https://gyazo.com/227fb0aacafc37ea4ea4b6cabe372e49
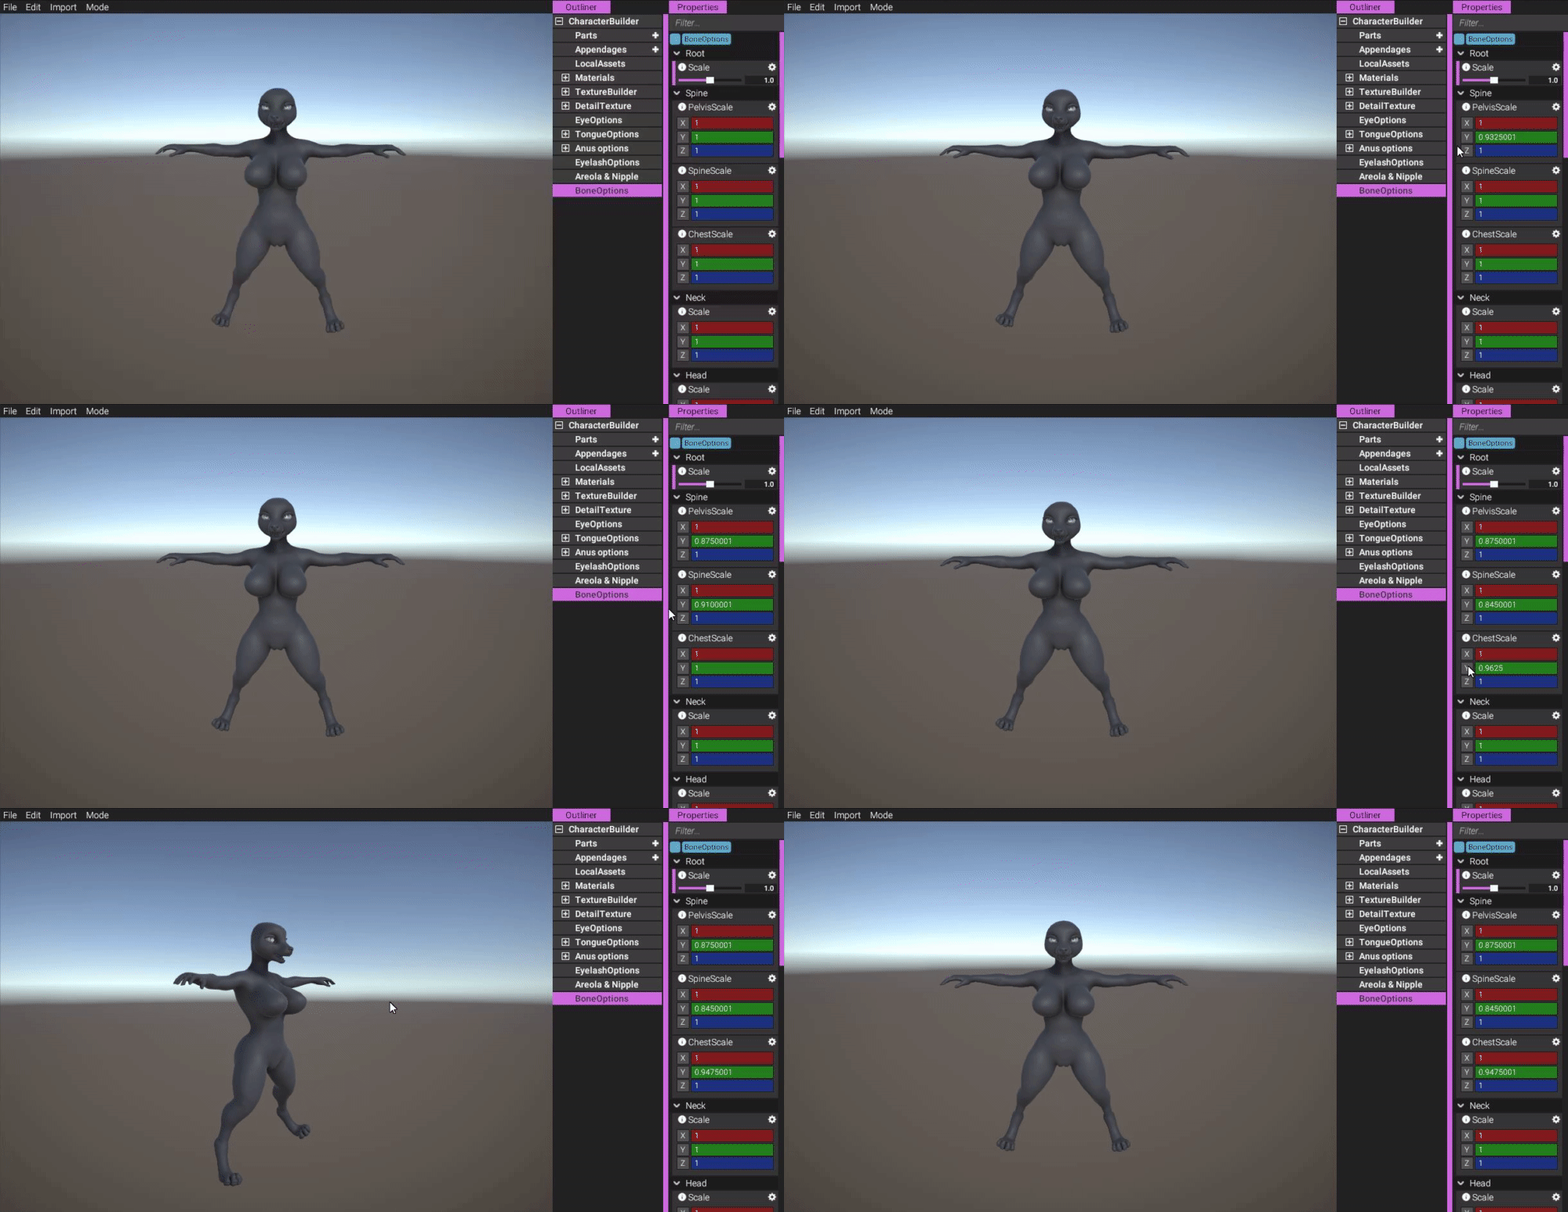
(Scaling pelvis and spine to make the body more proportional.)
https://gyazo.com/62cf2e95aee9a070a2cad4c1ab5c0d23
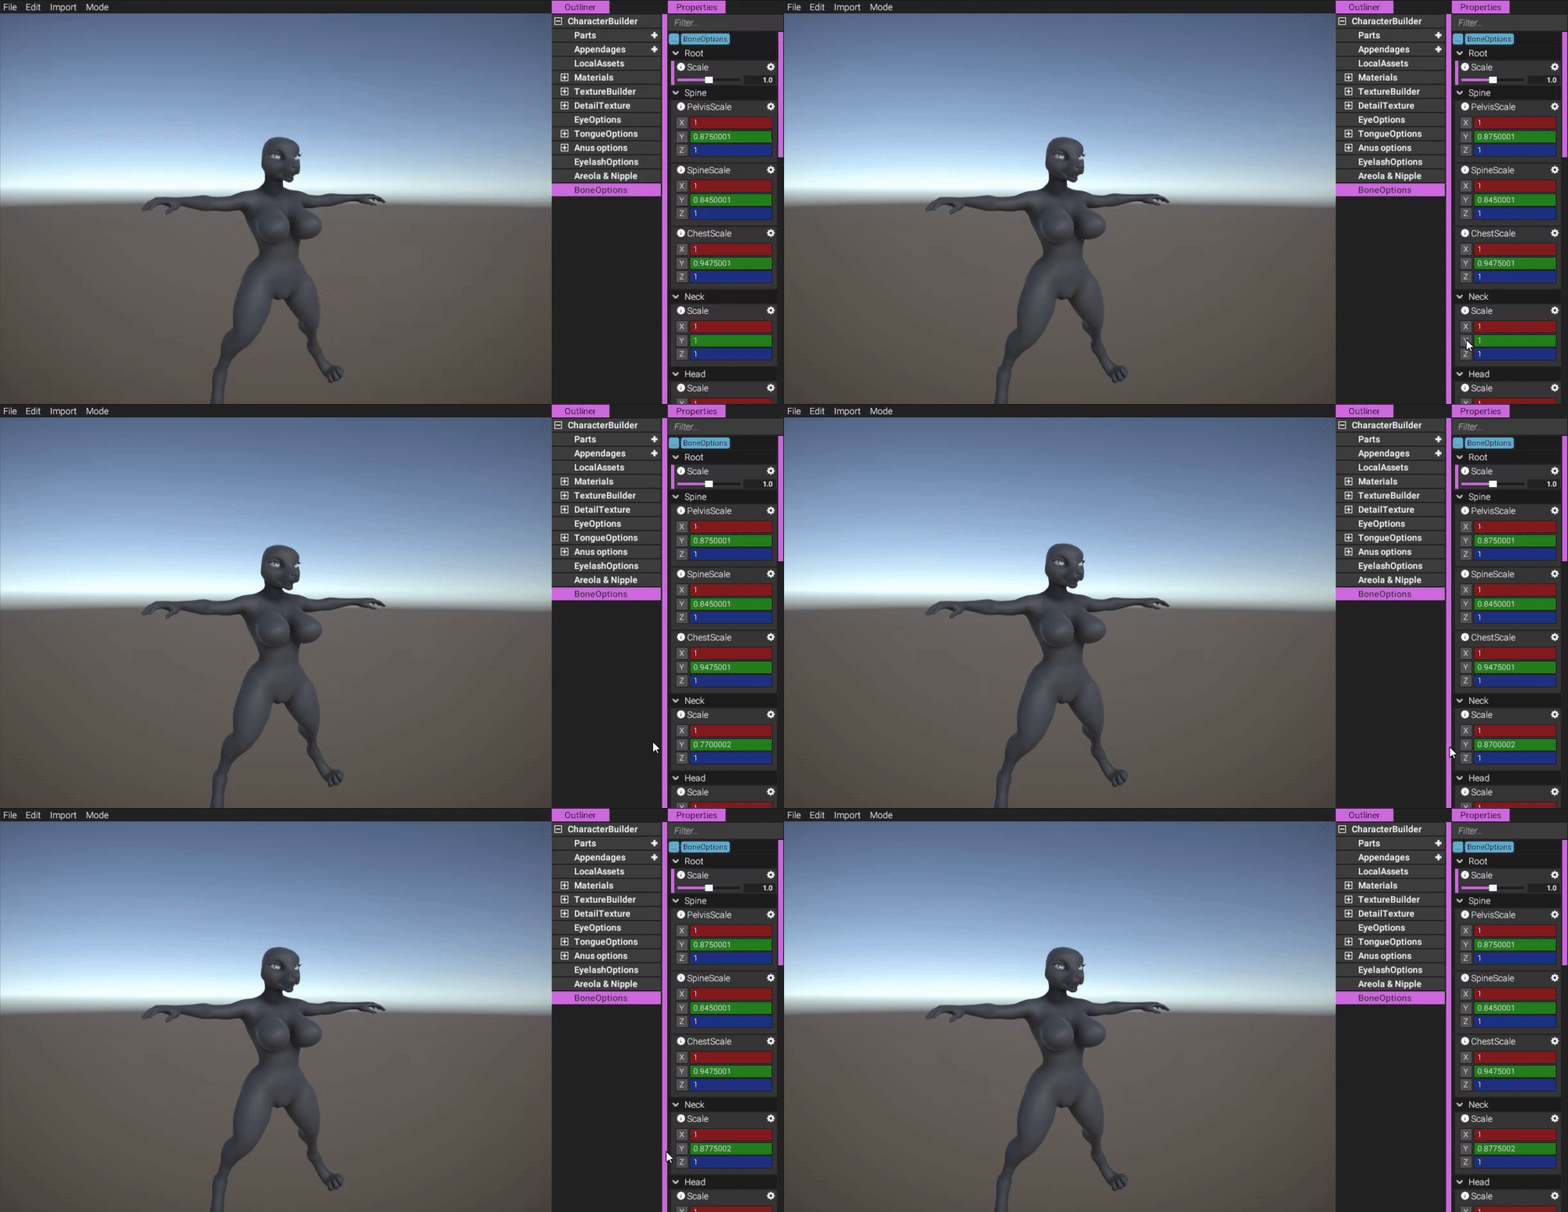
(The neck felt a little long. No biggie!)
https://gyazo.com/3a2da6aedccf7c9a3cb459c667cdcece
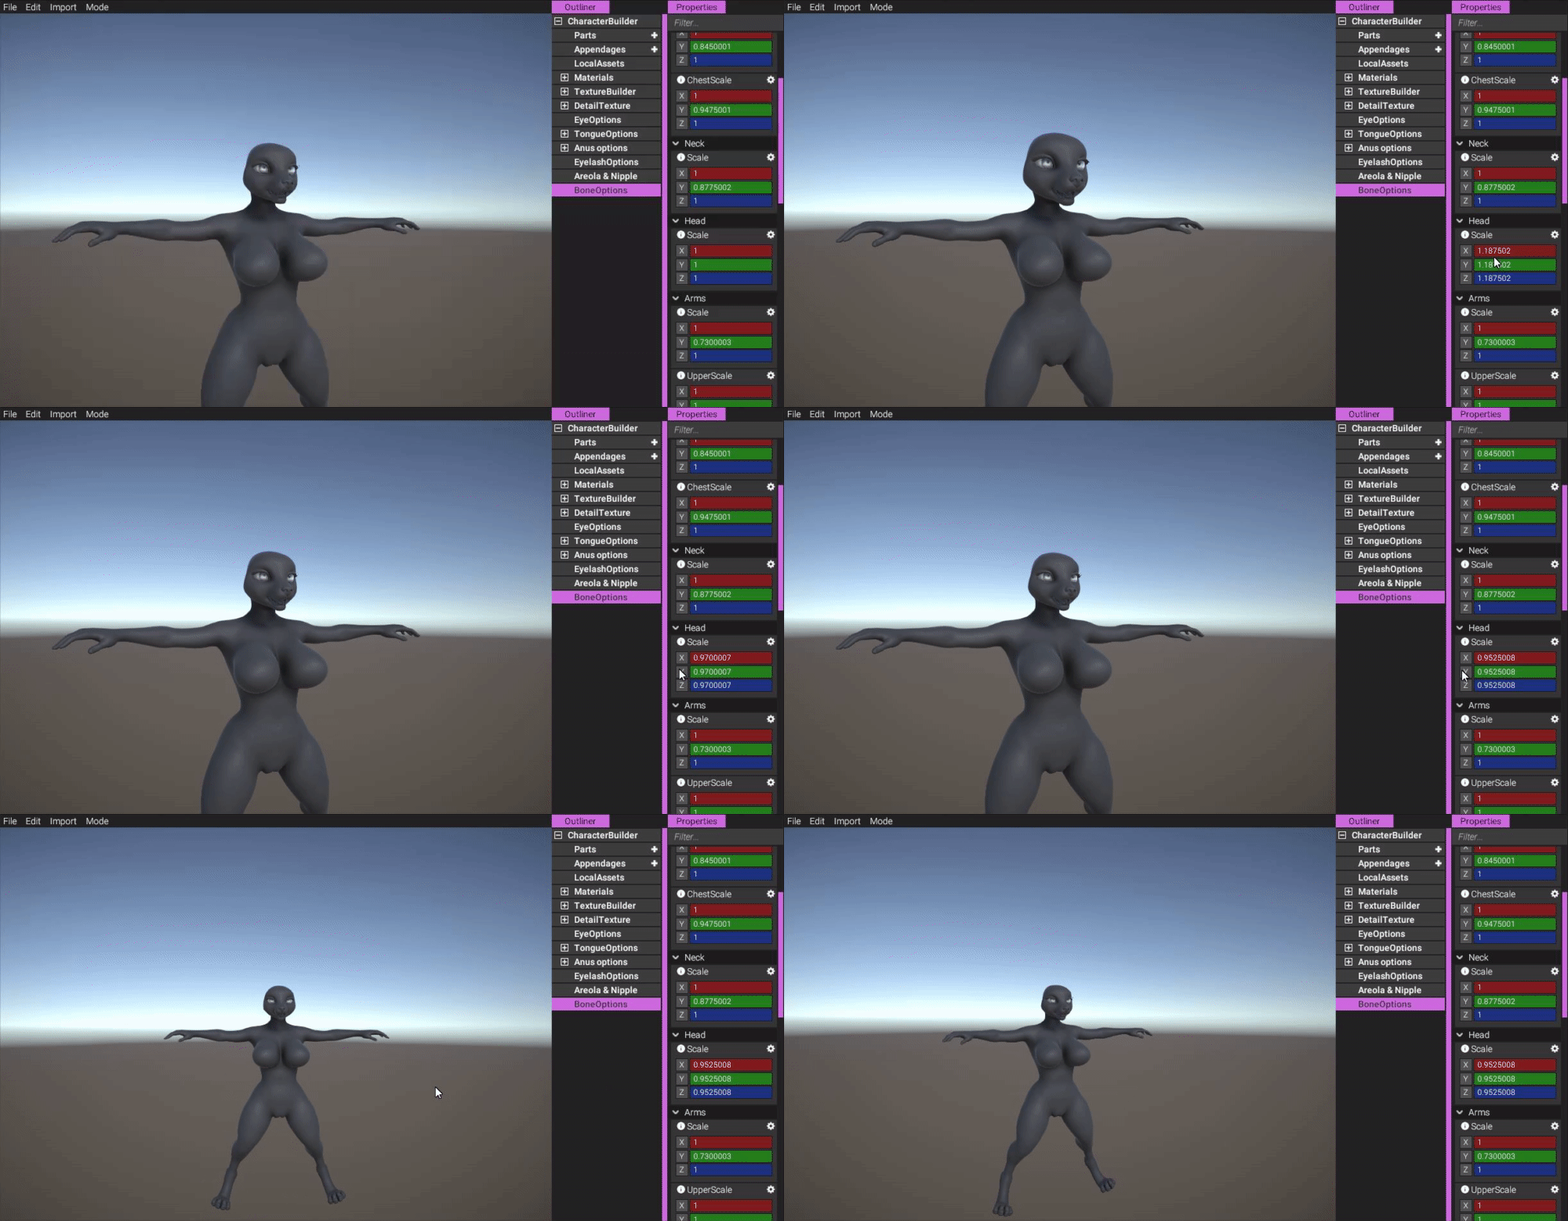
(Scaling the head. You can shift-drag a component to affect all components at the same time, making uniform scaling much more convenient.)
https://gyazo.com/57b2bc8582c6915a6de7fb999b1b8d69
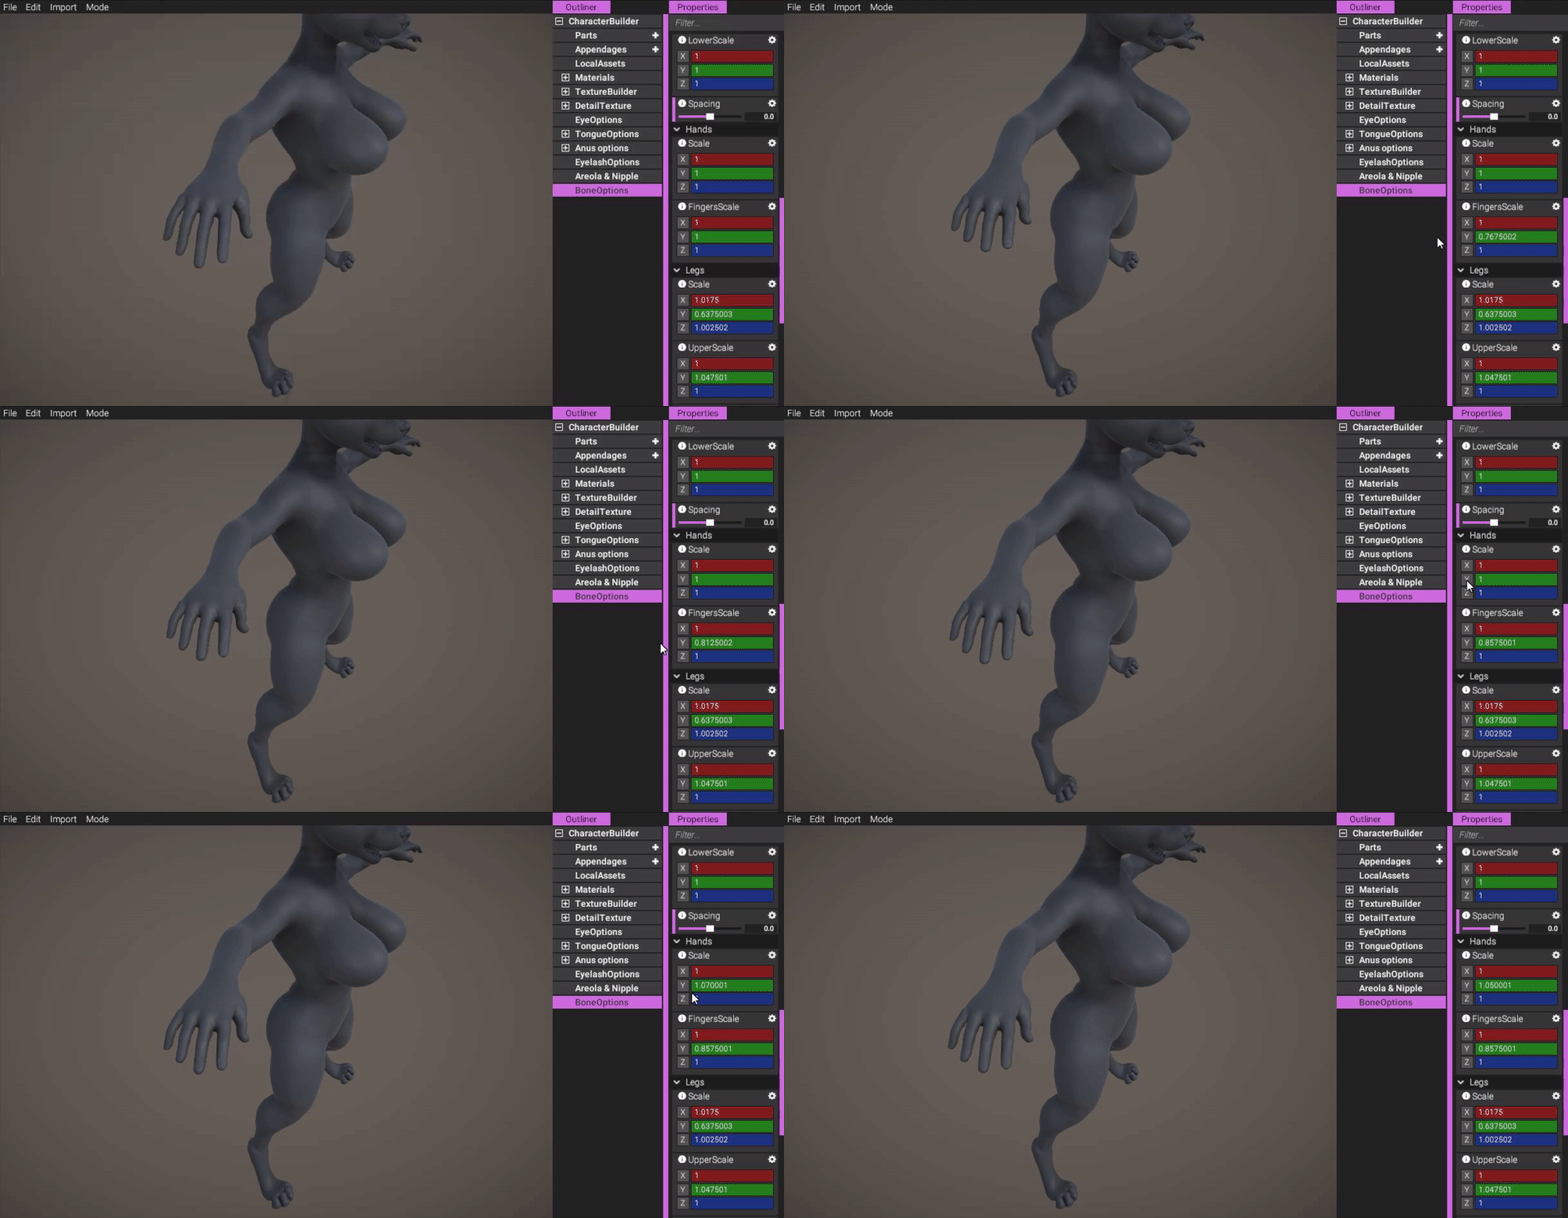
(Naturally, fingers are also possible to scale in any way you like.)
https://gyazo.com/272491c916251cb1e7327a17670a724c
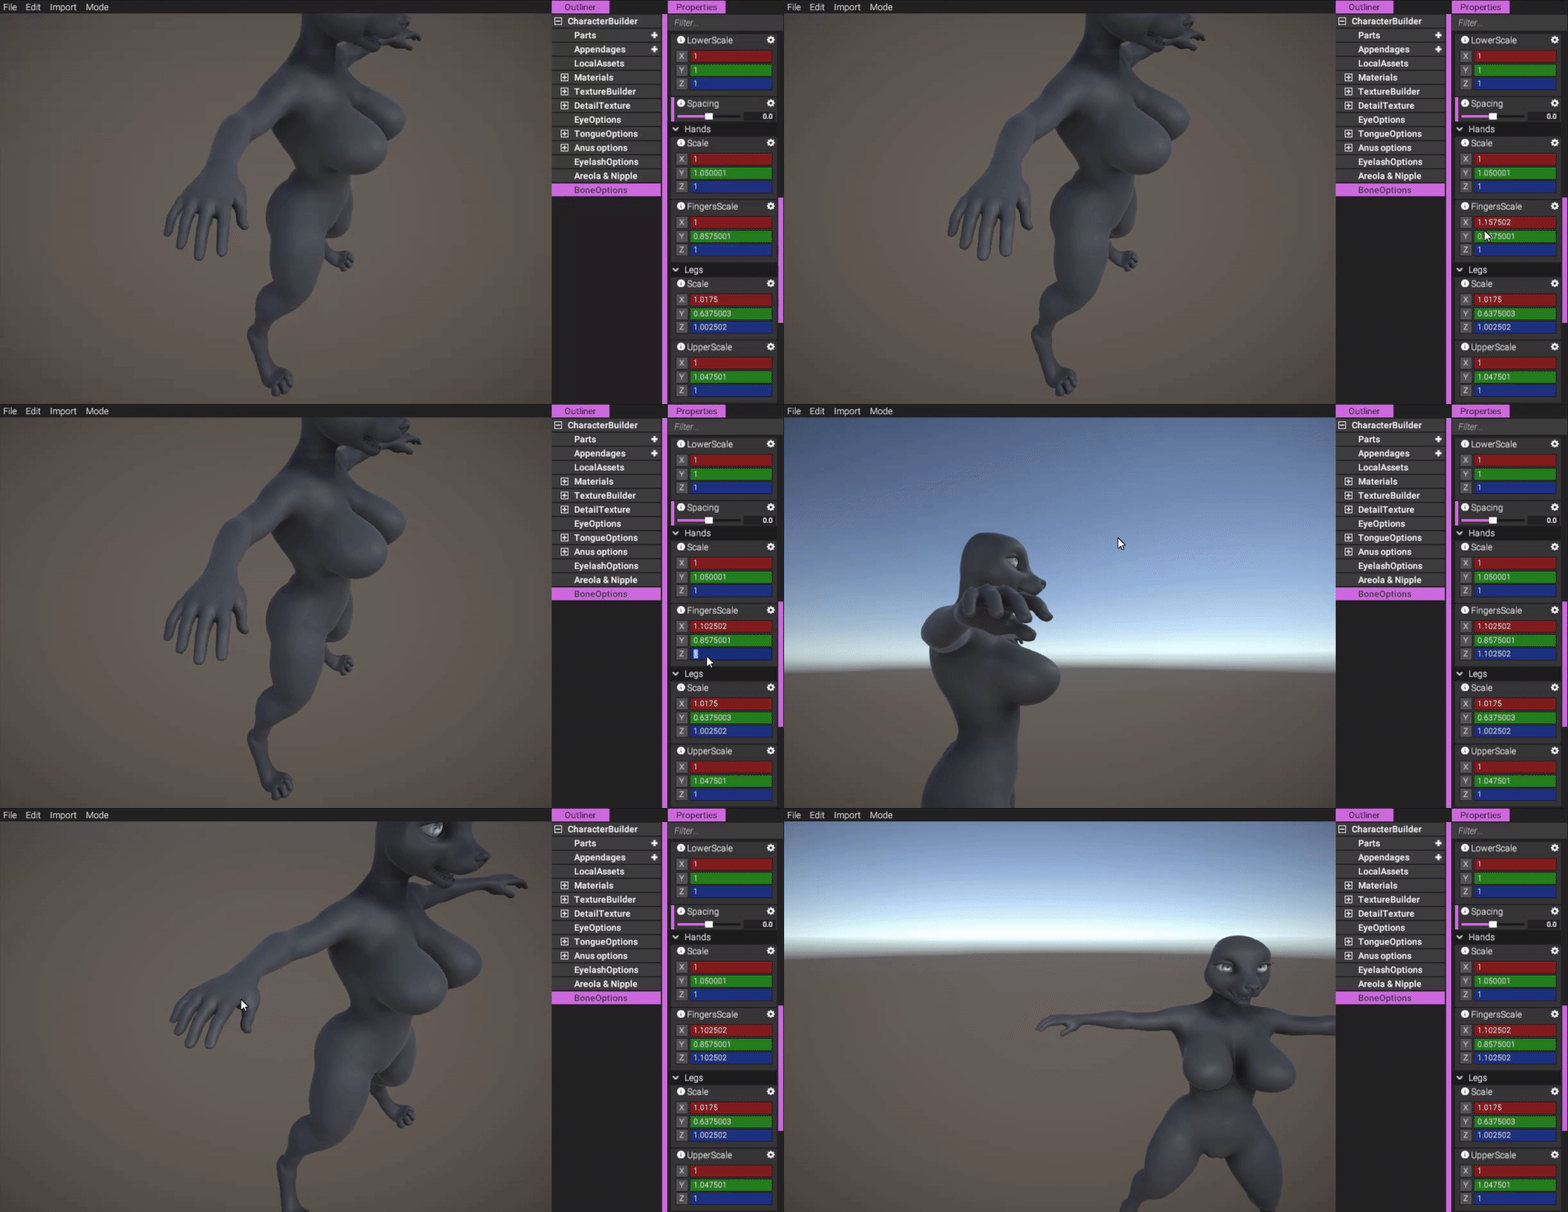
(Making the fingers thicker.)
https://gyazo.com/37c98399ff573c0f12547623ae40ecaa
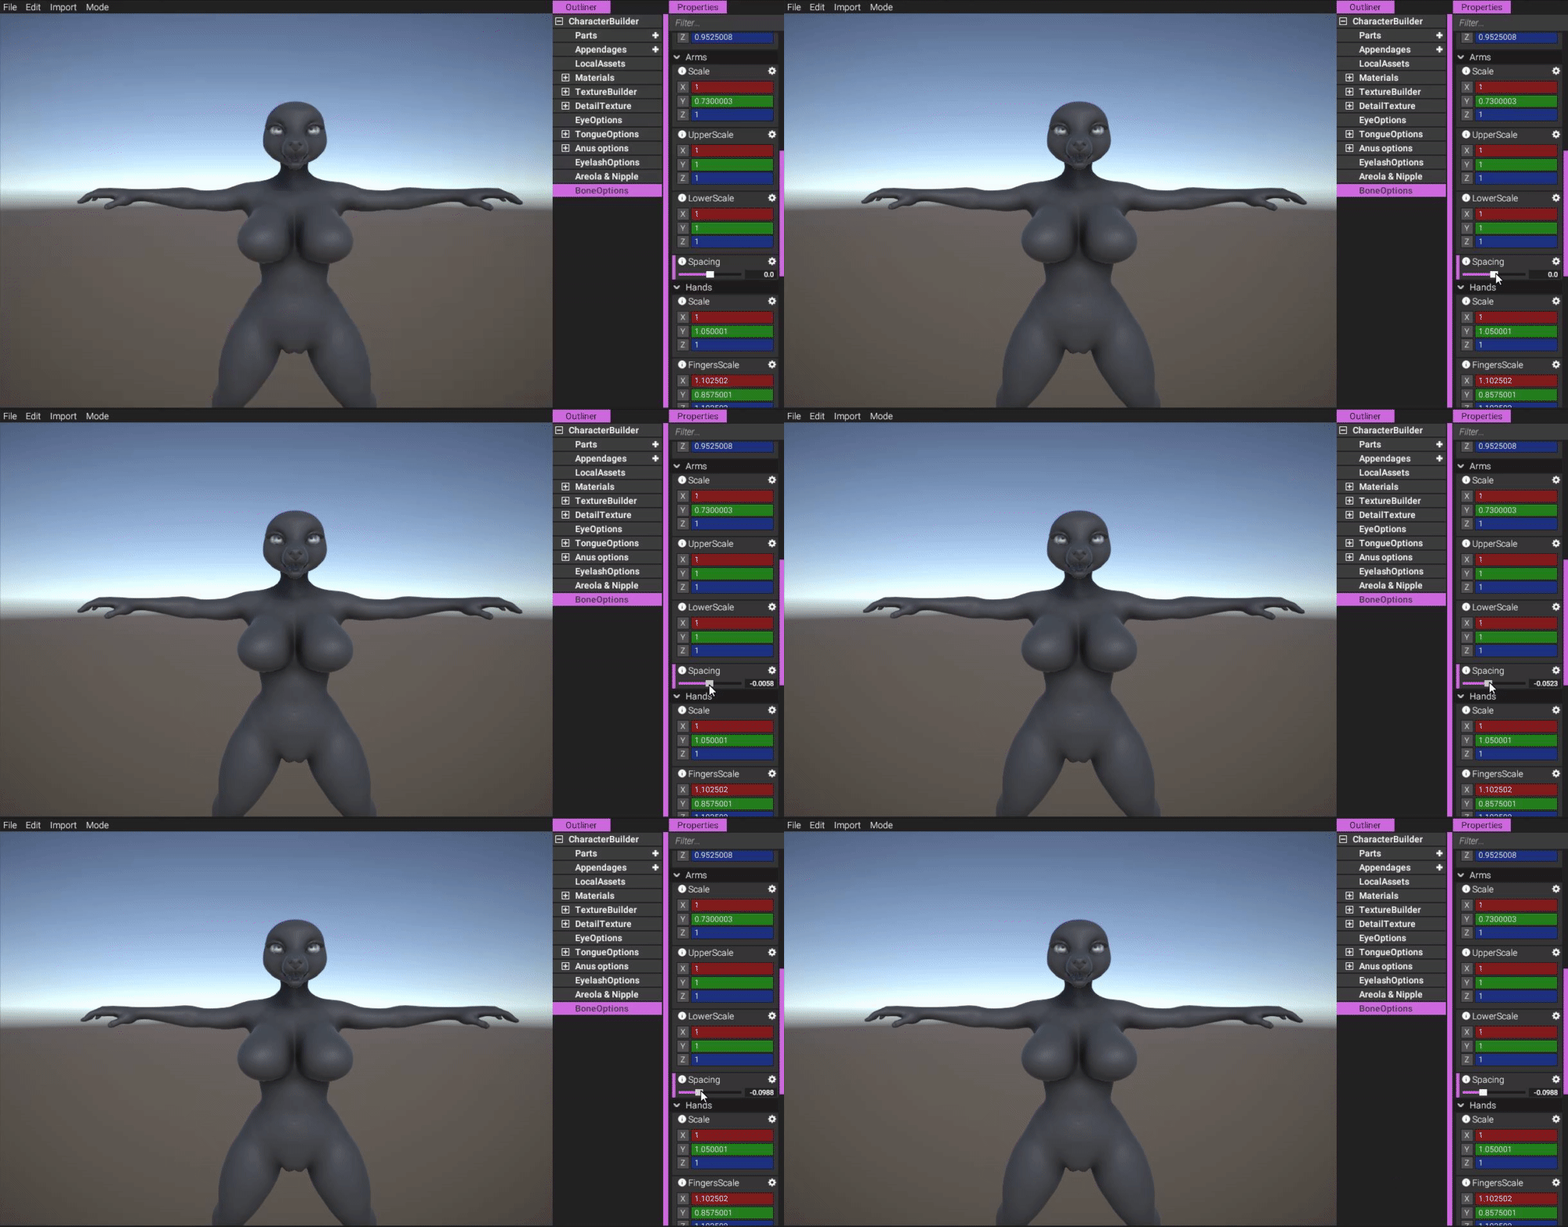
(Shoulder spacing.)
https://gyazo.com/403b9d9e4fe7e94971dd7637157f1991
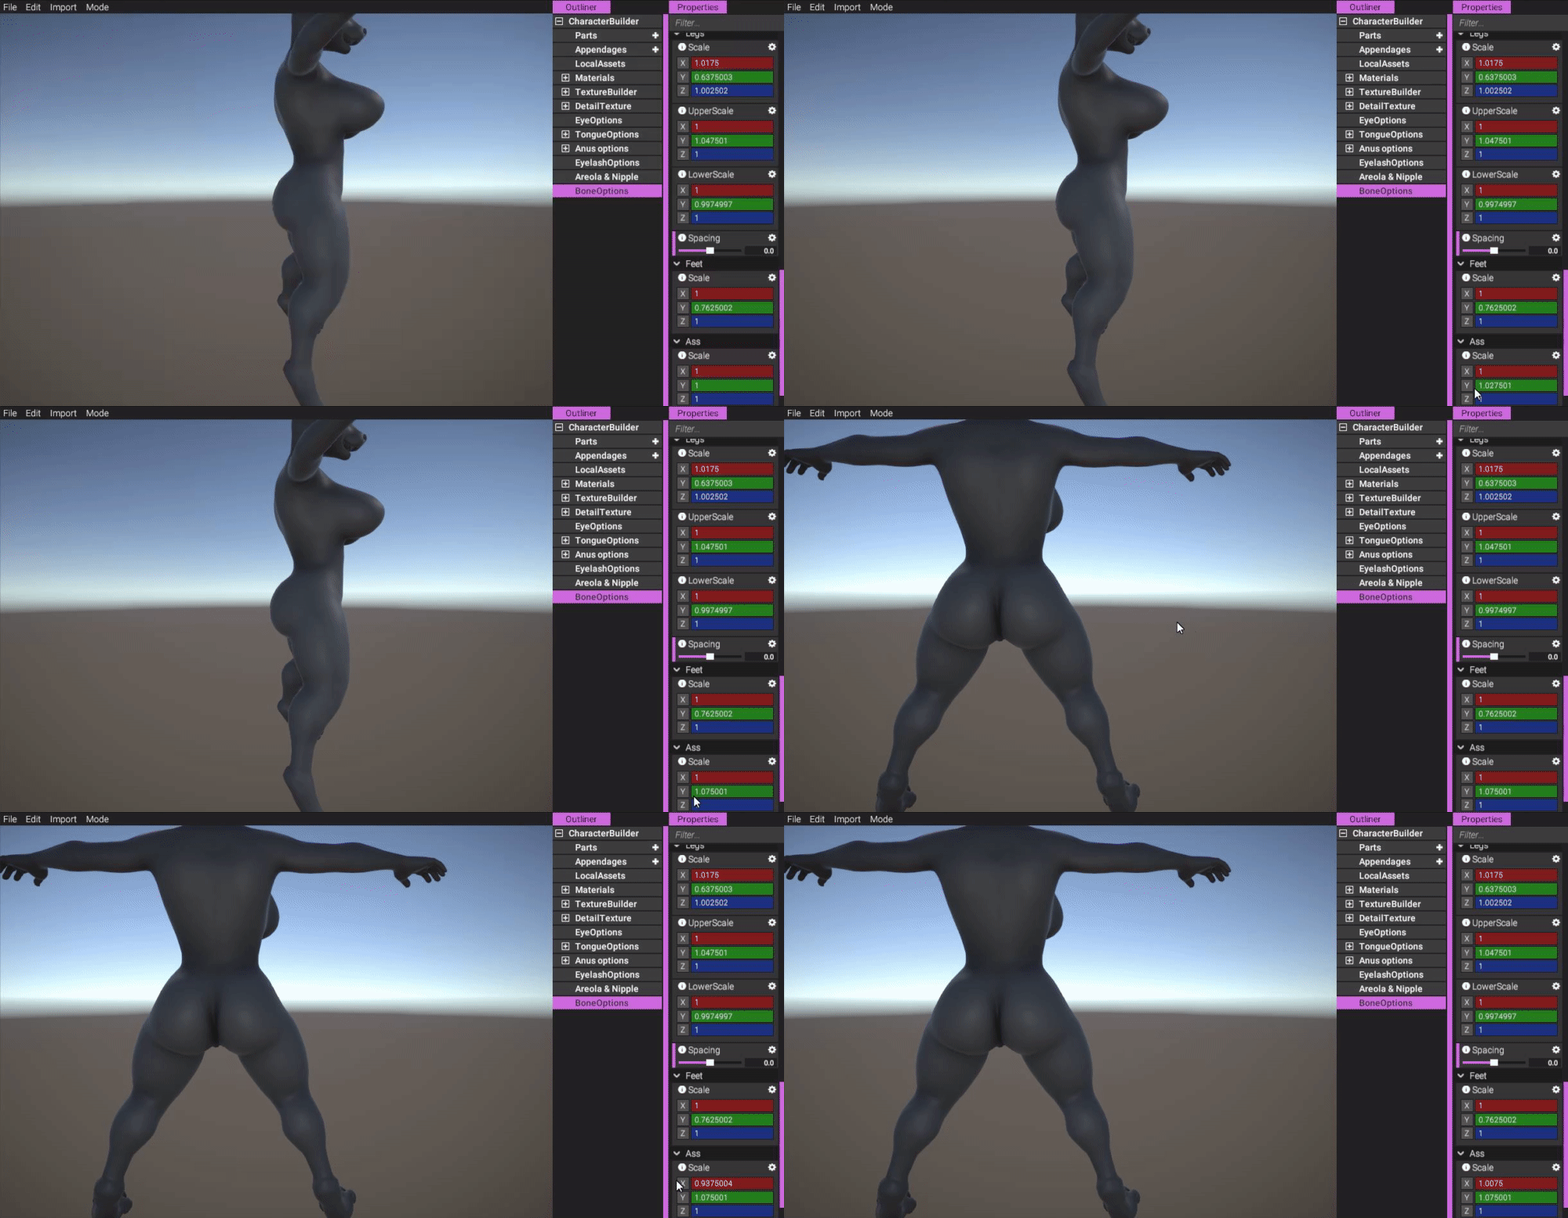
(Ass is possible to scale too.)
https://gyazo.com/ee213c9c519ebbda09e1cb92093d9511
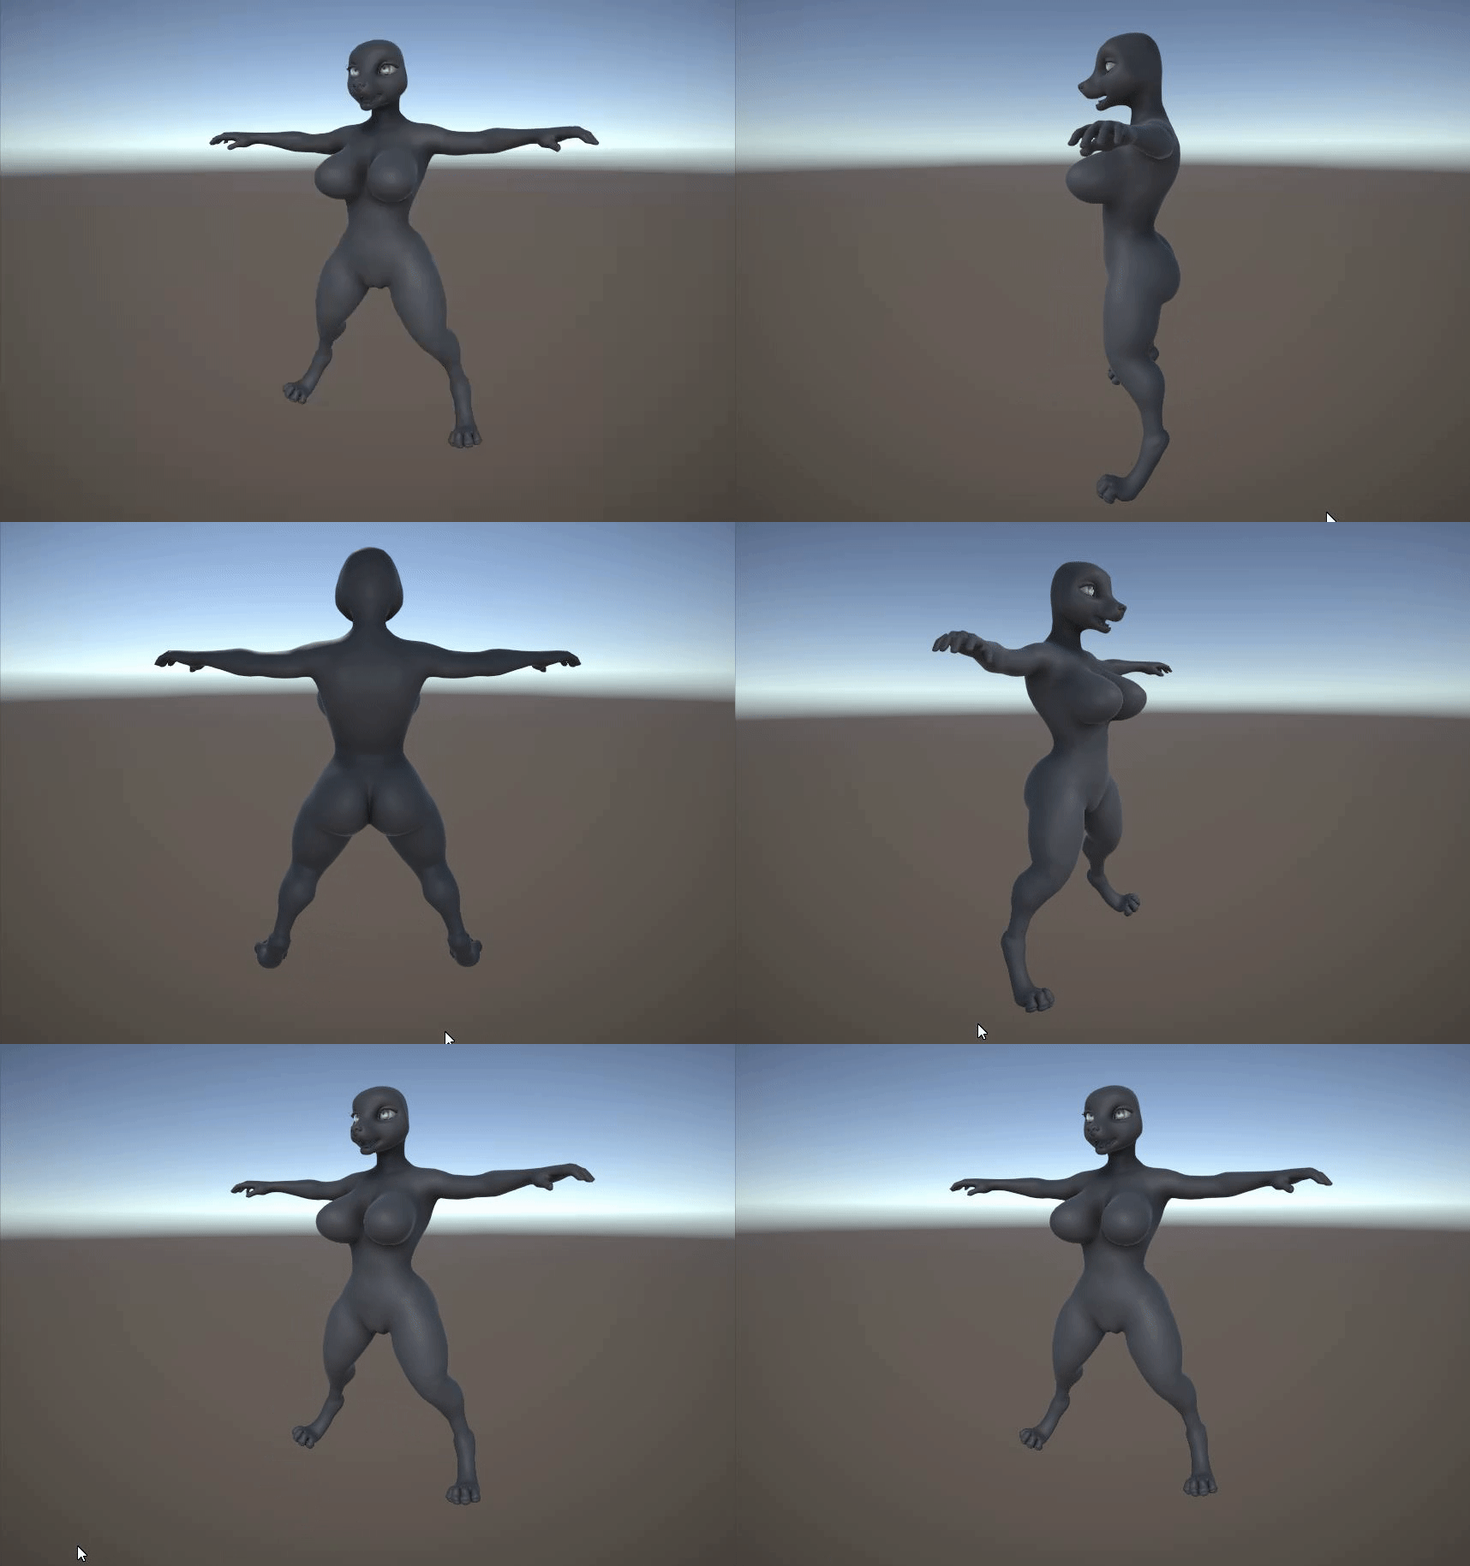
(Final result of the bone scaling.)
https://gyazo.com/25eafbc922169e9dbc24adc03e9f154e
This bone scaling functionality combined with our body type system will open up for great versatility in user customization. We can't wait to see what you'll create using these tools!
Revamped shaft options
Once we had this scaling tech implemented, we wanted to revamp our shaft customization options to make use of it. Originally, we were using two blend shapes (one "short" shape and one "long") and a single uniform scaling slider to affect the whole model. Together, these could be used to create both thick, long and in-between shapes for the shaft. However, we weren't happy with this solution, for several reasons:
- Having to combine length and scaling to affect thickness was counter-intuitive.
- The user was limited to our pre-authored "long" and "short" shapes. There are a lot of ways a penis could be short, for example. In the case of a knotted penis - when shortening it - should it shorten the knot too or only the shaft part? There was no way to configure this in our old implementation.
- If you wanted to increase the size of a certain part of the model, let's say the knot, there was no way to do that.
- Having to author these "short" and "long" shapes costs us extra time. If we can avoid them entirely while at the same time increase user options, obviously that would be preferable.
So using the same scaling tech demonstrated above, we reimplemented the shaft options to use it. Our new implementation has far more options, while at the same time being more intuitive (at least I think so). It also doesn't require us to author any special shapes for the shaft - it's simply just a model - which means we save precious time.
Let's see it in action!
To configure the length of the penis, there are multiple sliders you can use:
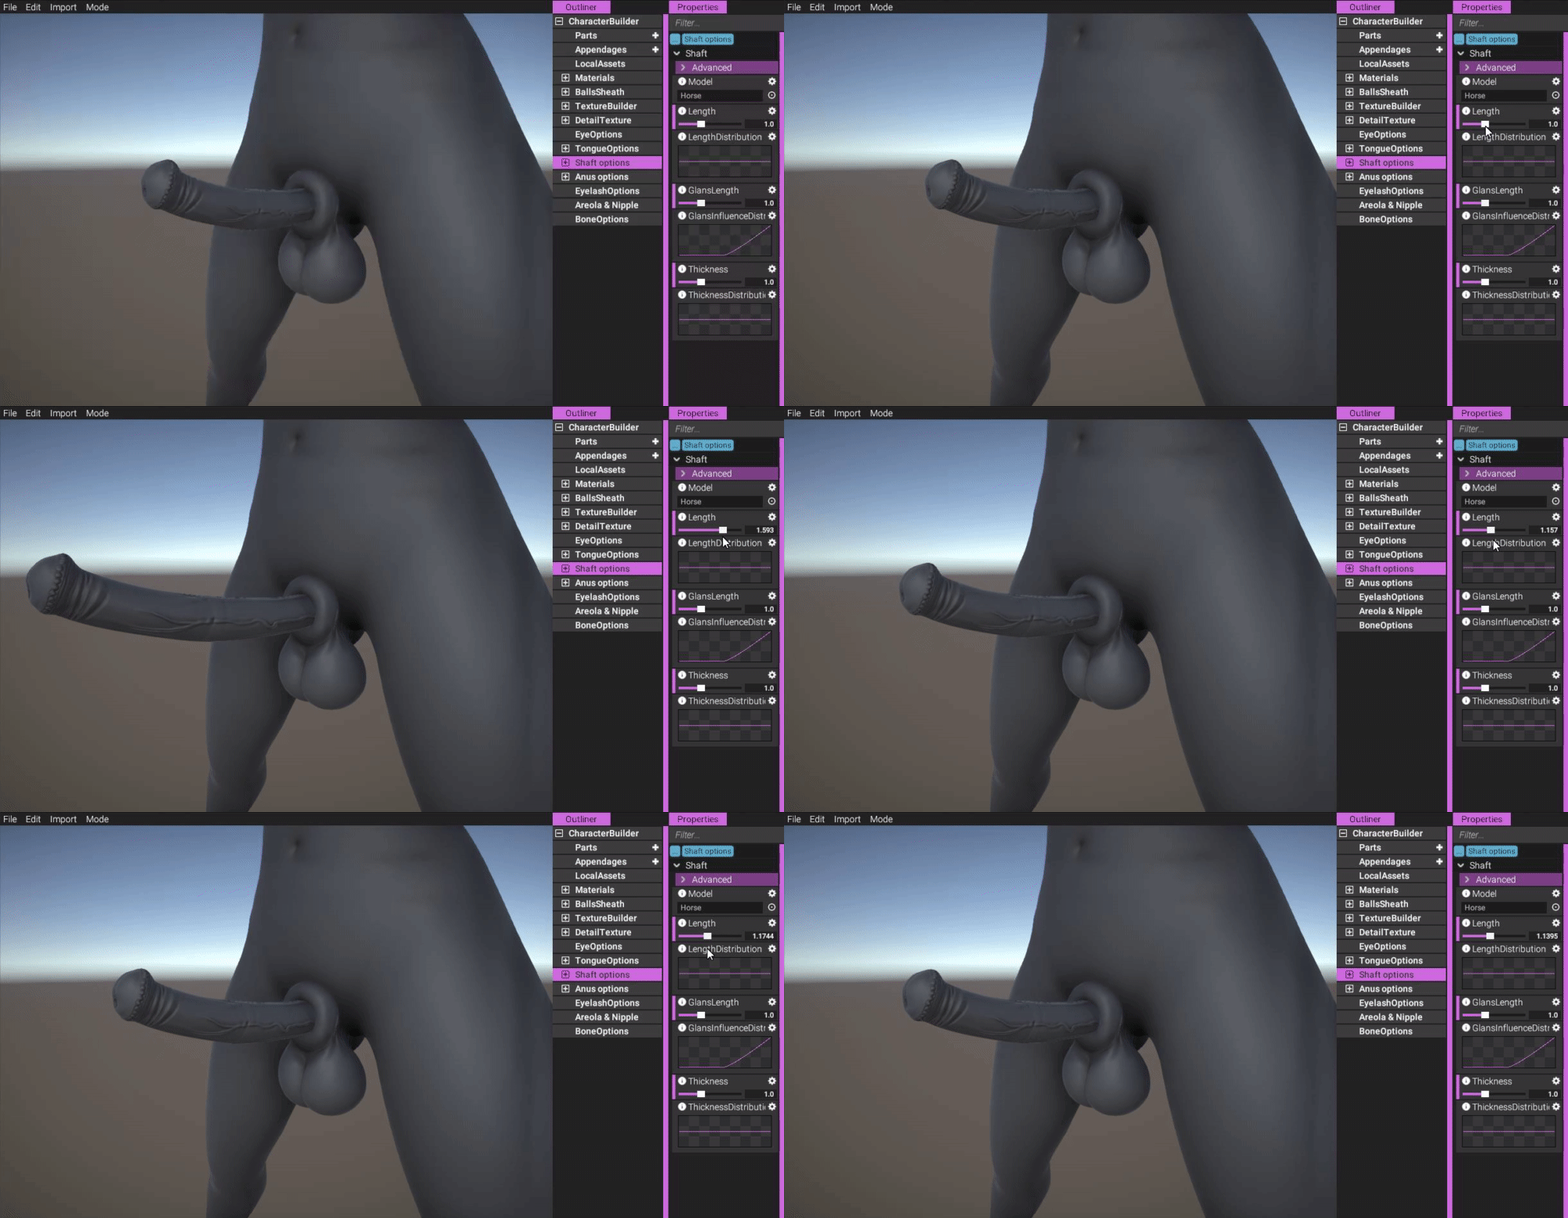
(Configure the length.)
https://gyazo.com/298b9395b02512378b99d2113dd7ca73
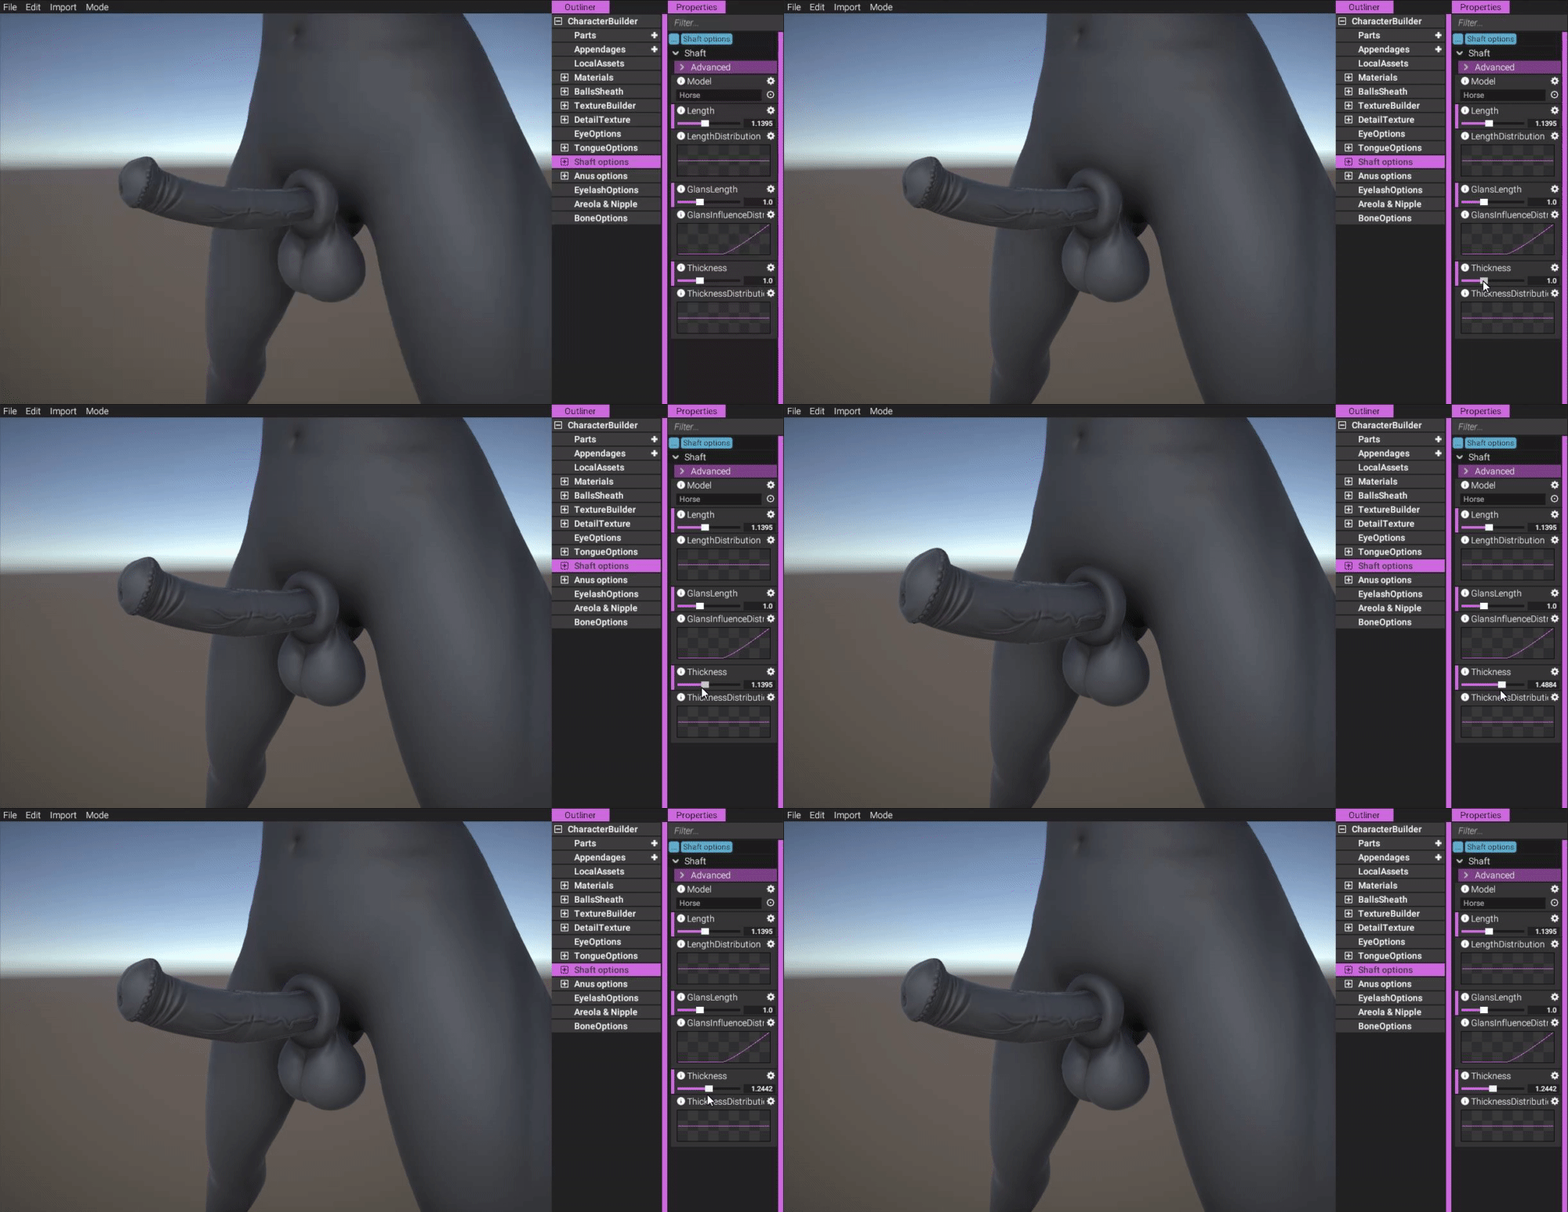
(Configure the thickness.)
https://gyazo.com/166a6c1ad6d50060dbeea0de6d416099
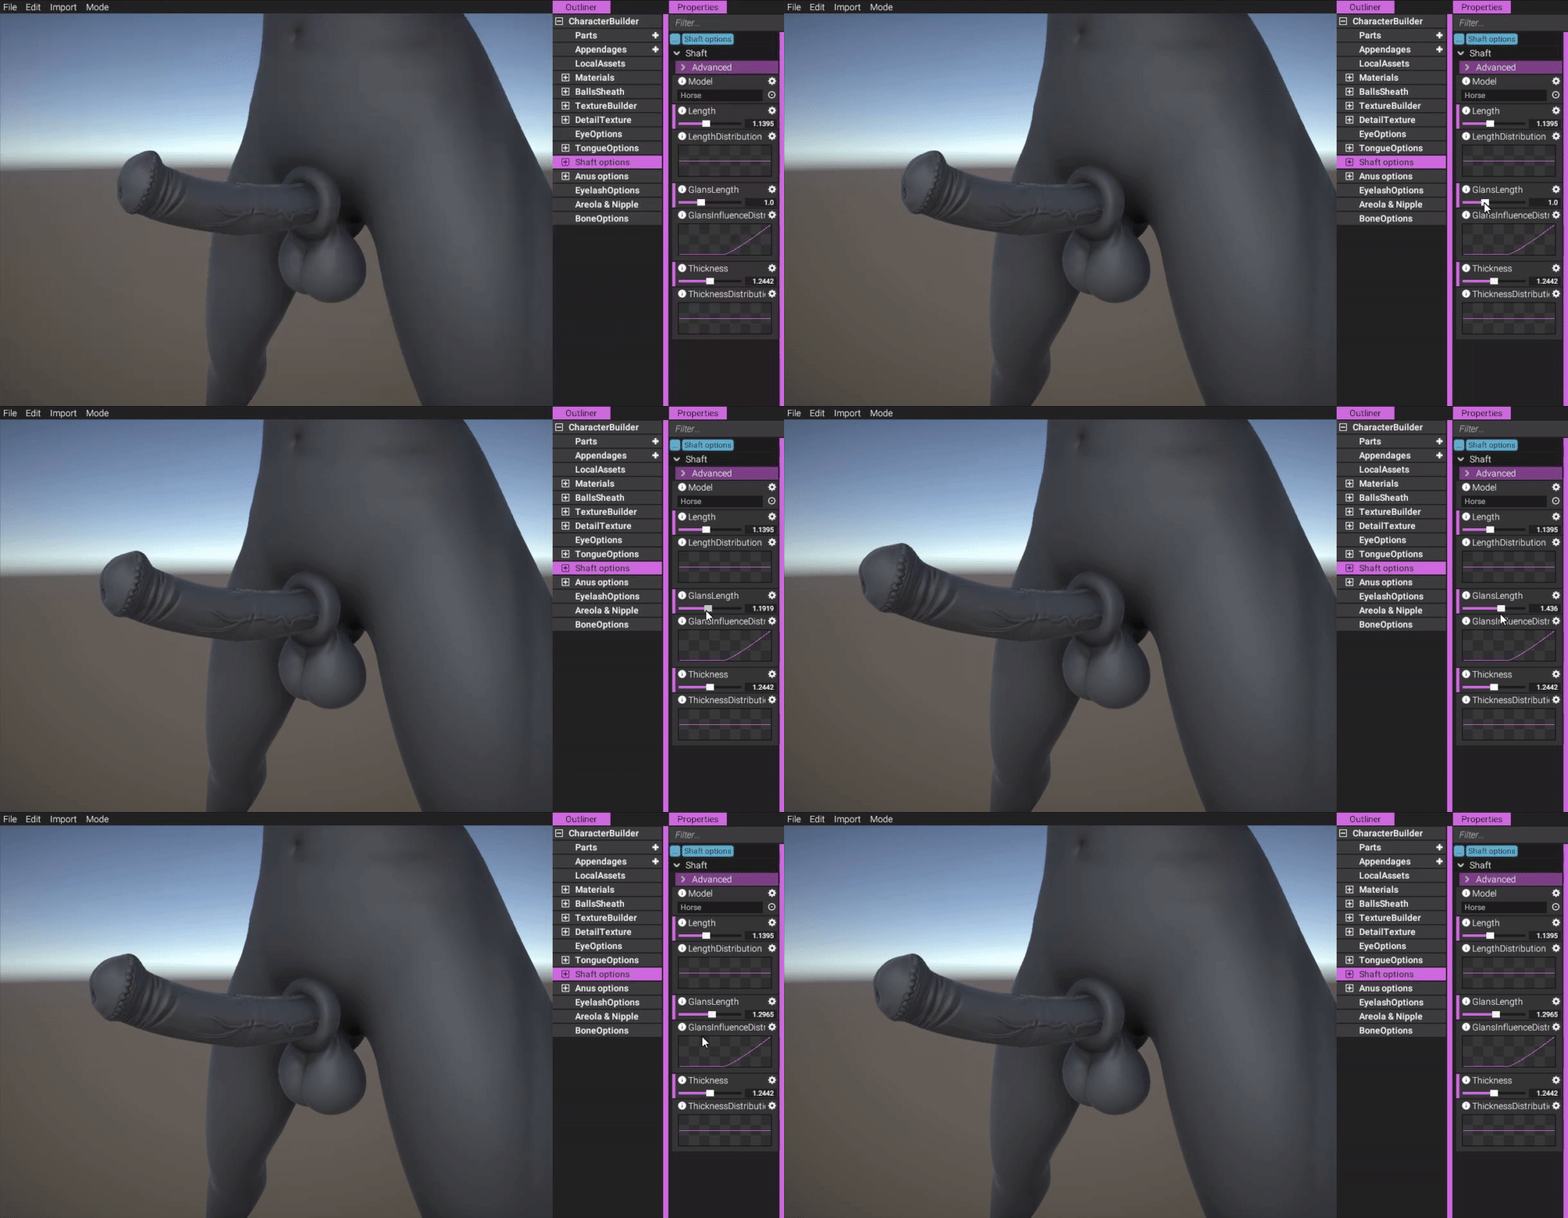
(You can configure the length of the tip of the penis individually from the rest. After increasing thickness, the glans looked a bit flat, so here we're making it longer.)
https://gyazo.com/981eac11d165d7271b050f1dcef1aadd
The glans distribution curve simply decides which length slider to use along the length of the penis. It's a convenience mechanic to split adjustment of length vs length of glans, which may come in handy when reducing length or when increasing thickness (as above). Let's see how this works in more detail.
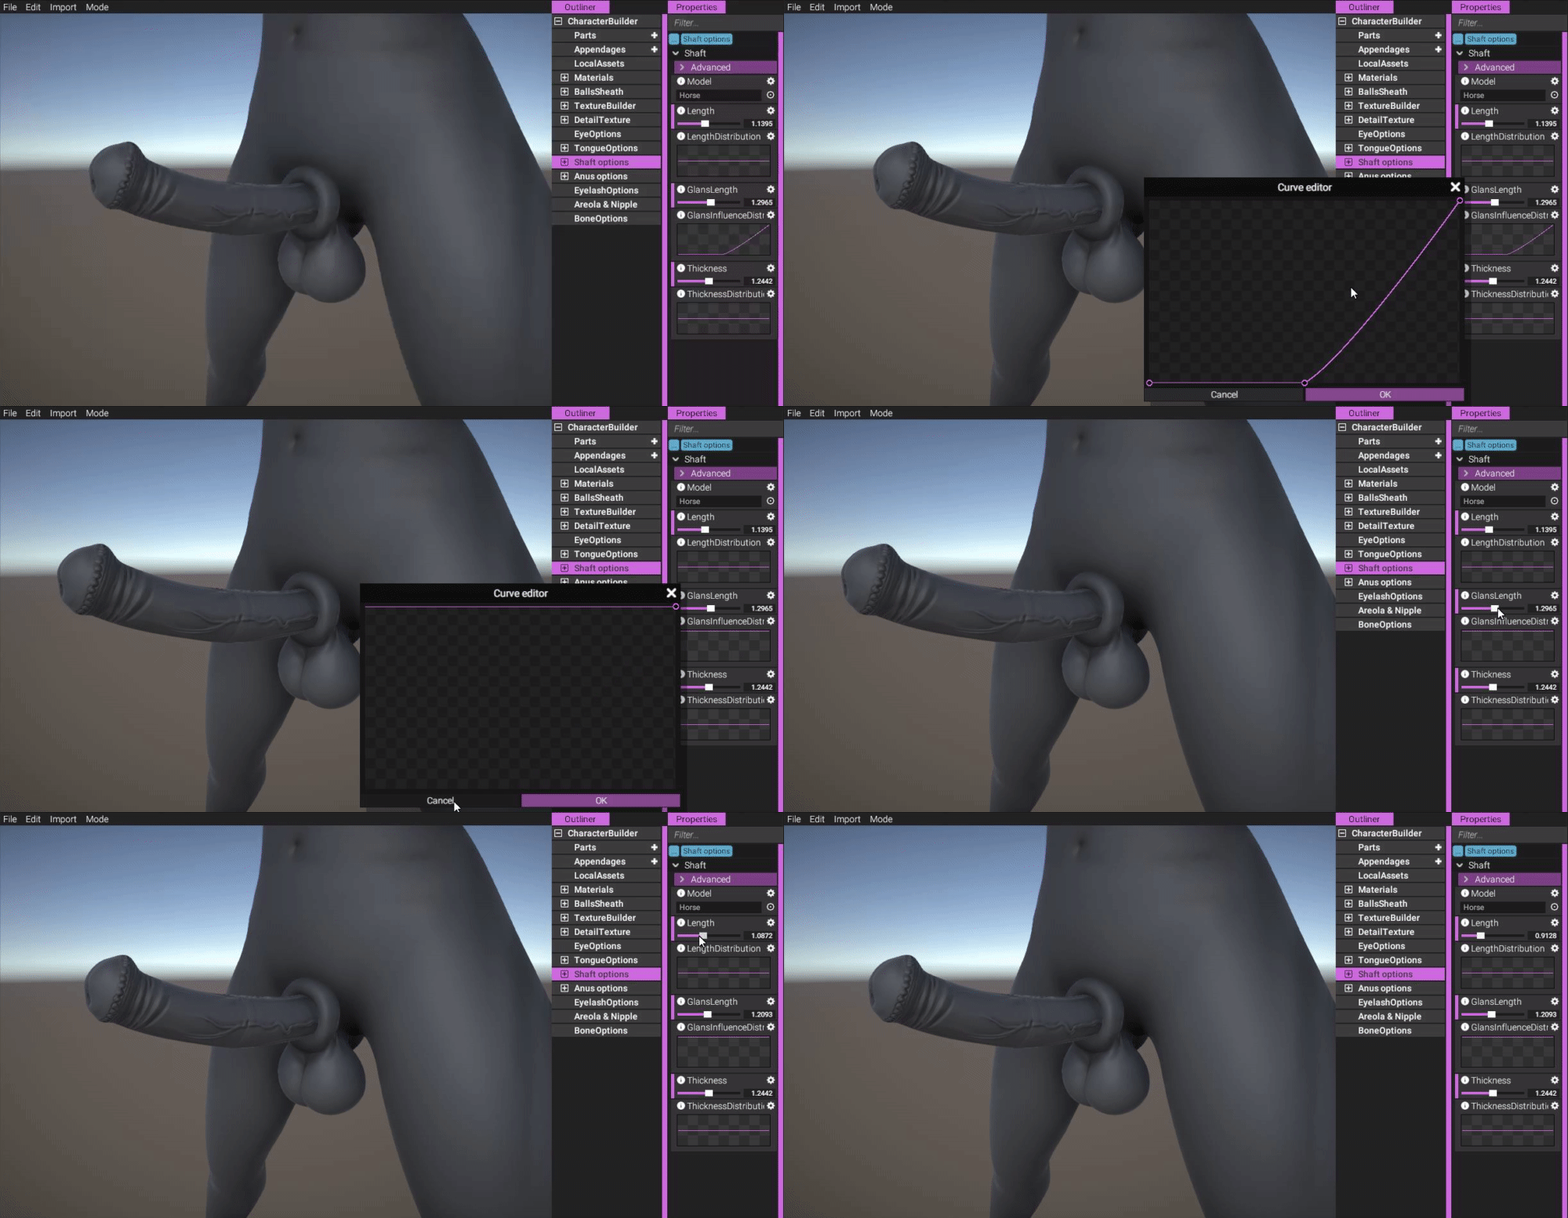
(By making the glans distribution only have a value of 1, we're effectively removing the length property and only using the glans length slider for the whole penis.)
https://gyazo.com/8eca1954a2719285a9bd5c8e06d434e1
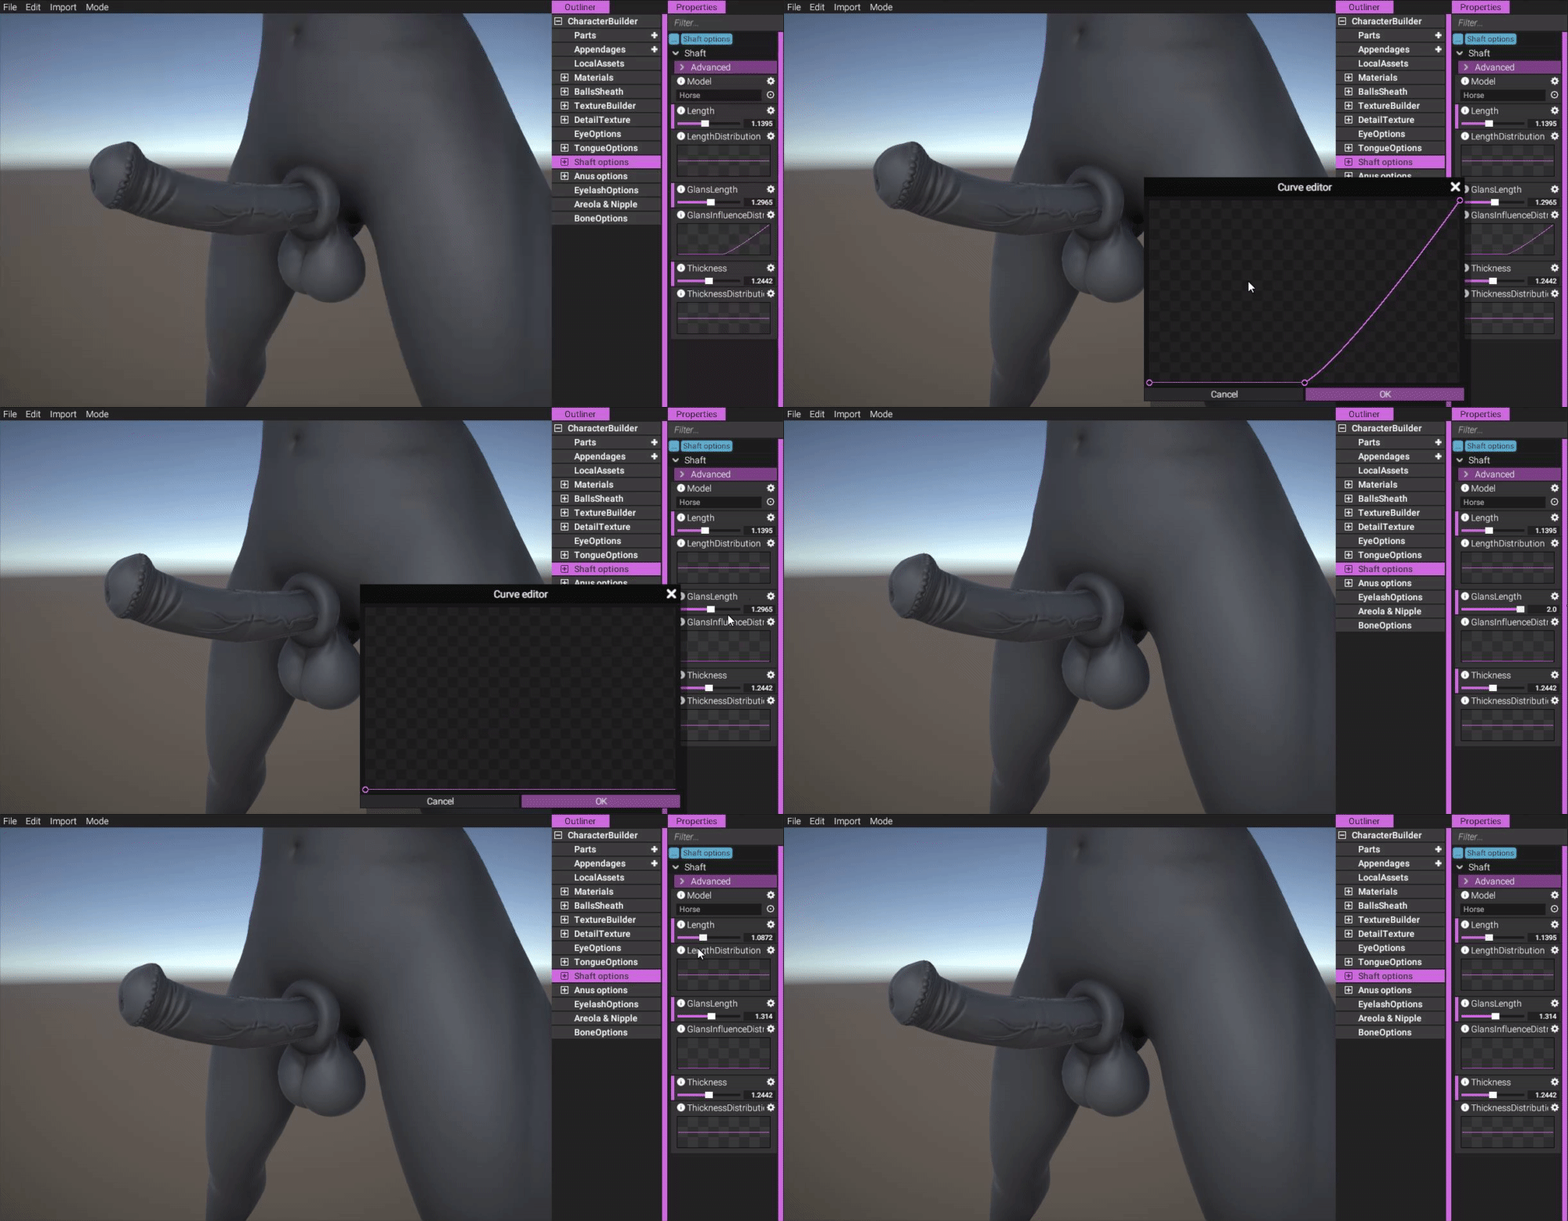
(Likewise, when reducing glans distrubtion curve to 0, we're canceling out the glans length slider entirely. Again, the whole idea with separating these sliders is for convenience. You probably don't want to change the glans distribution curve as much as this, but I felt like I needed to explain what it does and how it works.)
https://gyazo.com/3ab776e54d2b01e54e9316a1d620c7bd
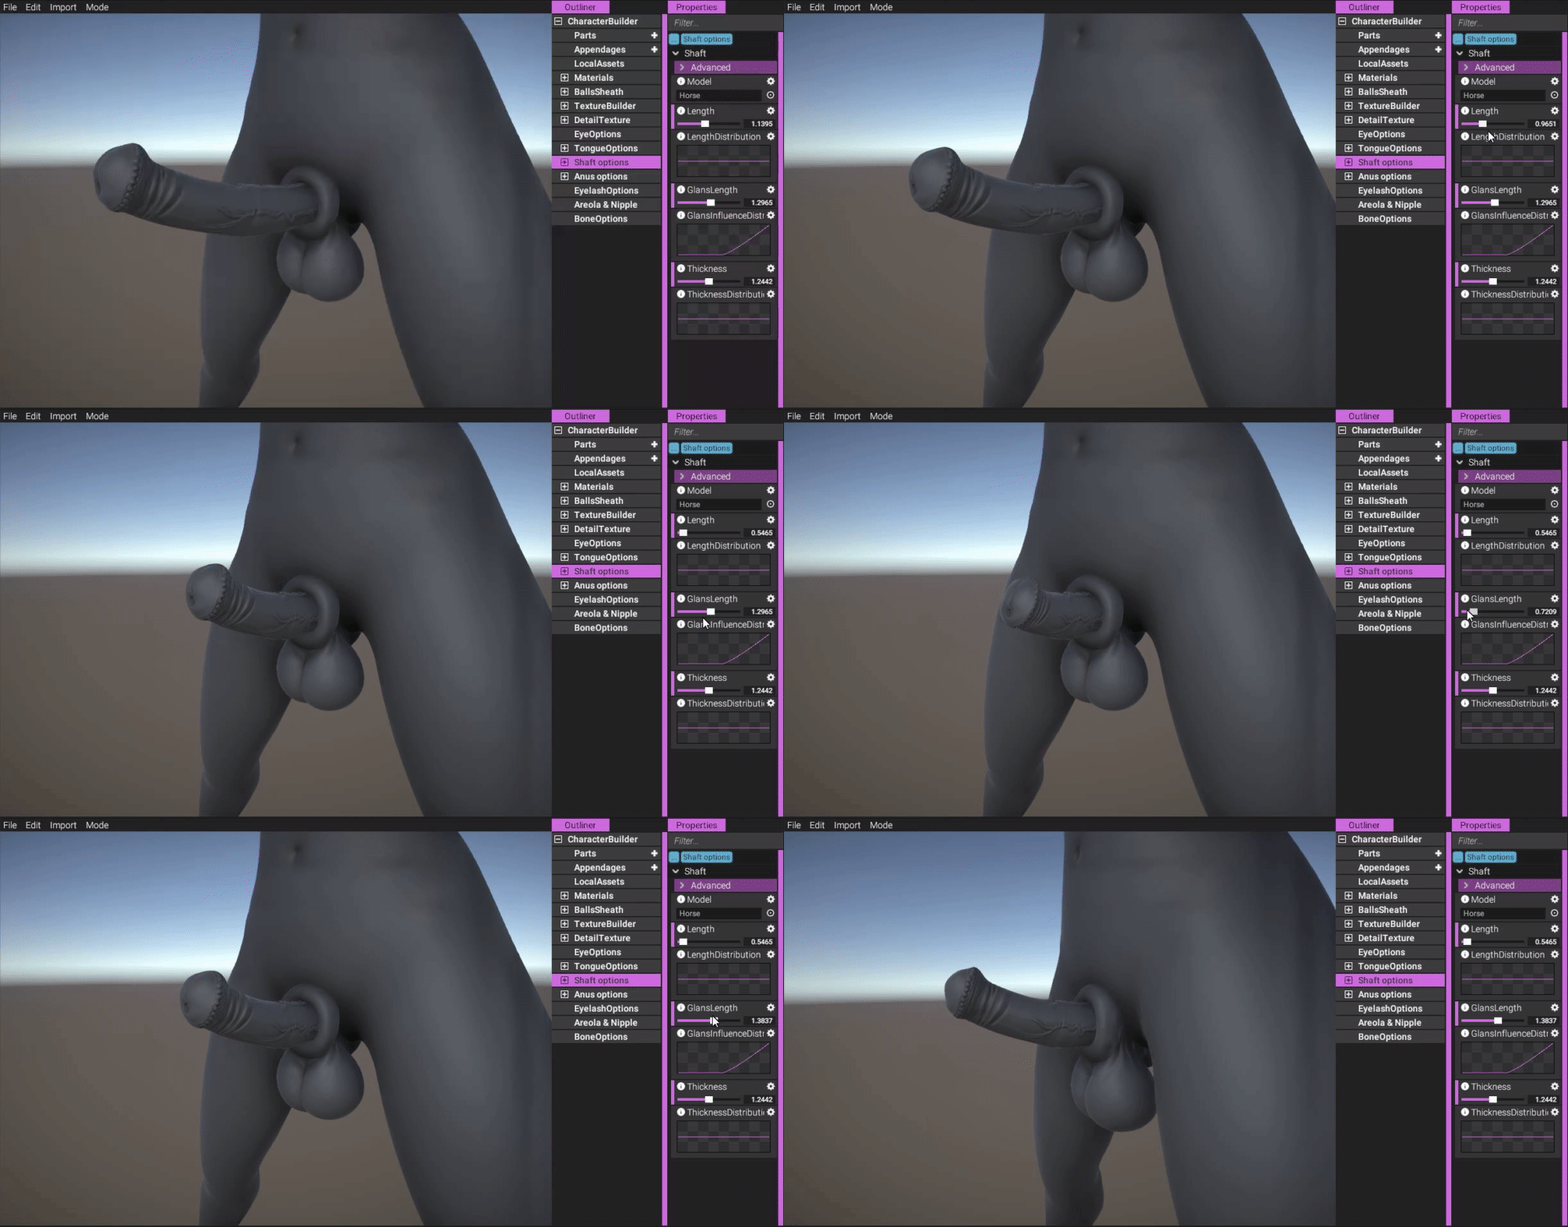
(Here we can see having the glans length separated from the base length is useful. When making the penis short, we don't want to distort the glans too much, and having a separate glans slider makes this easier to configure.)
https://gyazo.com/4313d0290a951306b5603c955110d309
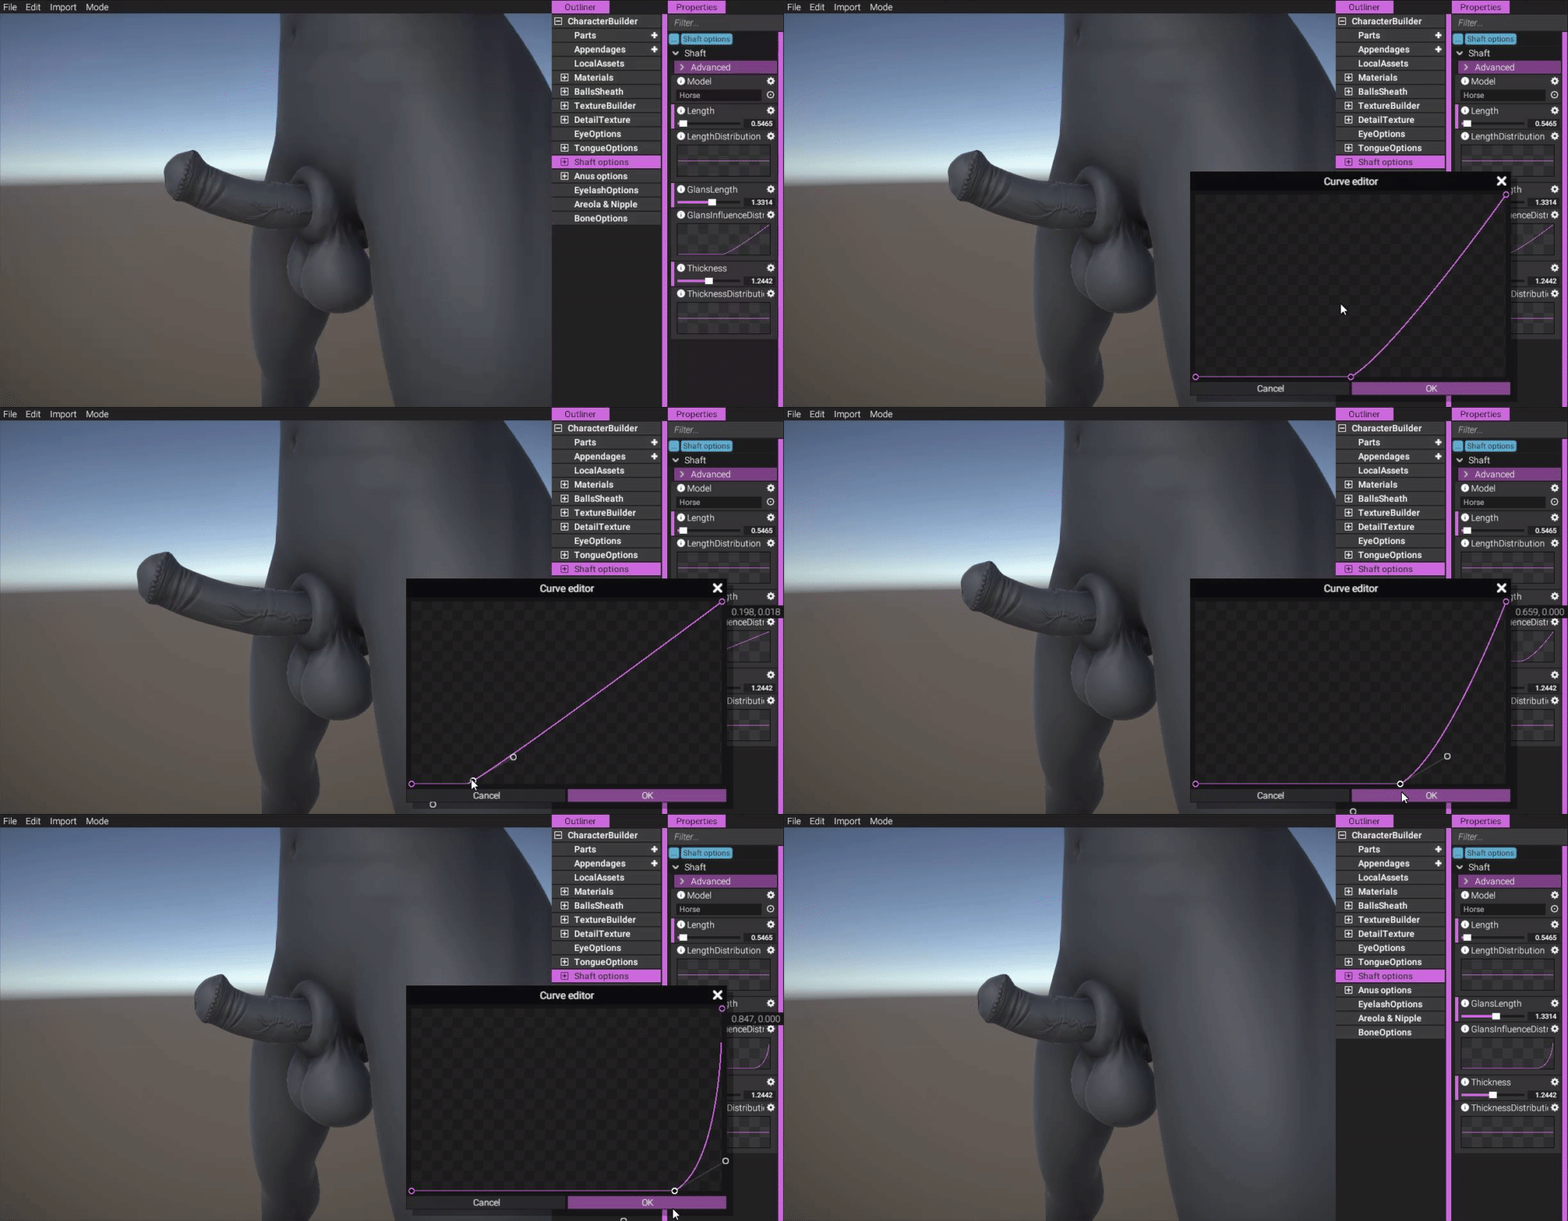
(Another example of what the glans distribution curve does. Here we're moving the point at which the glans length slider starts to "take".)
https://gyazo.com/8900b9ee089f36439faaeaaffeafabb5
Let's see how we could use these sliders and the length slider to affect a canine penis:
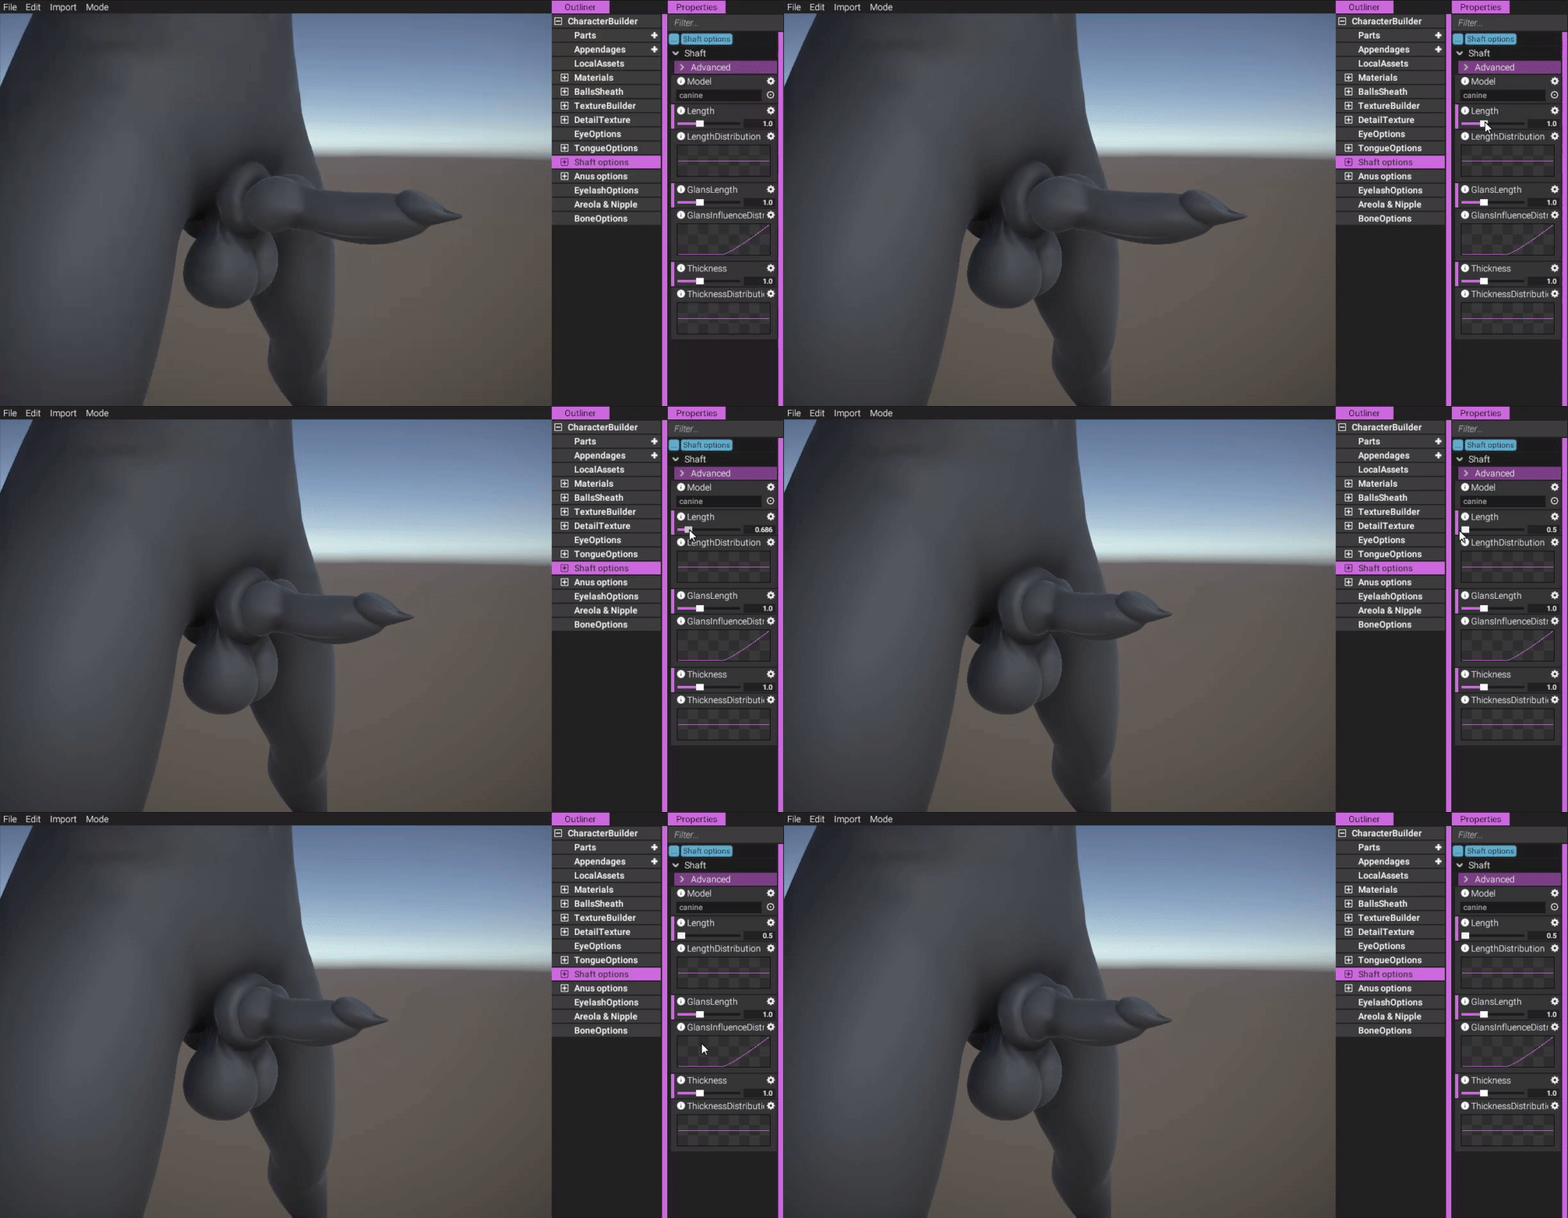
(When reducing the length of the canine penis, we're also making the knot smaller. In this case, that's not what we want.)
https://gyazo.com/75fe29425224ad3469de76d81921d6b9
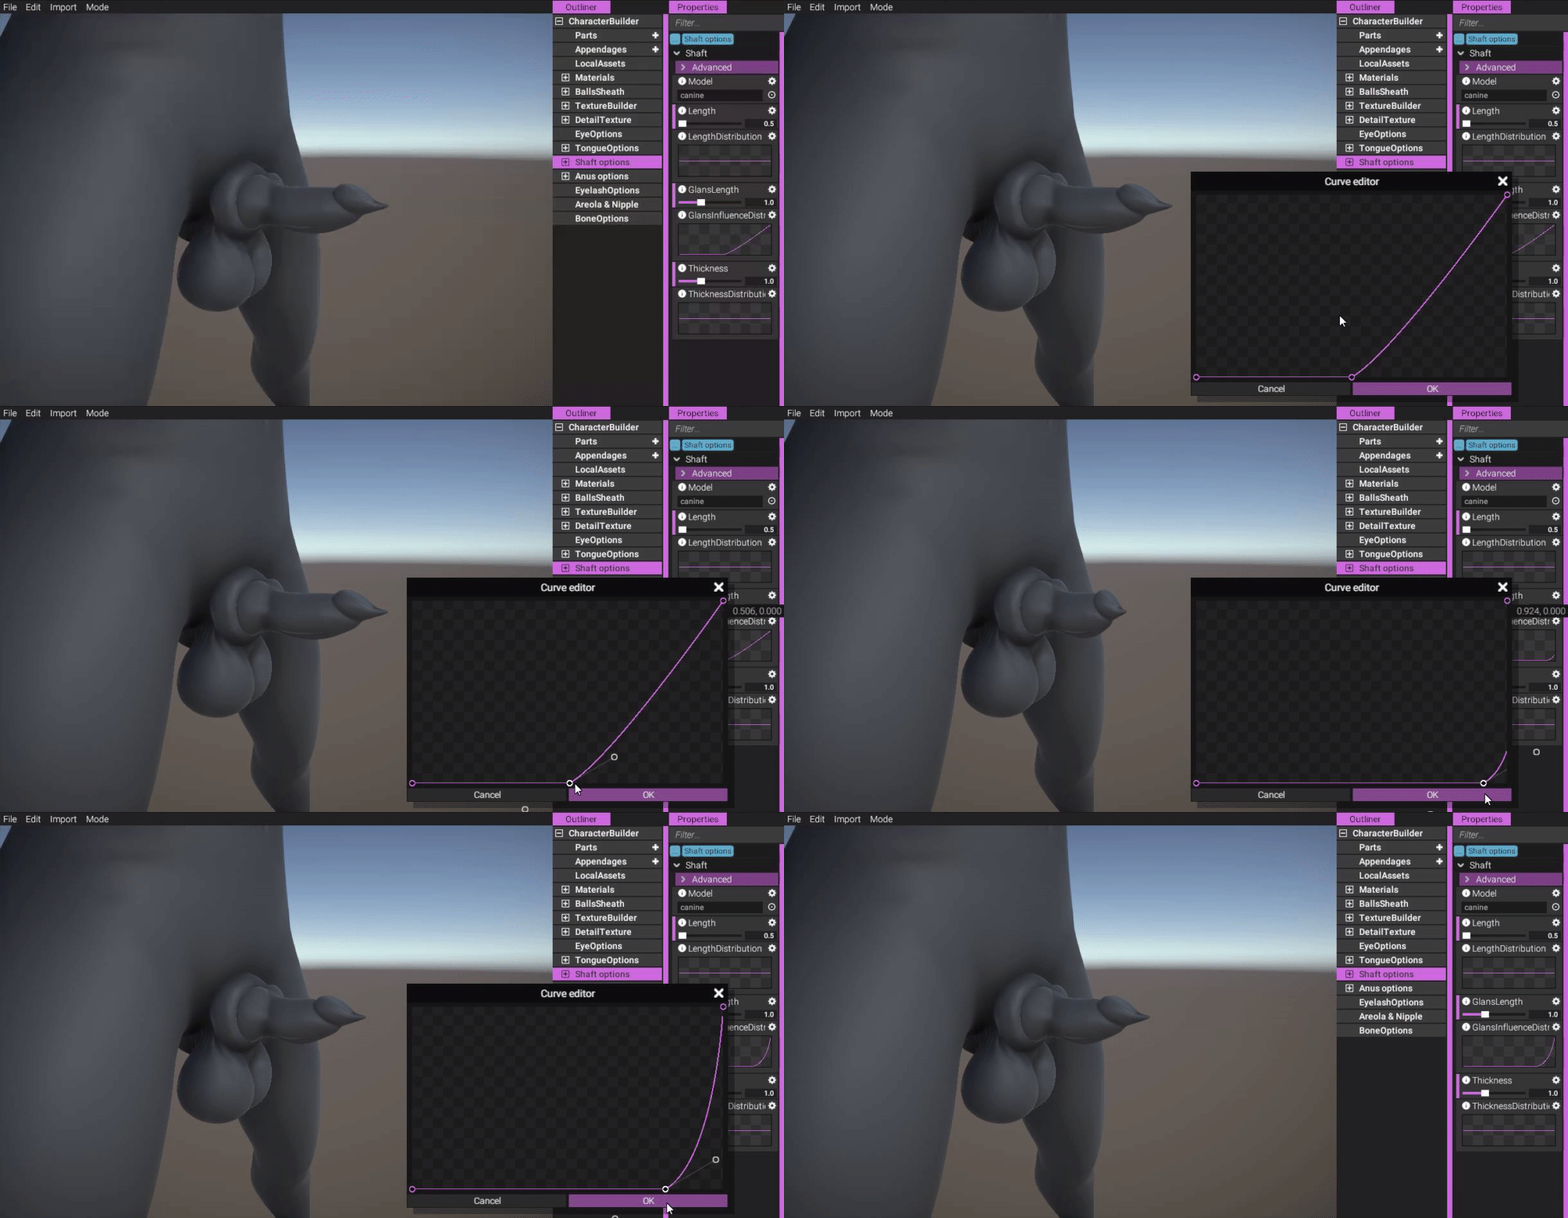
(We can start fixing this by tweaking the glans distribution curve.)
https://gyazo.com/98a907392650a683d8f391526ebeb451
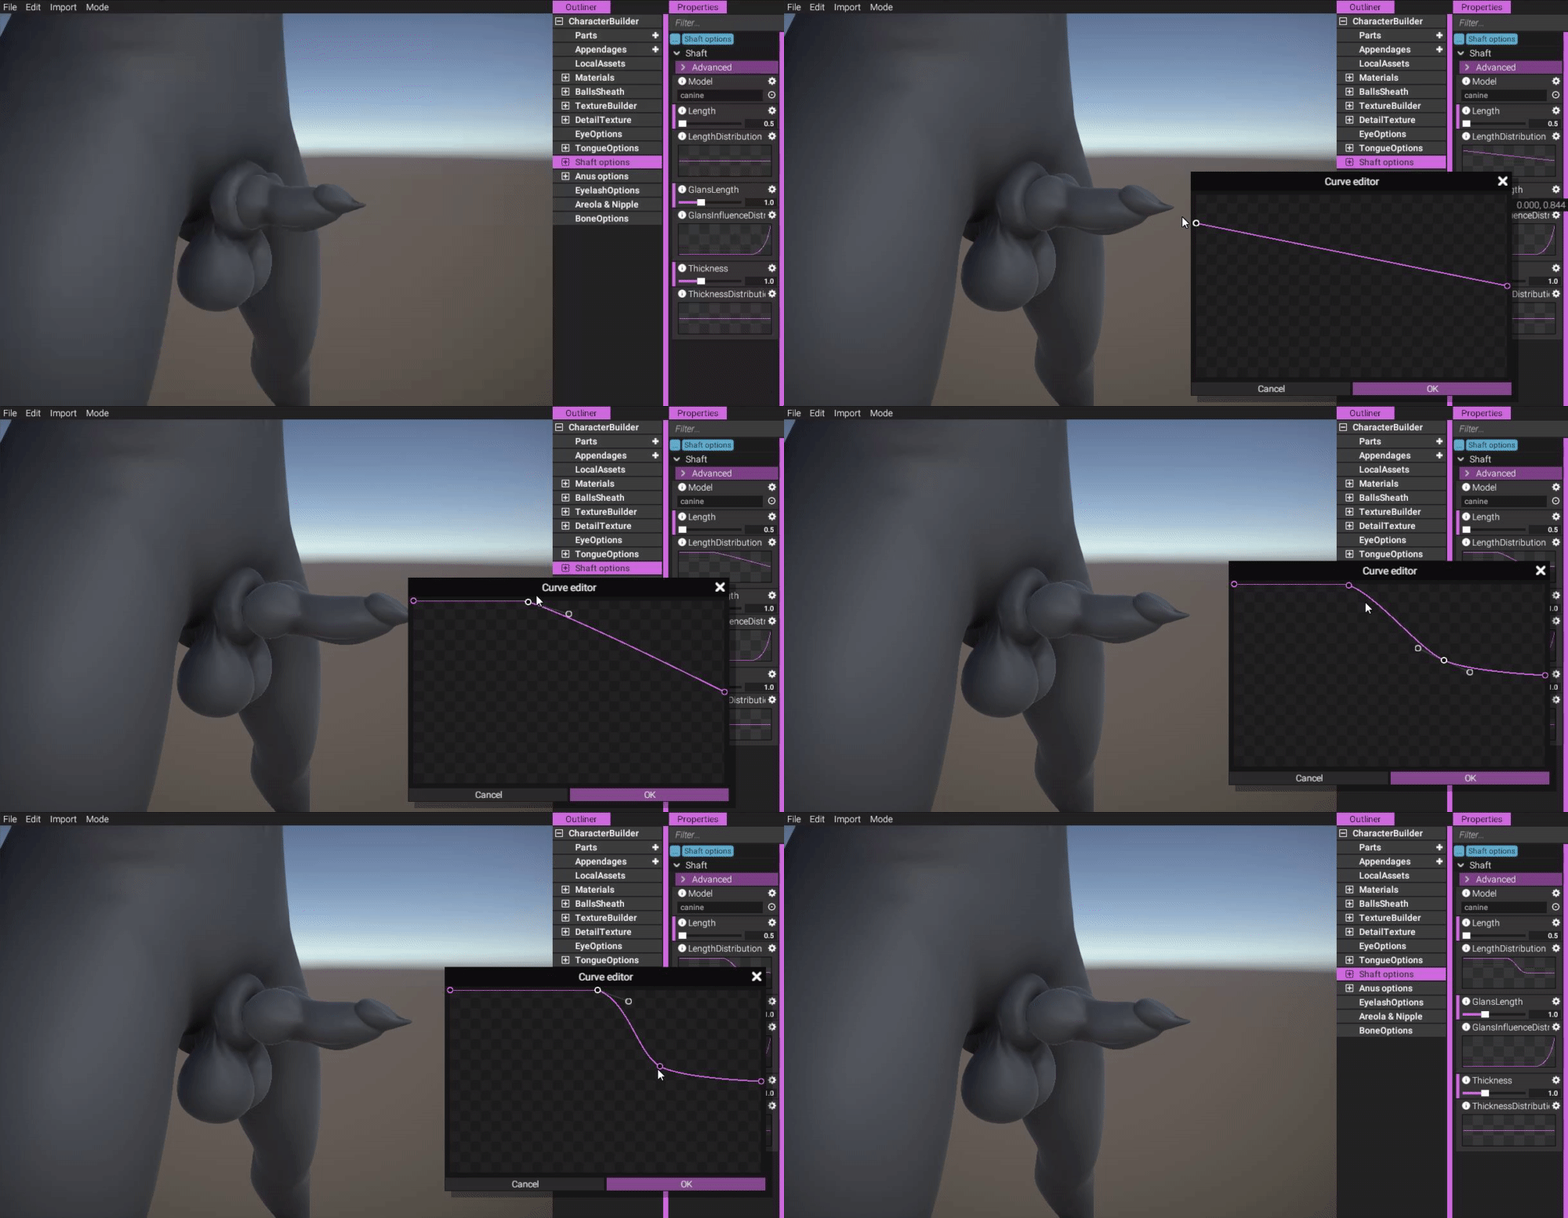
(Lastly, we tweak the length distribution to affect the length in areas in the fashion we want.)
https://gyazo.com/35470cd645a154b319fdc589cc5599bf
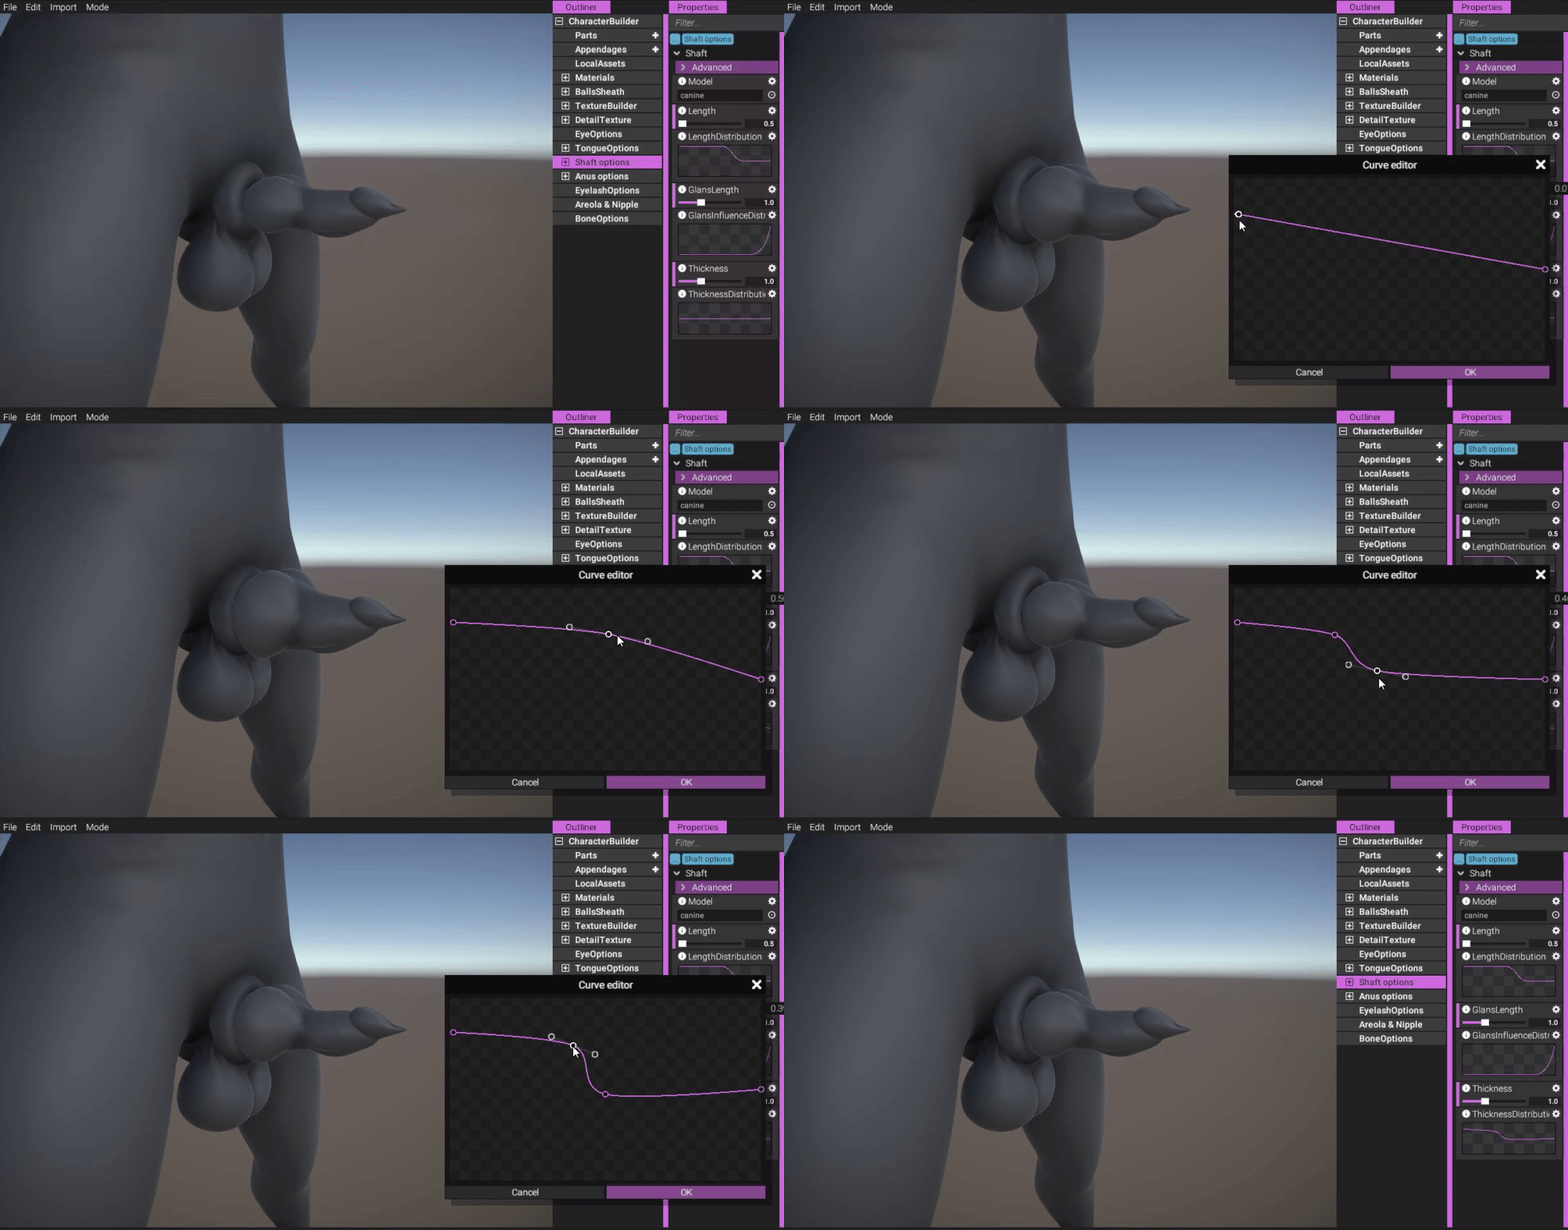
(Thickness also has a curve slider. Here, we're increasing the size of the knot only.)
https://gyazo.com/13c12304f9ab4c43f15b058ddadf4cd1
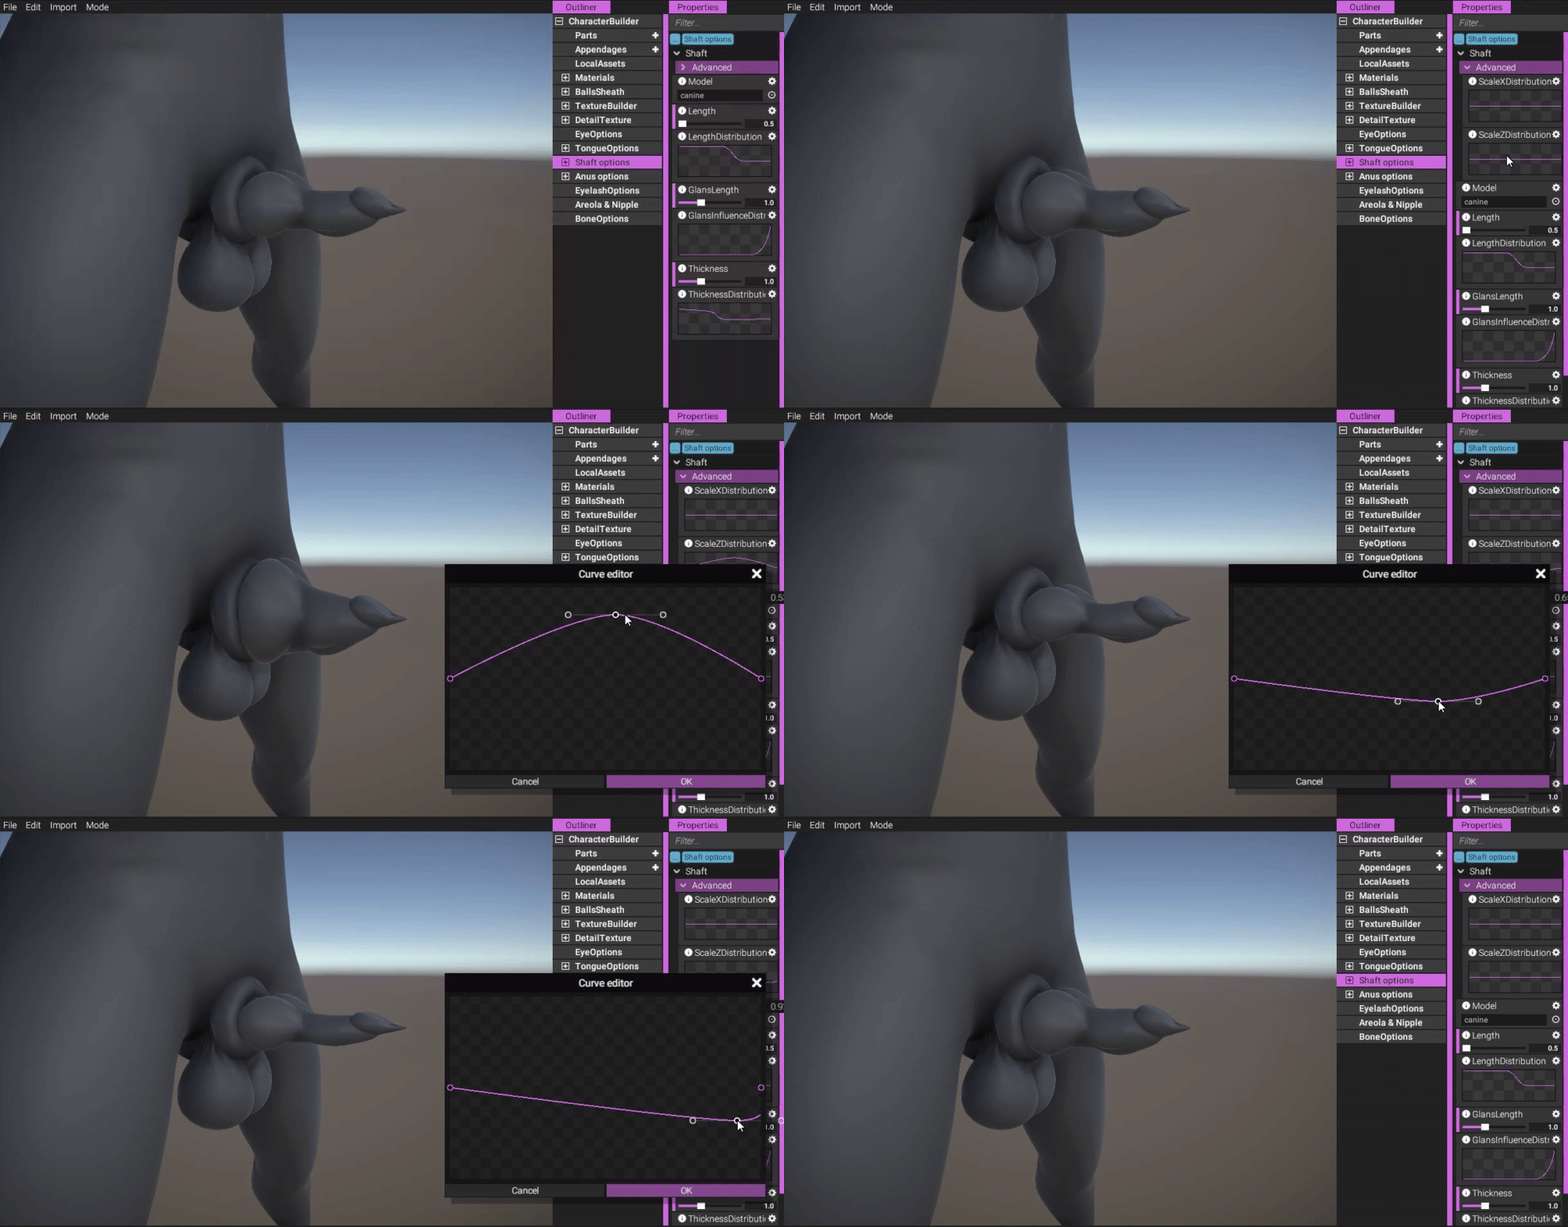
(You also have access to individual X and Z axis in the advanced section, if you for whatever reason would like to change the size of the penis on those axis.)
https://gyazo.com/e16971c9ba7ad624280abb0aa45a504c
With this implementation, we have vastly increased user options while at the same time reducing our own work load. Everybody wins!
Balls authoring
Shafts aren't the only thing to receive some love this month. We've also been hard at work implementing customization for balls.
Originally, balls and inflation for balls were supposed to be pre-authored (just like in Yiffalicious). However, feeling inspired by our progress regarding our newly implemented bone and shaft options, we wanted to see how we could enable our fans to author their own shapes for the balls as well. This is great for many reasons - again, not only increasing user options, but also reducing our work load. It would be a win-win for everyone!
Now when configuring the character to use a balls/sheath model, not only is a specific shaft instance created in the outliner, but also a "BallsSheath" object. The object itself doesn't have any publicly viewable properties. However, when selecting it, 3 node points become visible that you can tweak in any way you like. Move, rotate and scale these nodes to author the ball shape you want!
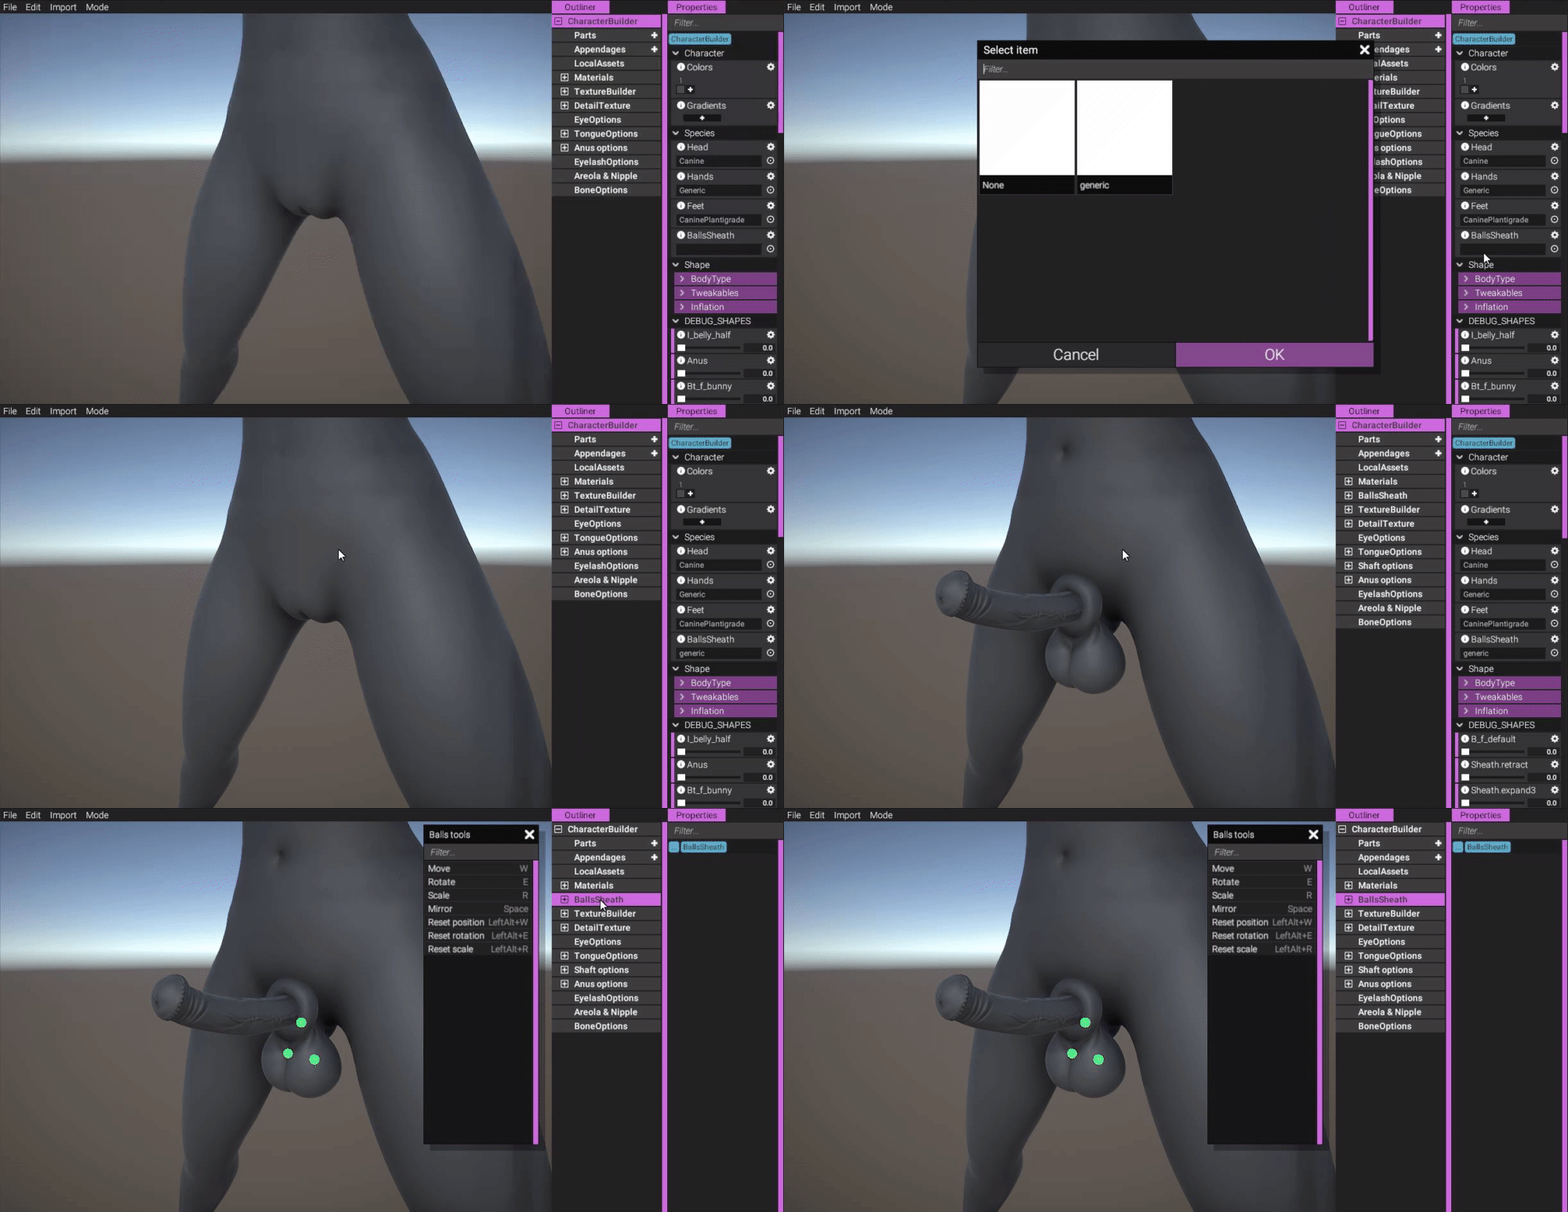
(When using balls/sheath, a new object is instanced which you can tweak to affect the balls.)
https://gyazo.com/0d2484c77fcb4c2d083866104f21ec9c
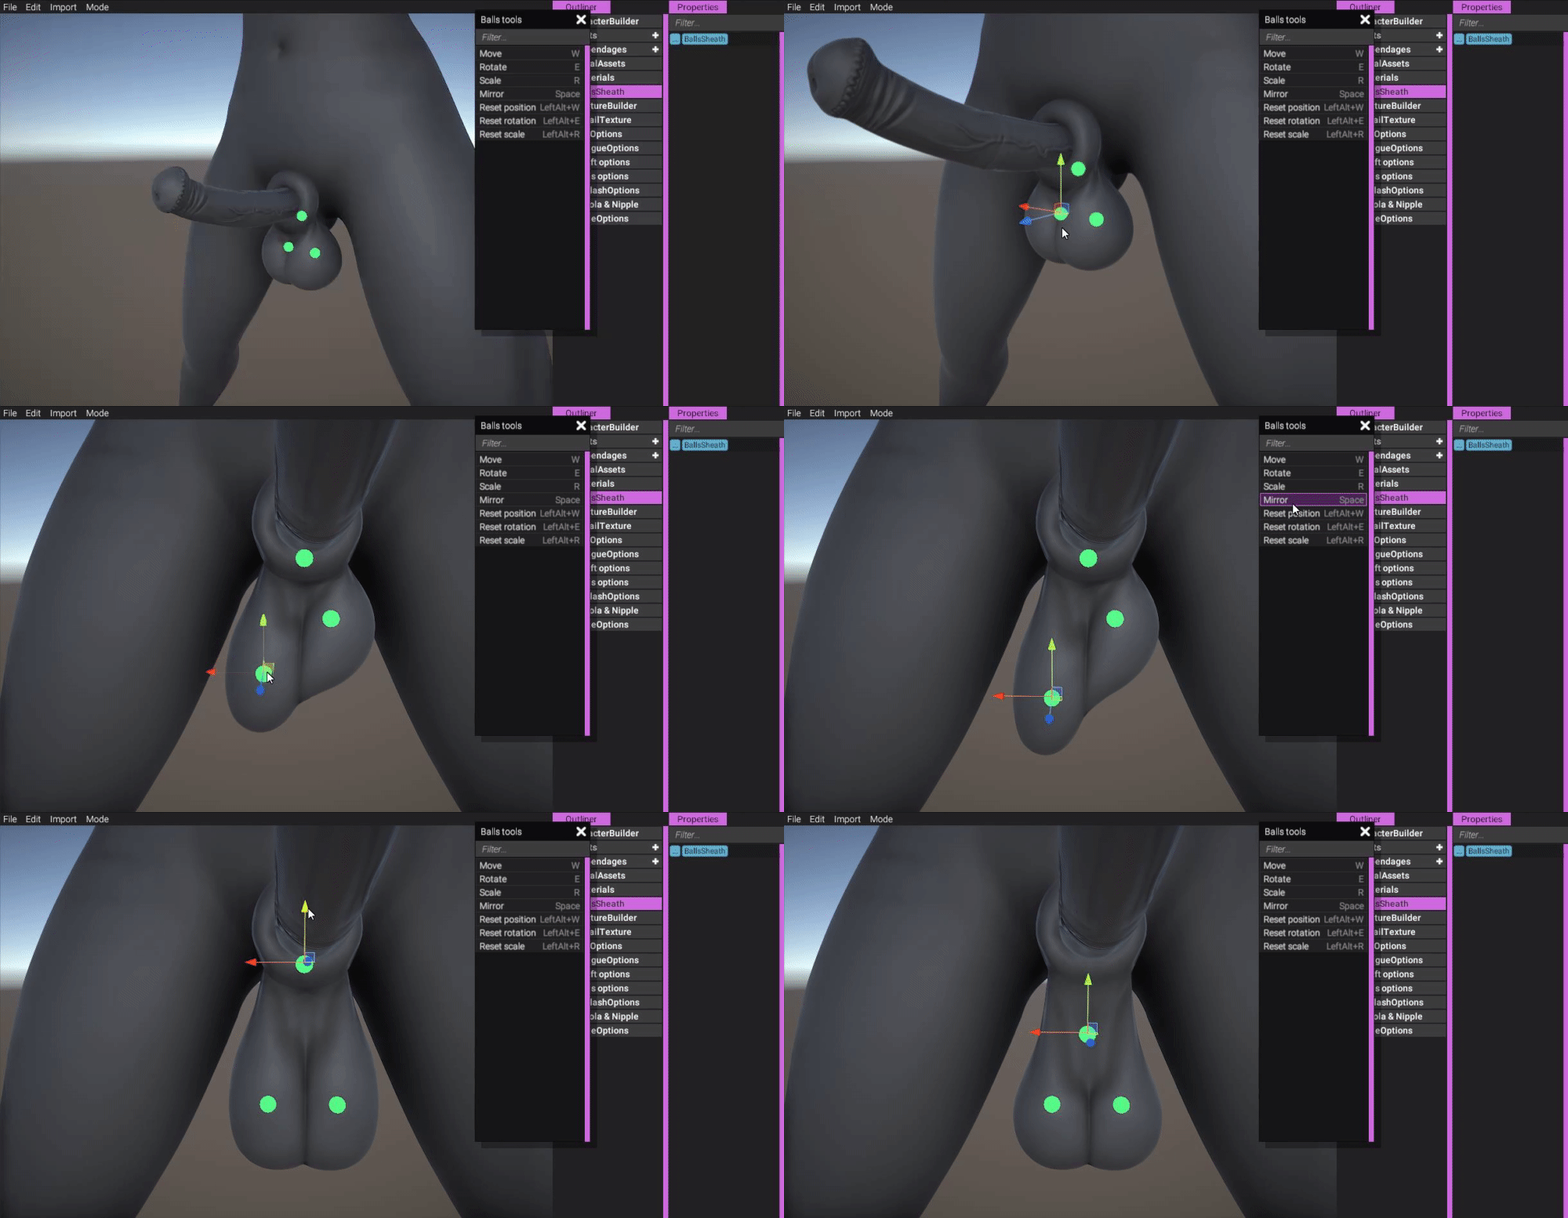
(Tweak the balls to your needs.)
https://gyazo.com/17b15b5e38a12adf2415cbe3dee923d9
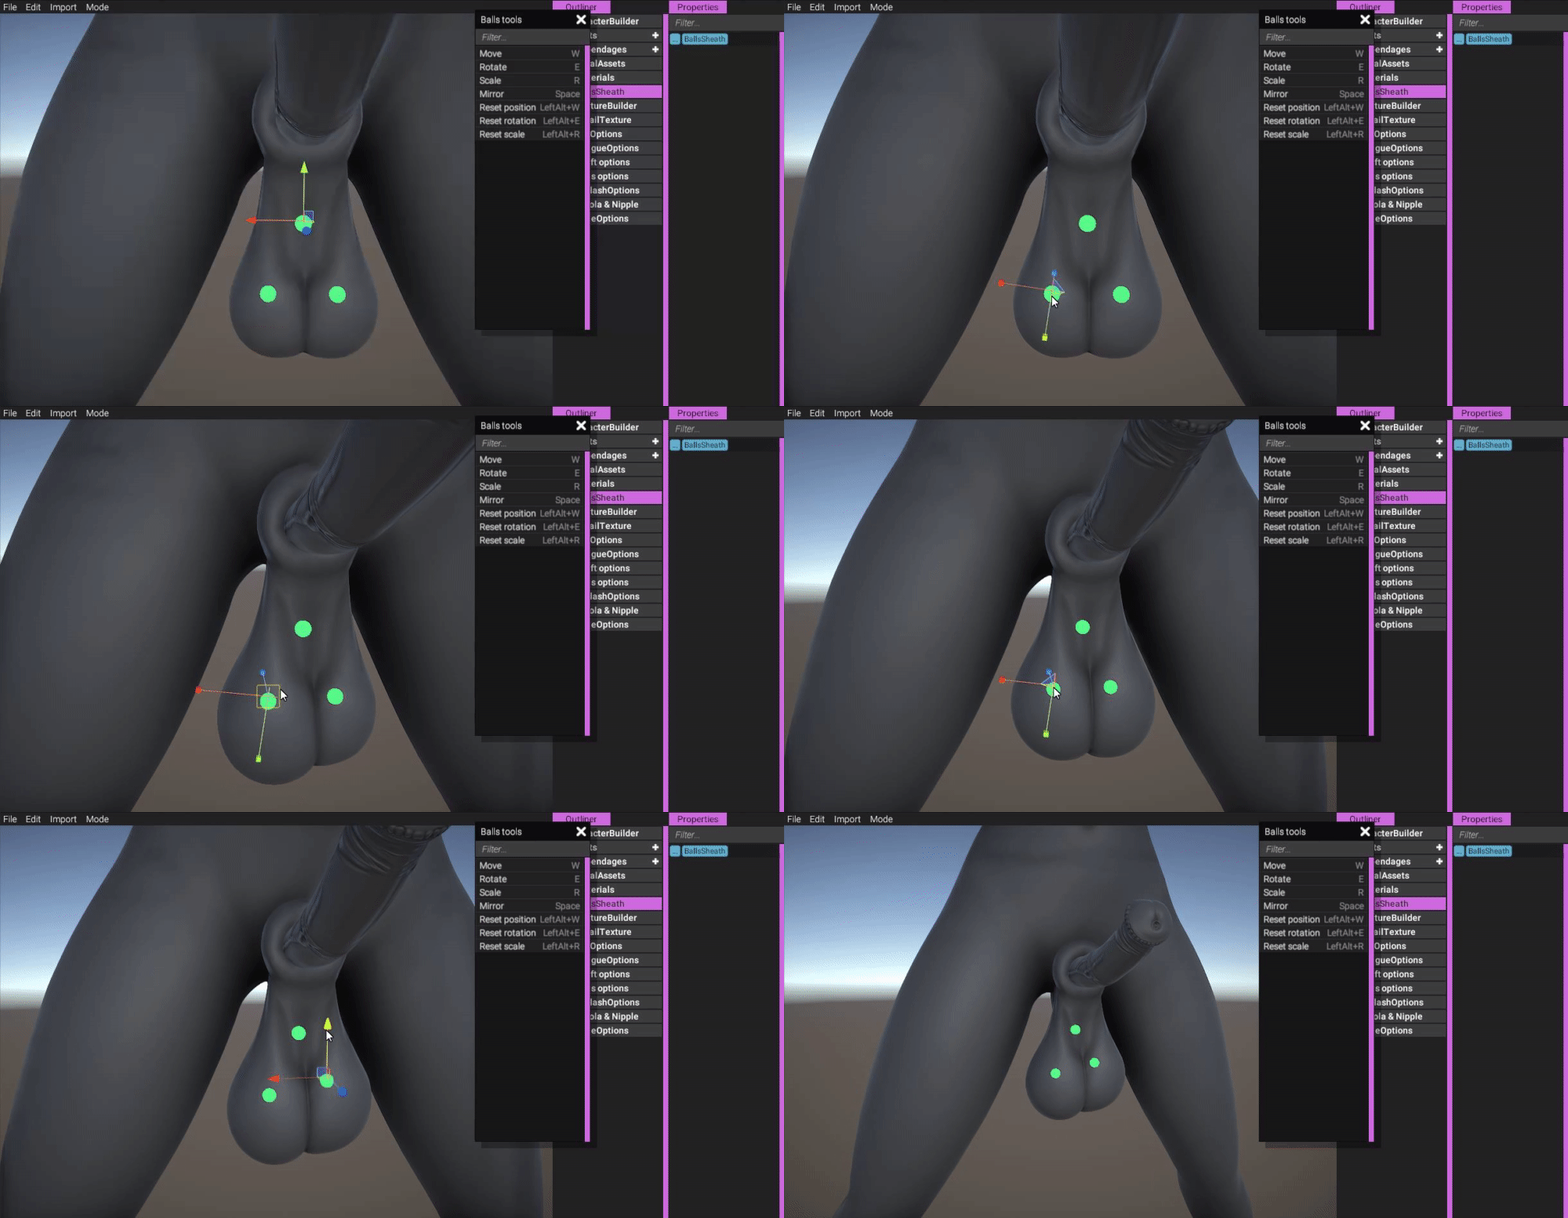
(More tweaking.)
https://gyazo.com/38706d1c69d806ad3d9ced0b991fab39
You may already have noticed that the BallsSheath object has a "+" sign next to it, indicating it has child objects. Let's see what that's all about!
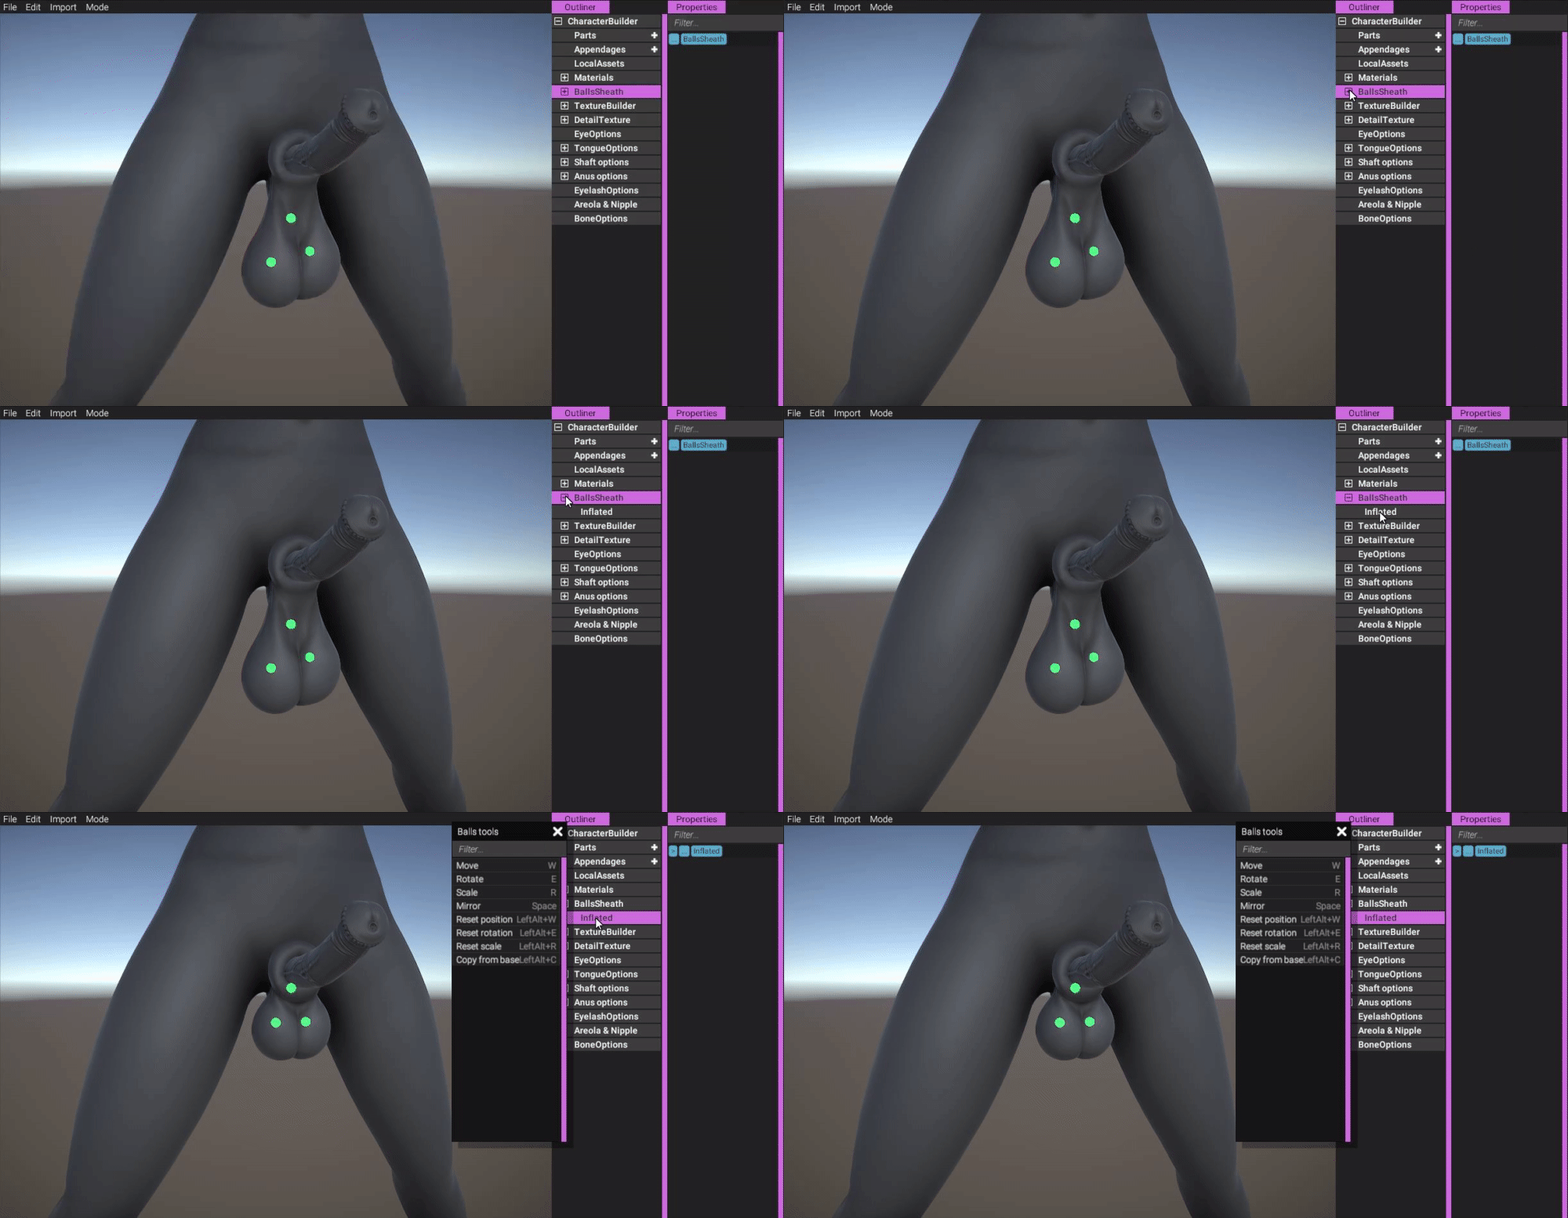
(The balls have an inflated state that is tweaked separately from its base state.)
https://gyazo.com/513cbae9e8864c140196e80acd140926
As you can see, the balls has an "inflated" object. By selecting and tweaking this object, you can configure the appearance of the balls in their inflated state.
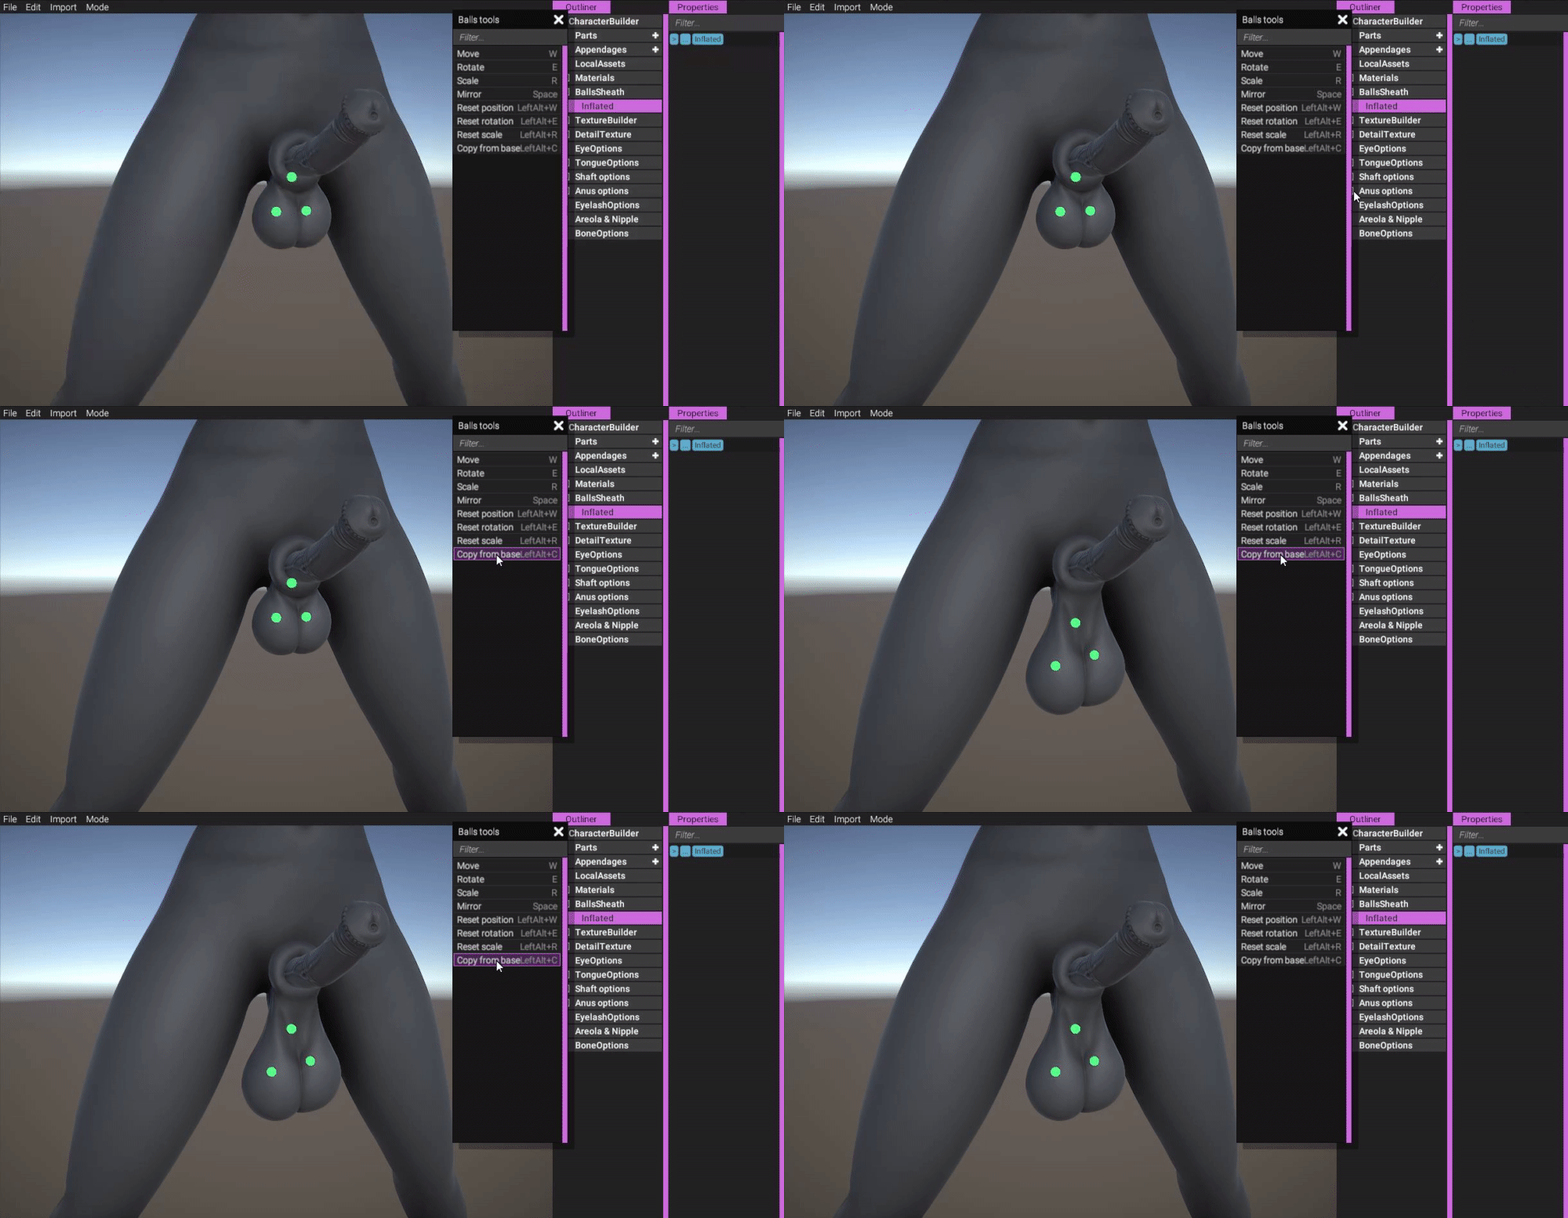
(You can copy the settings from the base state.)
https://gyazo.com/b19a6a88bc8636e5de5b0c9f62bd18d4
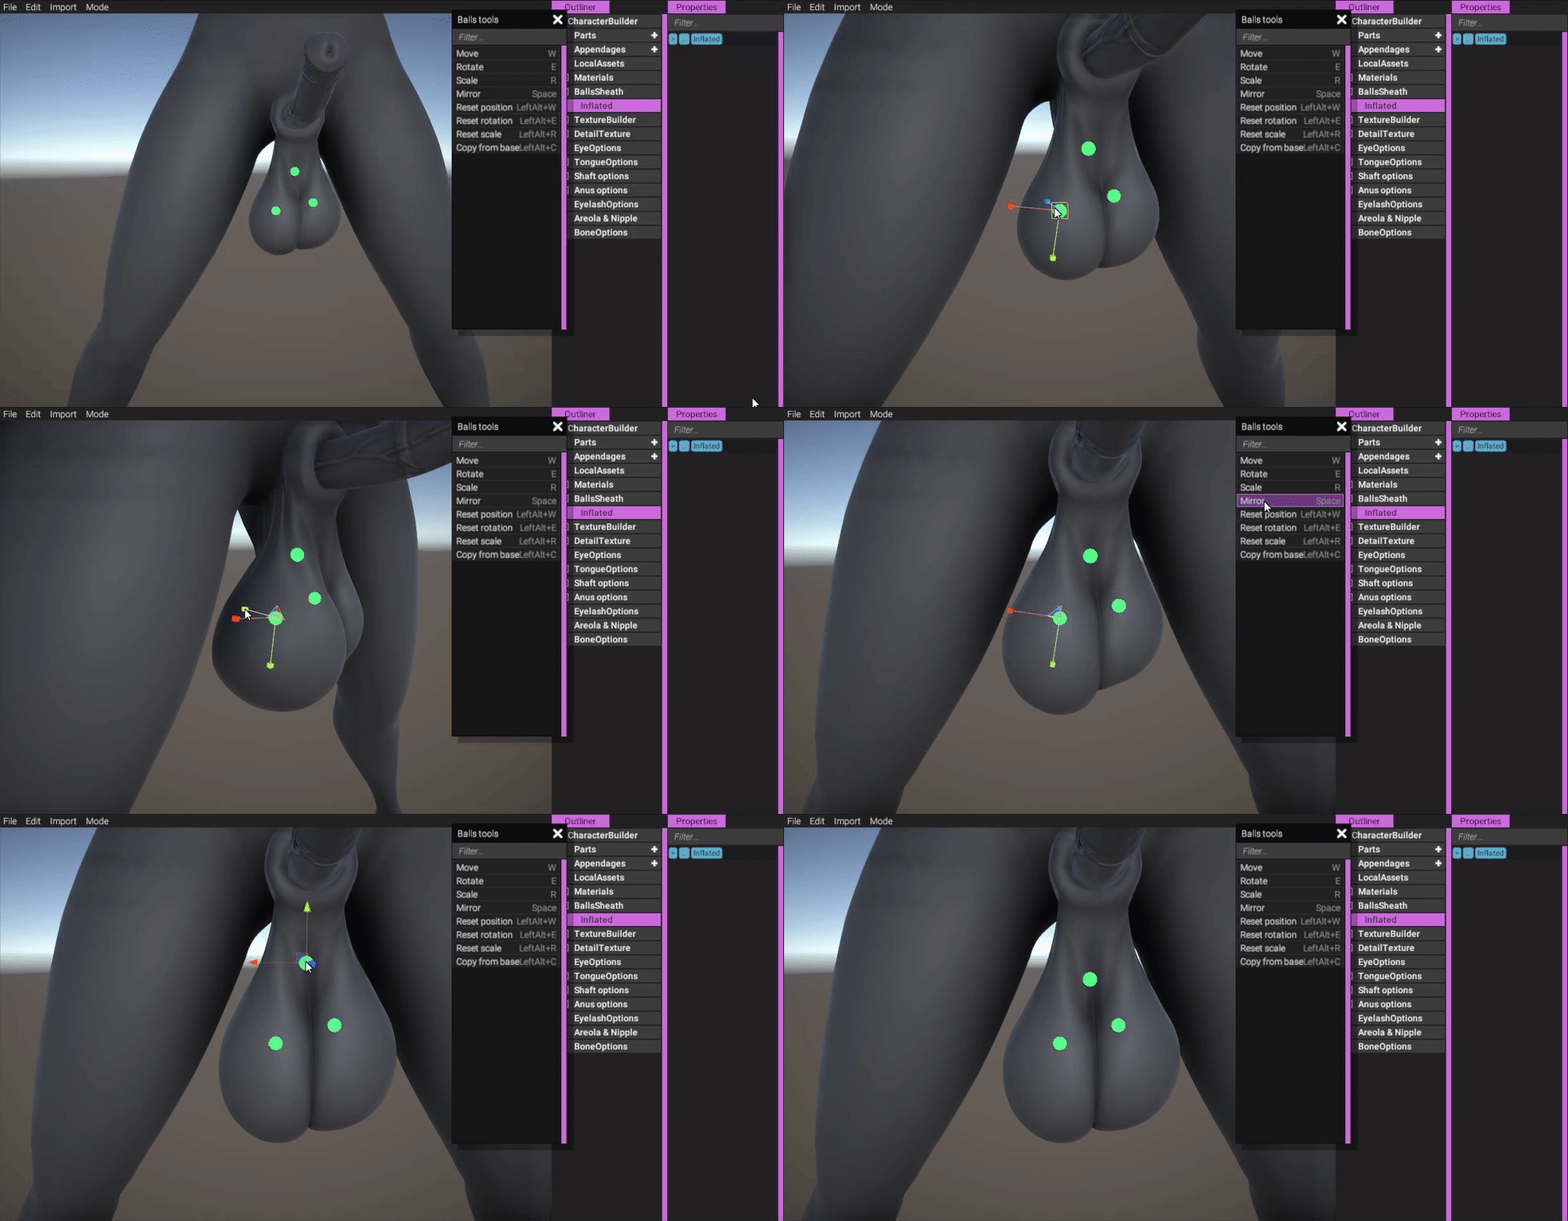
(Tweak the inflated state as you like.)
https://gyazo.com/b2022001b1826adc54e83b87579da572
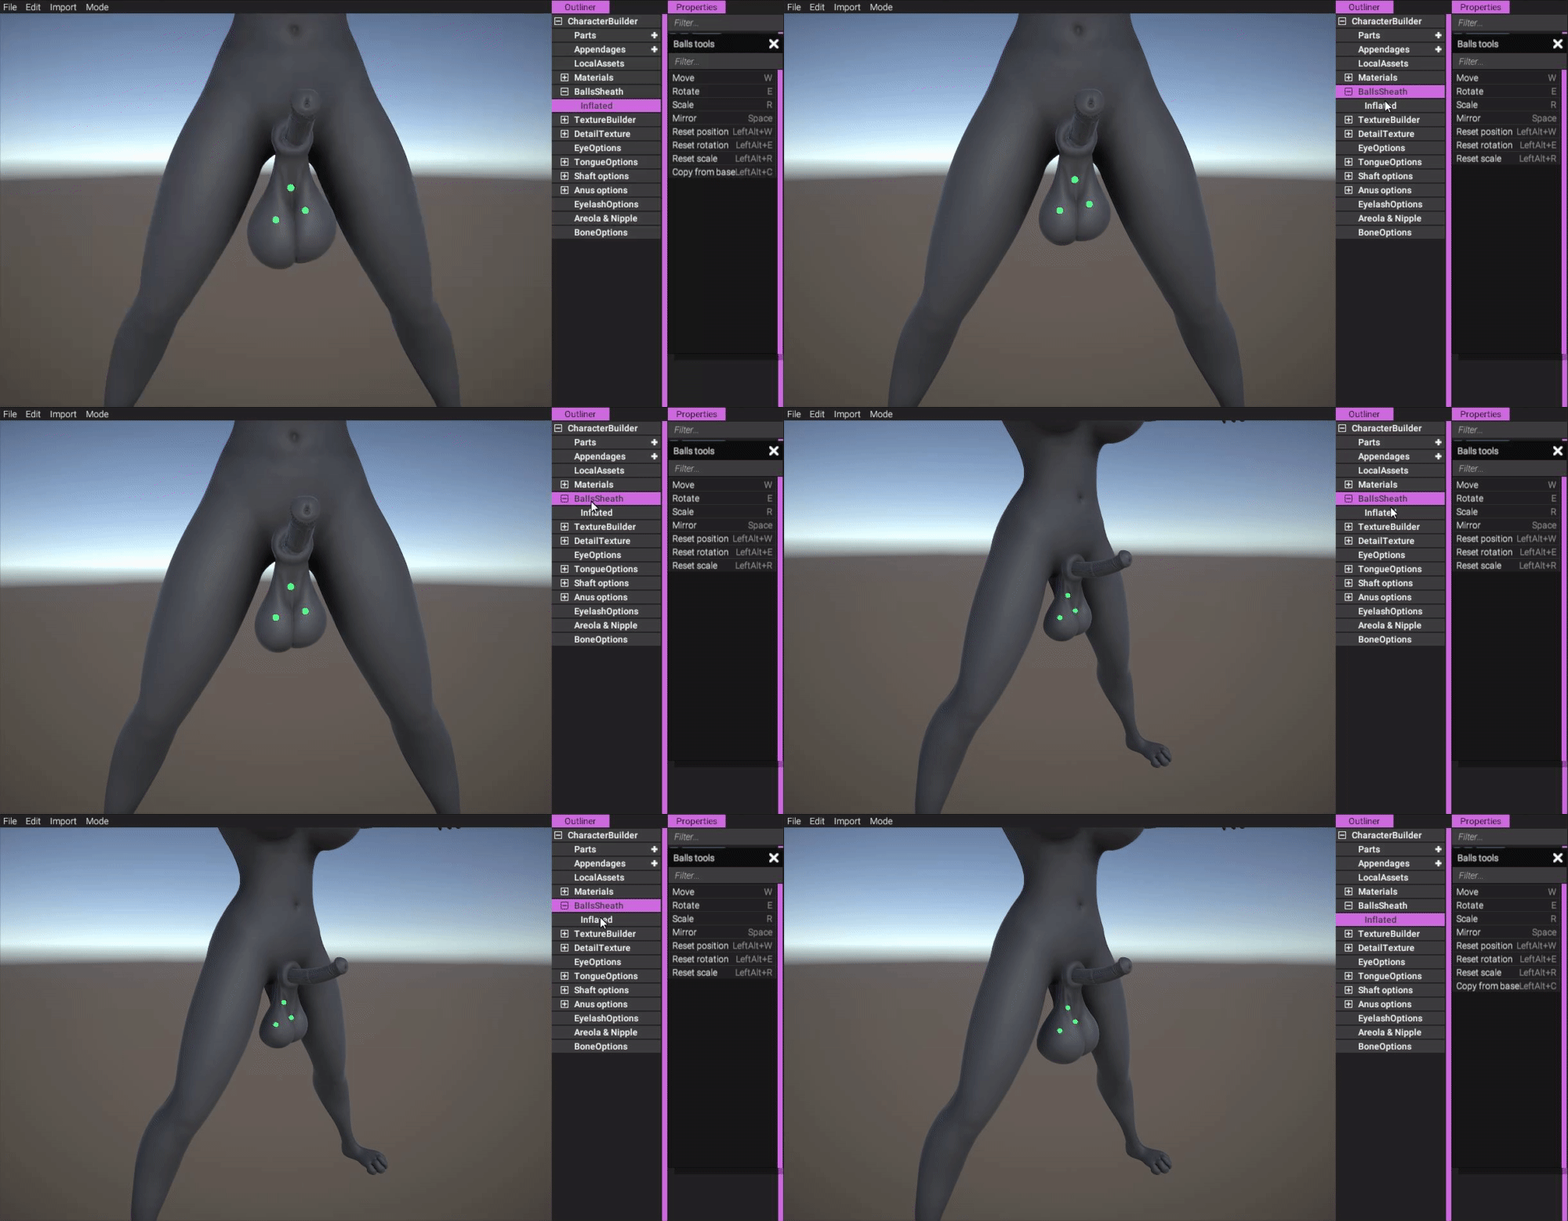
(Previewing the balls in their base and inflated state.)
https://gyazo.com/c007b977218523380e7cd7ff771cb0e8
Interpolation between the default state and the inflated one (i.e. inflation slider) isn't implemented yet, but it will be. ![]()
With all of these options, we believe we are offering our fans a great deal of customization while at the same time reducing our work load. Again, everybody wins!
Areola mask
As you may have seen from our earlier updates, we have a rather unique and advanced areola/nipple tech implemented, that allows you to configure areola/nipples in very custom ways through projection and vector displacement technology. However, there wasn't any convenient way to color areola/nipples in our texture building system. Since the shape of the areola/nipple isn't really present in the model (it's calculated in the shader during rendering using vector maps), it would be very challenging to author maps for them. Clearly, this wasn't good enough. That's why we this month have invested time into creating a special procedural mask for our texture building system made specifically for areolas/nipples.
The character is the only object whose texture builder has access to this special mask. To create such a mask, navigate to the masks of the character's texture builder and click the plus sign. Then, select "Areola":
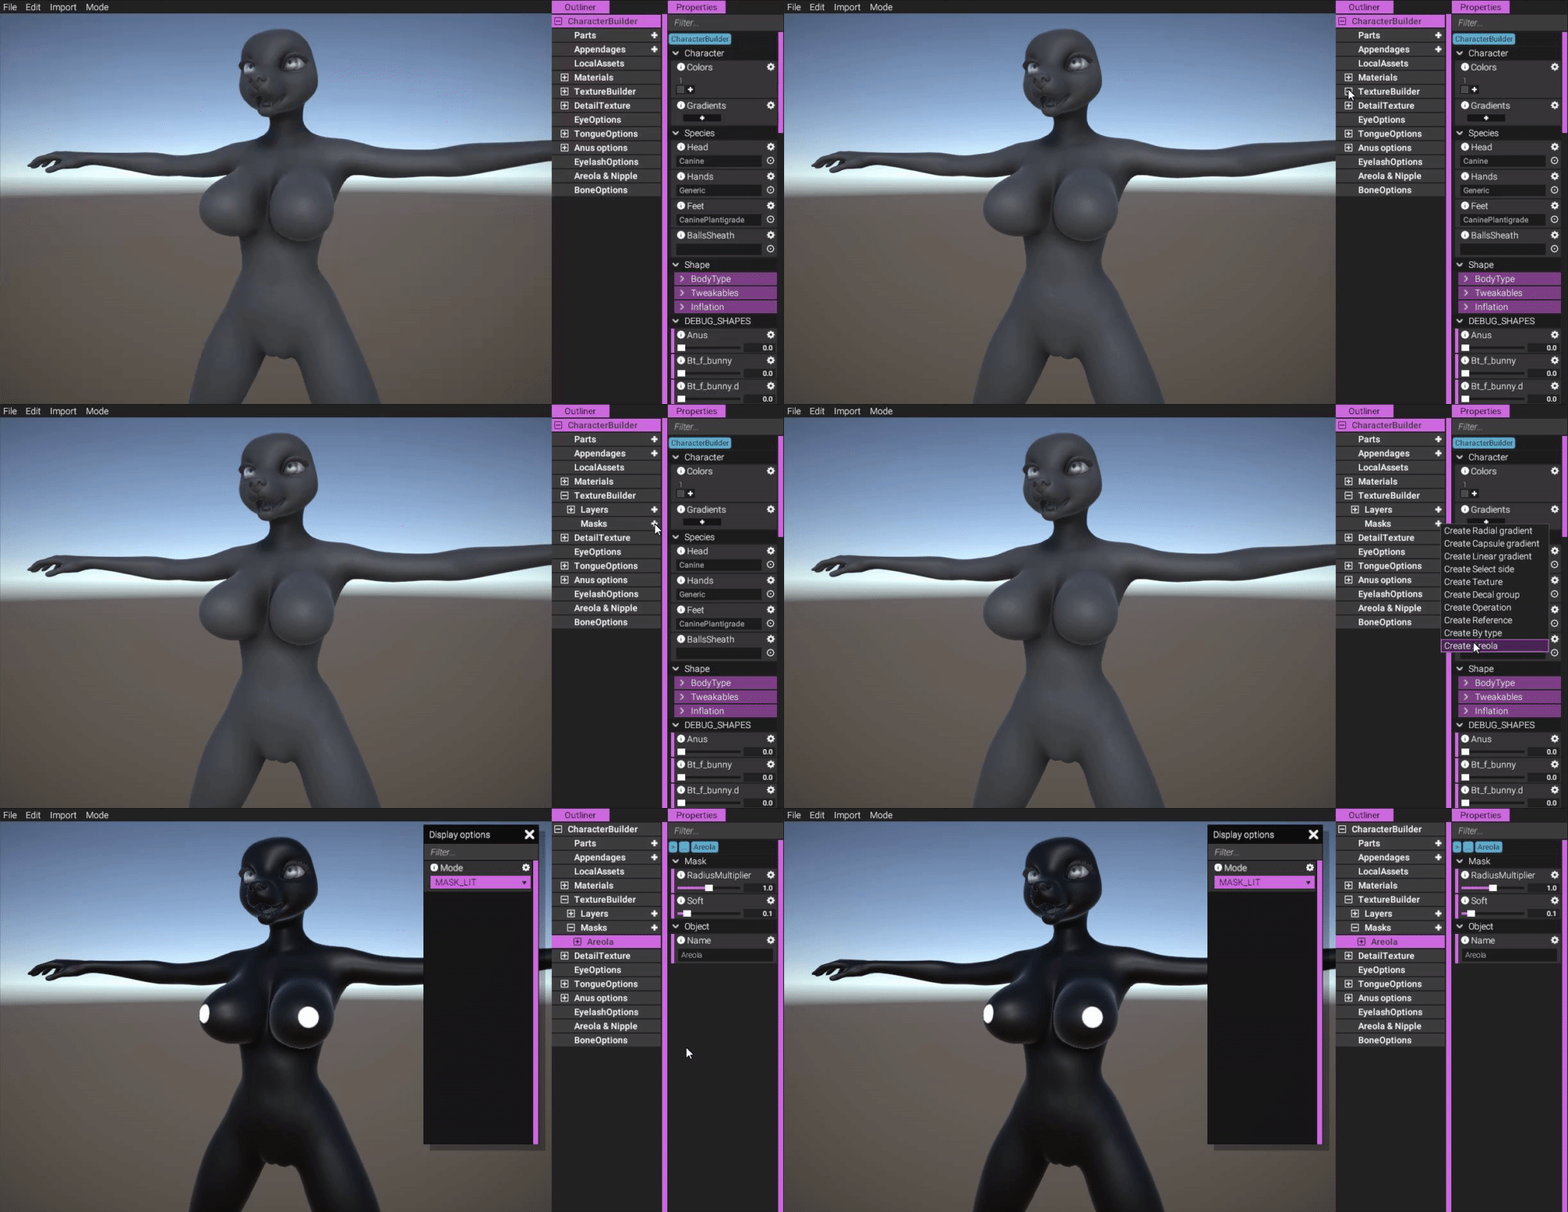
(Creating a procedural areola mask.)
https://gyazo.com/1915804902d21b801c77de0a69eba753
The mask is connected to the options of the Areola/Nipple object, meaning if you change the size of the areola in the areola/nipple options, it means the mask will be affected as well:
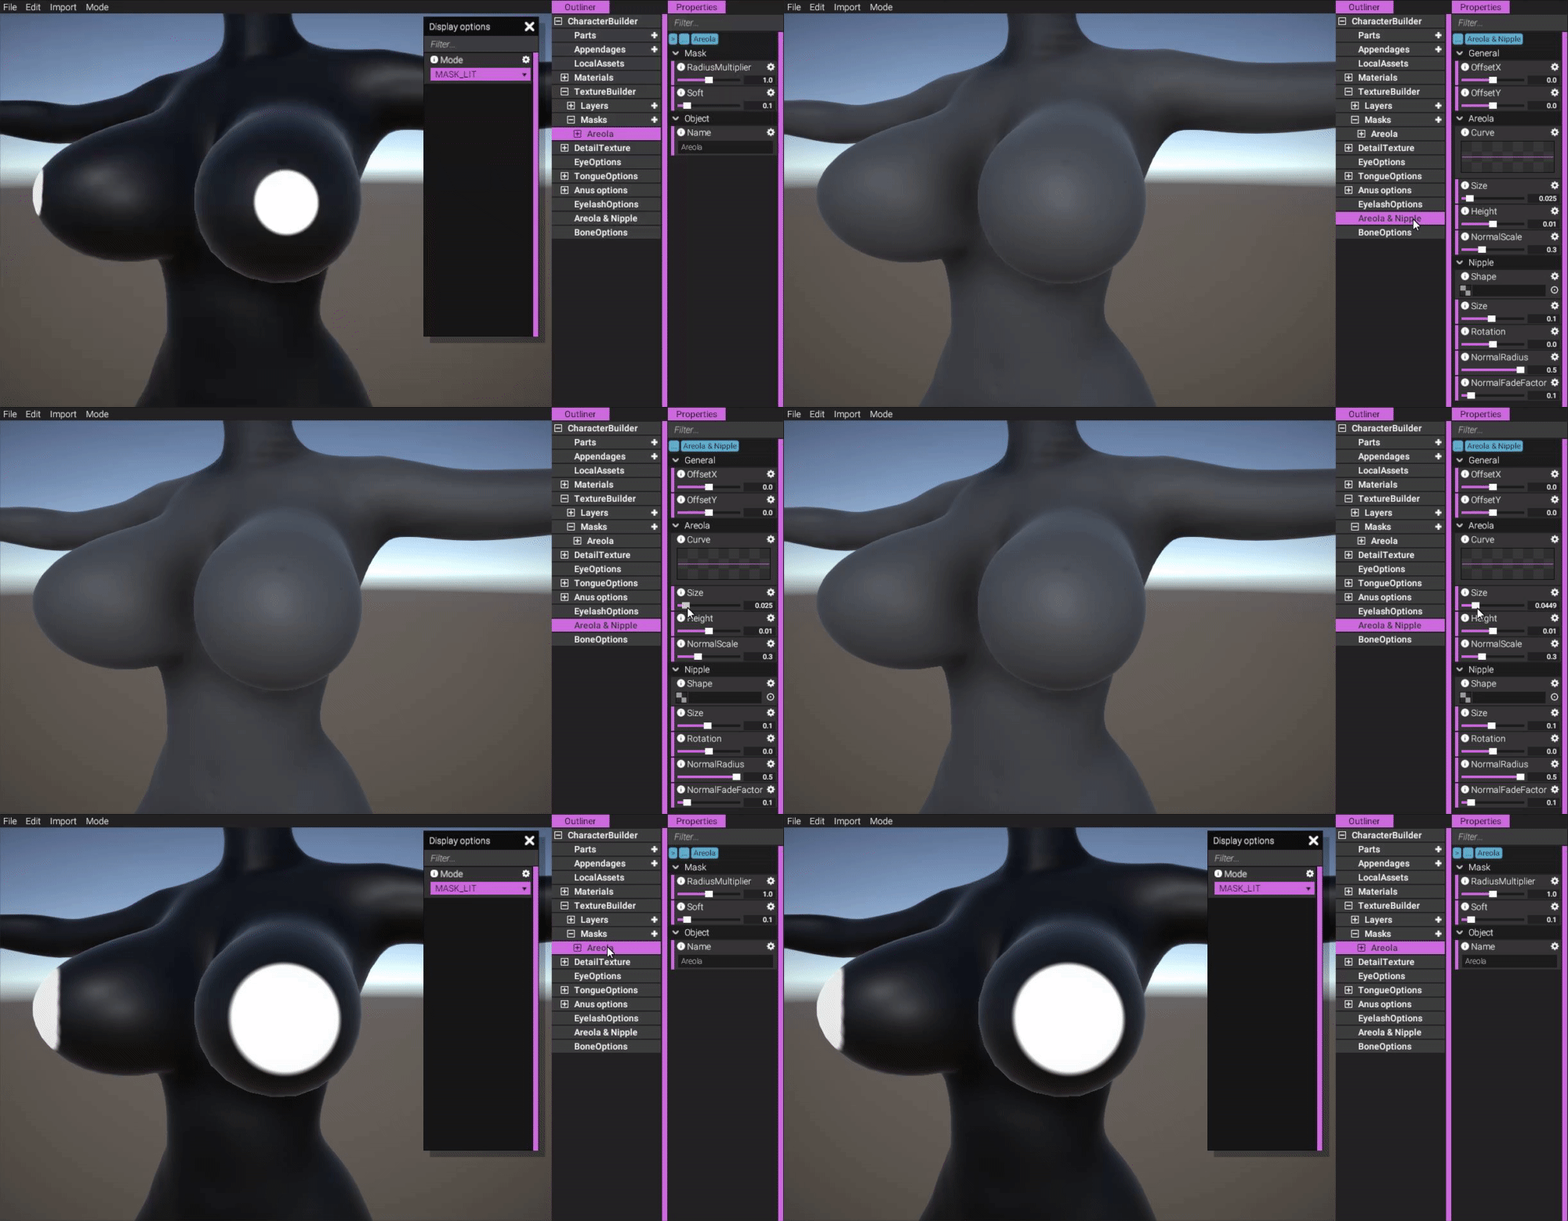
(The areola mask is connected to the areola/nipple options. If areola size is affected in areola/nipple options, then mask is affected too.)
https://gyazo.com/5962923239c98995388226f10ce86520
You can still affected the size inside the actual mask itself though. This is implemented as a radius multiplier of the areola size:
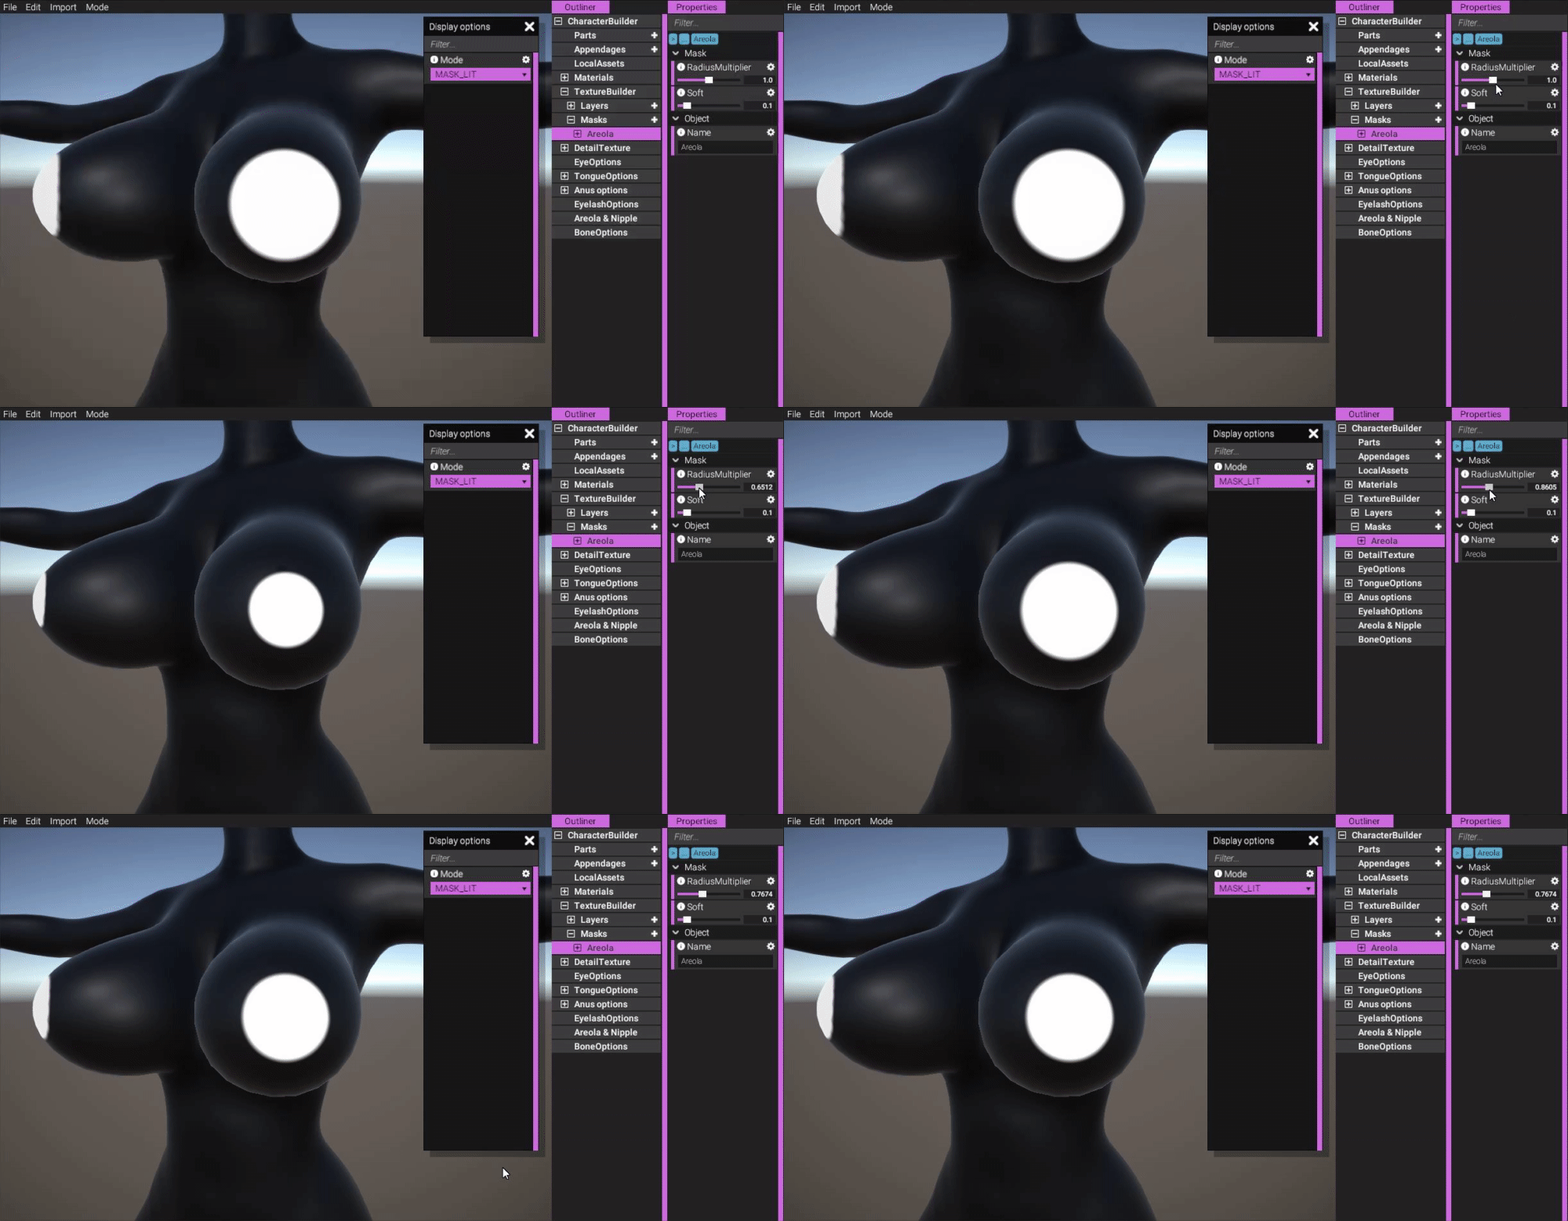
(Affect the size of the areola mask, as a multiplier of the areola size in areola/nipple options.)
https://gyazo.com/fa515bc7daac721822eb432f91facd32
You can also affect how "soft" the mask is, i.e. how far into the mask the fading from black to white should go, expressed as a multiplier of the mask size:
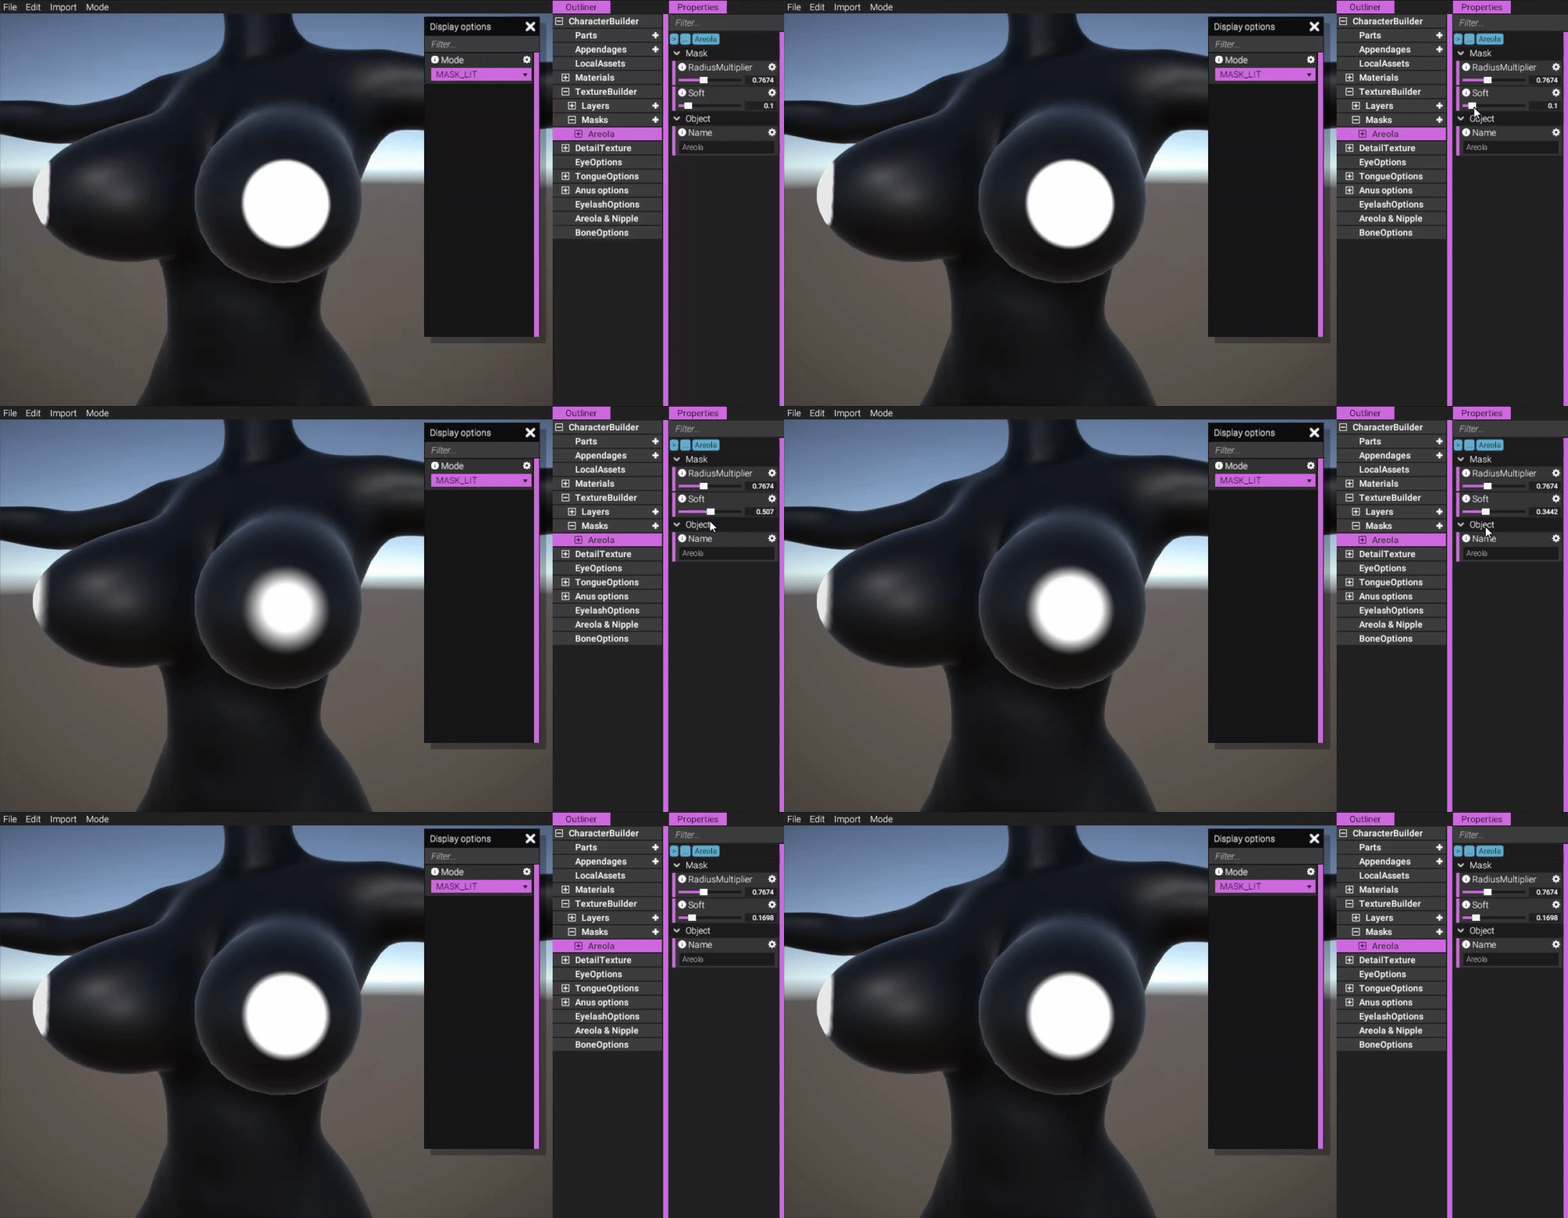
(Affect the fading gradient of the mask.)
https://gyazo.com/7e0822dc75773cafba7209d184f34bb8
As per usual - a mask by itself doesn't actually do anything. It needs to be referenced in a layer to actually affect the texture output. Here, we're simply using a LayerFillMask to fill the texture output with a pink color:
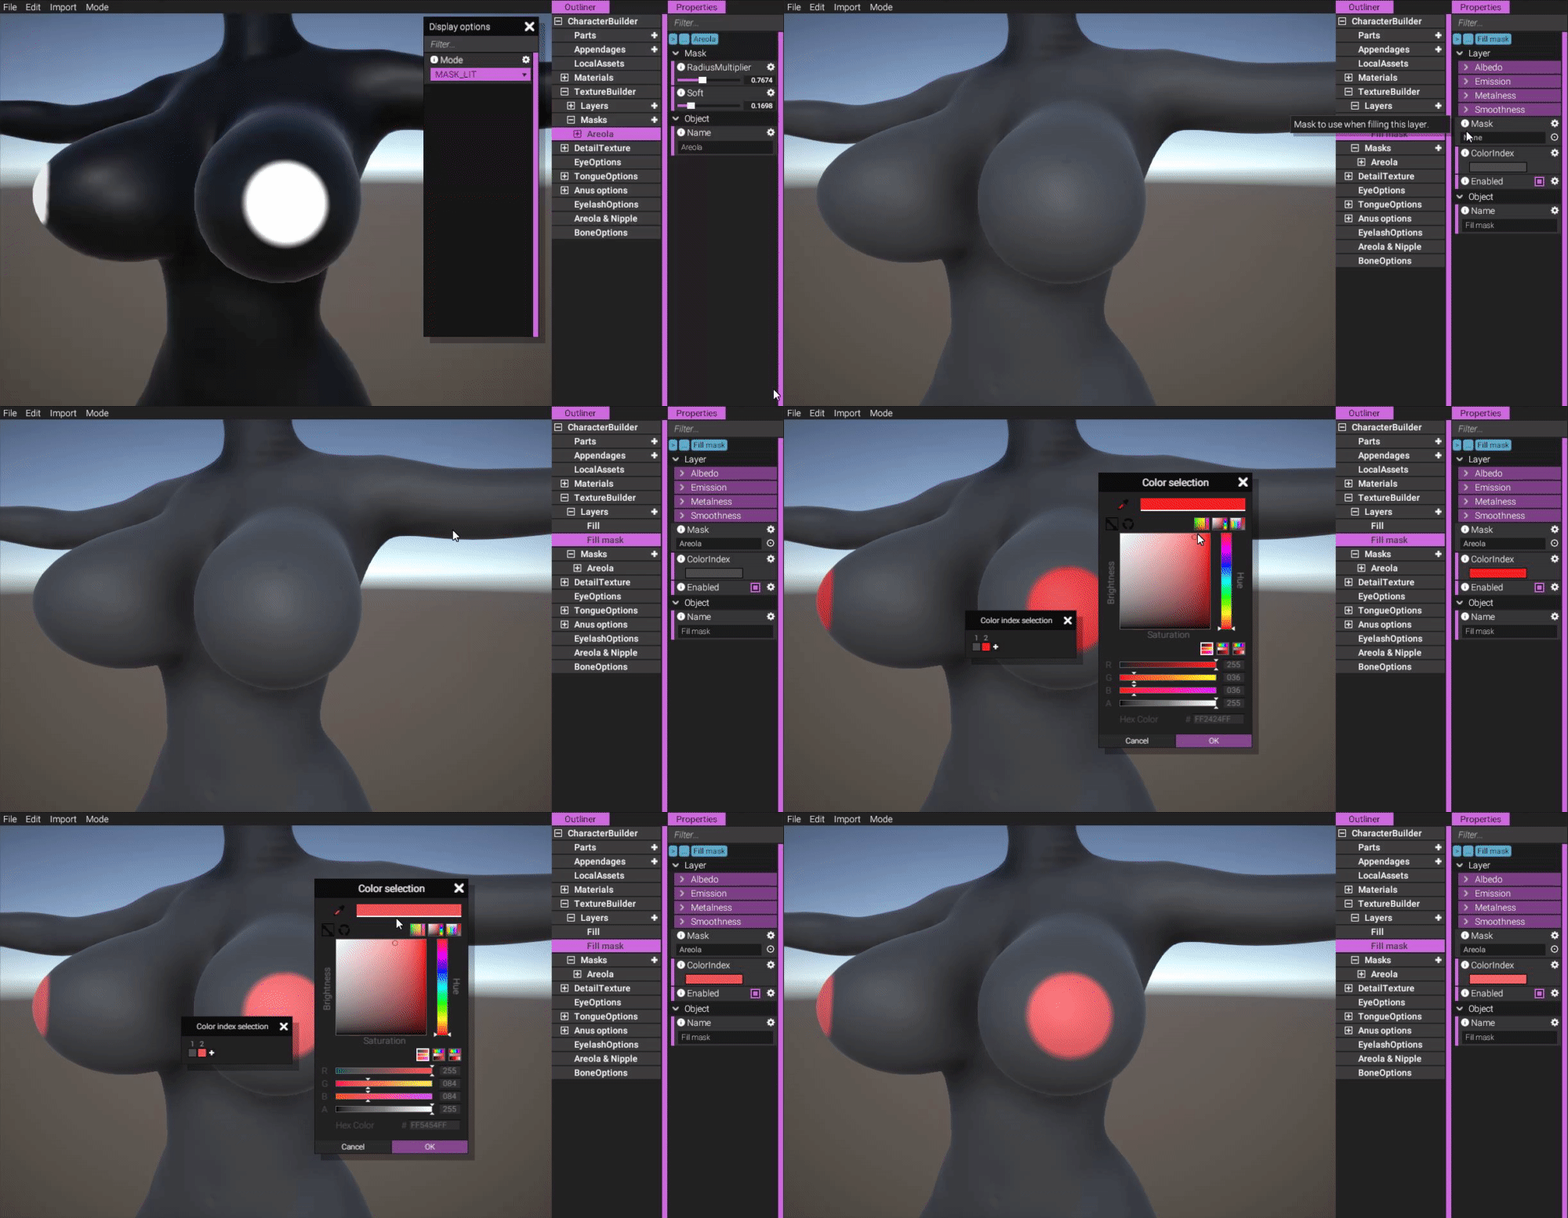
(Filling the areola mask with color.)
https://gyazo.com/c30fbe2e50e4b1f6b4e9673b159184a2
Just to see what it looks like, let's add in a nipple to this!
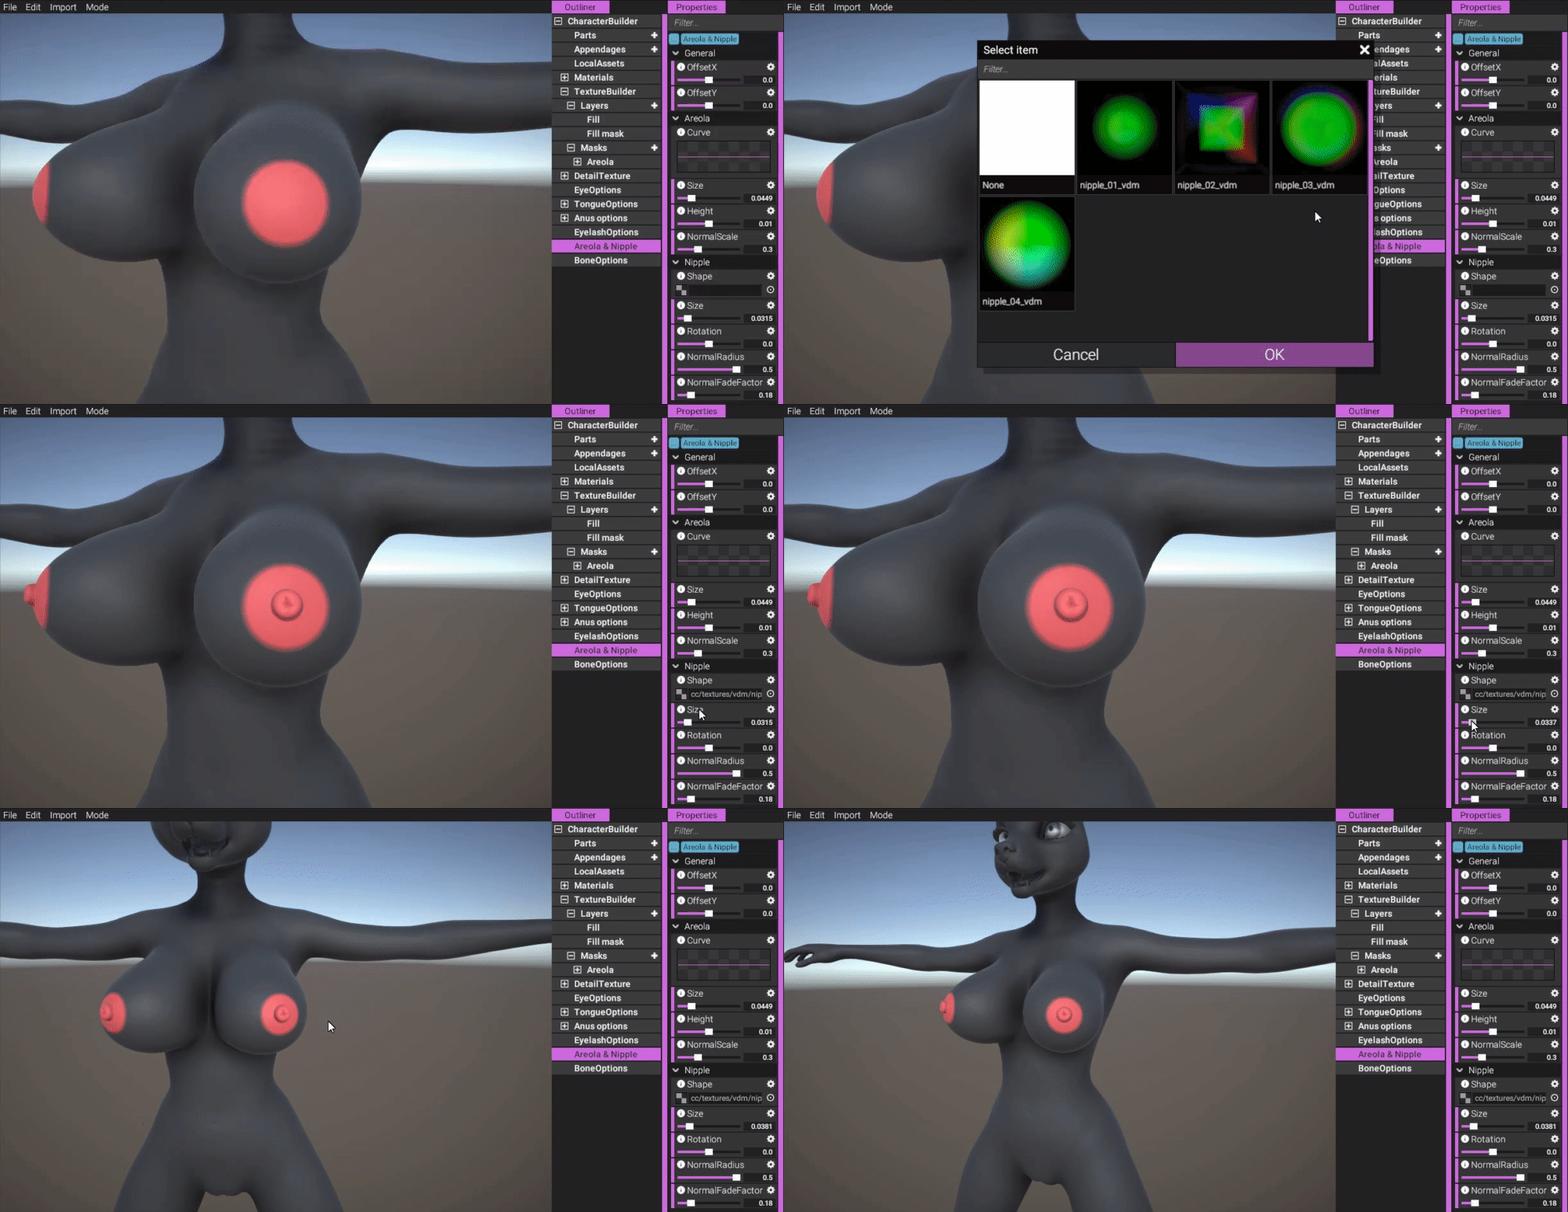
(Adding a nipple to the setup.)
https://gyazo.com/480e4bb2de315727e43de1a9b661cbac
Hopefully this mask should make coloring areolas/nipples much more convenient!
YL2 Batch Tools
A significant amount of time was spent refactoring the way YL2 Batch Tools work. Previously, we were required to issue the "export" command for each model we wanted to bake before baking, so that the newest of these low poly models would be exported from blender into a format that the baker understands. However, we discovered that this easily became quite difficult to remember to do each time you'd change the low or high poly model, so a lot of times we ended up baking maps for outdated models, which caused problems and cost us time.
I realized that this whole export process could essentially be entirely hidden from the user (in this case dogson) and done in the background instead. So now, we don't even have an export command anymore (for baking that is - we still have one for moving assets to Unity). Rather, when a baking command is issued, then the latest low poly model will be exported automatically (if needed), and all the asset management will happen in the background. This way, there's no room for human errors anymore.
This required quite a significant refactoring, because the system wasn't made for this originally, but I'm happy we did this change because it makes us more efficient in the long run and reduces weight on the mind (fewer things required to be remembered).
We've also upgraded YL2 Batch Tools with other quality-of-life improvements, such as head and teeth maps (which are baked separately) being automatically combined when exported to Unity. In addition to that, we've also added more tests such as checking that parts and body fit with eachother in bone weighting.
Future
In our last update, I mentioned we'd spend time working on dev-builds, pose, simulation and tit dynamics. But, as you see, instead time was spent on the things we've been writing about above. So we got a little bit side-tracked. Not by things that weren't needed to be done, but just in the order which we originally had intended to do them. All of the things above are things that were necessary and that we'd do regardless.
But that means we still have those other things needing to be done, and I suppose now is a good time to do them. Especially content for dev-builds is something we want to get going with ASAP.
An issue we ran into when we started testing content built with our asset bundle project was that since some models are missing skeletons, it means the app would fail to merge the skeletons and would halt. So dogson hasn't been able to test his content inside the app yet, and since I've been busy coding I haven't had the time to add those skeletons to fix it. So at the moment, we're quite bottle-necked by the fact I'm both the coder and the rigger. In the future, when dogson has grown more proficient at rigging, hopefully he'll be able to take over the responsibility of these things.
Luckily, dogson has had a ton of other things to do though, so it's not like we've been losing any time - just that dogson hasn't been able to test his content inside the app yet.
But anyway, fixing those things and starting to test content in our internal dev-build is definitely something that's high up on the todo list.
Release plan
We have a special date in mind when it comes to a release, and we're prepared to make sacrifices to make it happen. For the initial release, we have chosen to cut out the cloud component entirely. That means no internal character browser or sharing. Instead, we will focus on finishing up the last bits and polishing the app as much as we can.
In the meantime, we have created a new section in our forum where you'll be able to share and discuss characters made with the character creator.
The built-in cloud browser and sharing system will arrive in a later release.
Summary
The character creator now has tools for great customization of the balls - both in default and inflated state. We've also implemented a new, much more intricate body proportion/bone-scaling system. We have used this new bone scaling system to revamp how shaft customization works. We've also added a new procedural mask to make coloring of areolas and nipples much more convenient. Work has also been spent on improving our internal dev-tools.
We are starting to feel confident about a release and have a special date in mind. We're willing to cut corners to make it happen, and so we have decided to cut out all cloud components from the initial release. Instead, we refer to our forum for sharing characters initially. Cloud features will be added in later.
We will continue to work with getting an internal dev-build up and running so we can start testing and polishing.
Comments
While 'cutting corners' traditionally means sacrificing quality, I strongly feel it's the right move, and I think whatever sacrifice happens will be worth it and made up for later. :emoji of encouragement:
Just to be clear, I'm not saying this so I can get my hands on an alpha sooner, I really do think limiting the amount of features (at least initially) will make for a better result.
*\o/*
I don´t know, these are just one man's dreams, but adding these features to the character creator is a lot of hard work and takes time.
Anyway keep being awesome!
Great to see you guys still trucking along, can't wait to see what you'll show us next!
Animal like vaginas are currently not planned in any way.
We used to offer Yiffalicious builds on itch.io for a short time. However, after trouble receiving payment and very unprofessional behavior on their part, I don't want to have anything to do with them anymore.
If you want a build but not become a subscriber, you could just pledge, download the build and then cancel pledge.
@all
Thanks for your words of encouragement!
I figure people will probably be using YL2 to design new fursonas and characters and things, so having that kind of information right there could be really useful for a ref sheet. It'd also help re-create existing characters exactly the size they should be.
Having a weight based on volume might also help people keep their character sheets realistic; I really commonly see things like "3 meters tall, 200 kilos" and other crazy numbers from people who don't understand the square-cube law (3m and 200kg is the equivalent of a 1.7 meter person weighing 36 kilos, or 5'7" and 80lbs).
Weight could hopefully just be abstracted from total volume (not including erect penis I guess?) and a density of 0.985 g/cm^3, with a note that muscular characters might weigh slightly more, and fat characters should ironically weigh a bit less than the estimate. I thiiiiiiink total character volume shouldn't be that hard to calculate?
@odes Would be scaling available during scene in future, like inflation currently? This will give us a lot of space to make new types of scenarios in our scenes.
@Loudstorm
Unfortunately, scaling will not be available during interaction authoring. Inflation will be though.
@odes
Btw, what will be in the release? Just the character creator? Or...
Yes, only the character creator (a very early version of it). The first release is only targeted to enthusiasts and 3D artists.
I'm sorry, I don't quite understand your question.
(For example, the authored posing will probably be set up in a way that makes sense for the big x small interaction, rather than treating both as the same size.)
Yes, for the interaction system we will implement a pov mode.
You mean placing certain camera angles in the scene? And having to use hidden characters for that currently? This could easily be added so you don't need to place characters for that.